Sentinel Model Rocket
thingiverse
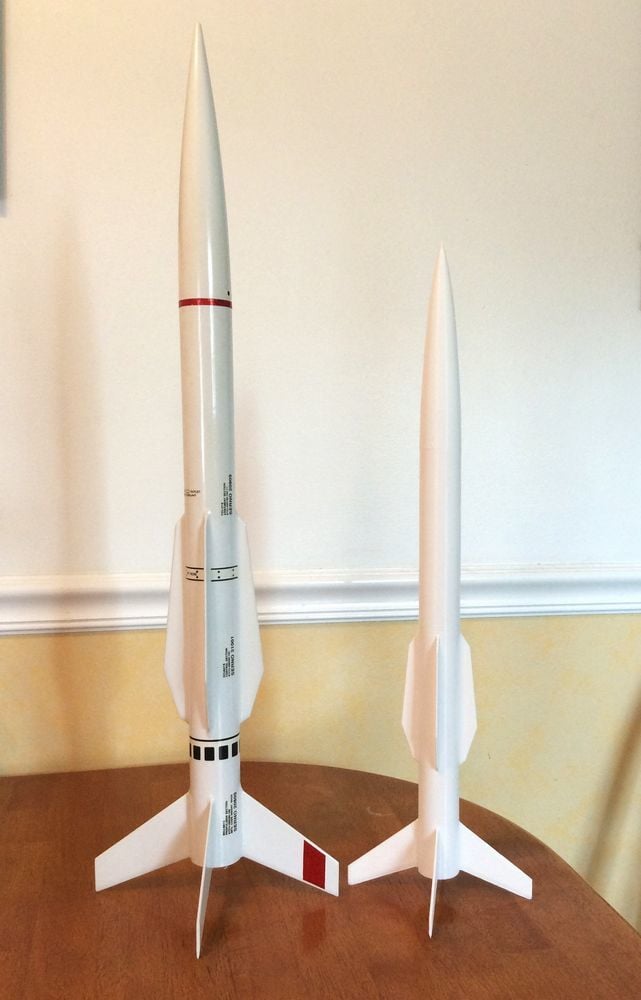
This is a replica of the Sentinel model rocket sold by Estes between 1988 and 1994, one of my favorite rockets. The photo shows the original Sentinel on the left, and the 3D printed version on the right. The original measures 27 inches tall, while the printed one stands at 21.5 inches. I scaled it down to 0.8 times its original size so that the fin section would fit within my Orion Delta printer's 6-inch diameter build plate. I set the body wall thickness to 1 mm, allowing for two extrusions of 0.5 mm each. If your printer has a build plate with an 8-inch or greater diameter, you can scale up this design by 1.25 times in your slicer and use an extrusion width of 0.625 mm to print it at its full original size. I have not flown this rocket, so proceed with caution if you decide to launch one. At the 0.8 scale, you should be able to use BT-55 centering rings to create a motor mount that is held in place between the bayonet fitting on the mid section and the retainer ring built into the bottom of the fin section. To set up the motor mount, file or cut four notches in the centering rings to allow them to pass by the bayonet bumps in the fin section. Be sure not to make the notches too large, as you don't want the ejection gases to escape out the rear of the rocket before they can eject the parachute. If printed at a 1.25 scale multiplier, BT-60 centering rings should work just fine. Always check your rocket's center of gravity and center of pressure locations before launching it. The parts connect with bayonet fittings. To assemble them, line up the channels with the bumps, insert the parts, and twist 90 degrees clockwise until you feel the snap into place. The "fore" section has an internal lug that can be used to attach a shock cord. You'll need to use a piece of stiff wire to thread the cord through the lug. Update May 3, 2018: I updated some parts to orient them correctly for printing. As a result, it's no longer necessary to rotate them after importing them into your slicer. I also enlarged the launch lugs to ensure that a 1/8-inch rod will fit even when the rocket is not scaled up. Update May 7, 2018: I added an alternate fin section called Fin2. This part should be printed with zero infill and either one or two perimeters for lightweight or strength, respectively. Use five solid bottom layers to provide adequate support for the built-in rafts on the three boosters. Remove the rafts after printing is complete.
With this file you will be able to print Sentinel Model Rocket with your 3D printer. Click on the button and save the file on your computer to work, edit or customize your design. You can also find more 3D designs for printers on Sentinel Model Rocket.