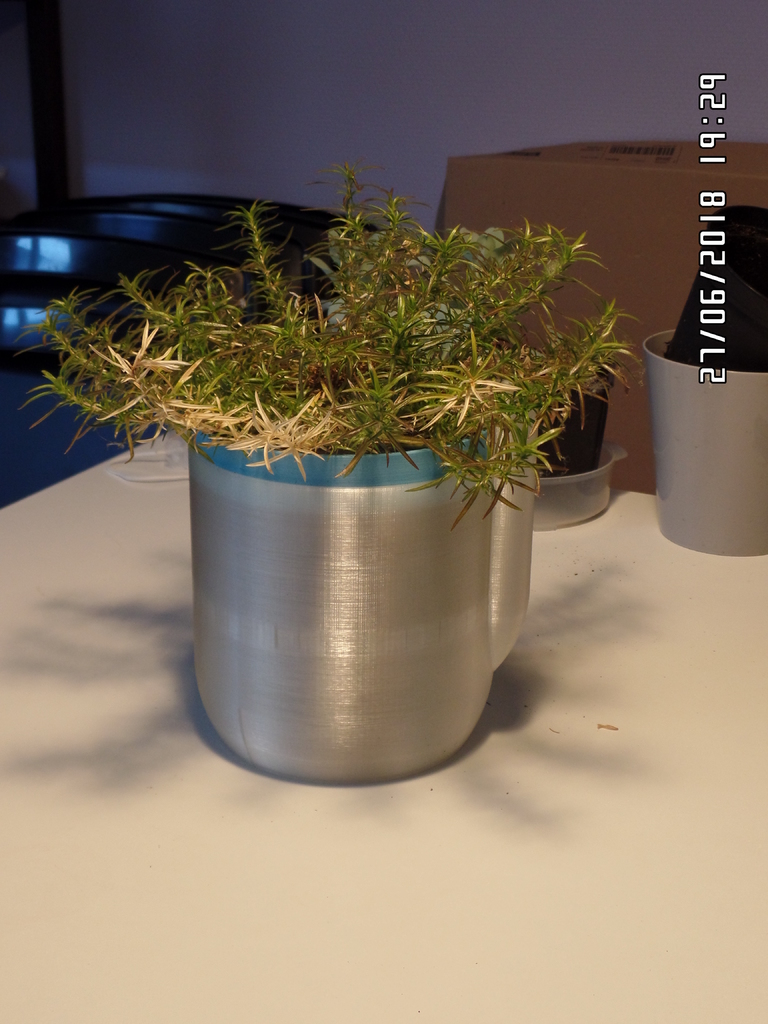
Self-Watering Flowerpot Large Remake
prusaprinters
<p>This is a remake of my self-watering flower pot that i designed a while ago, as requested by one of my followers. This is one is designed to be more easily printed with a 0.6 and 0.4mm nozzle. It has a thicker shell that can be printed as a solid perimeter with both nozzles without infill. Next to this it's also made to be easier to print all overhangs. The water pipe has an improved shape that looks way better after being printed than the last model.</p> <p>Inner pot V2: made the border higher so there is more colour.</p> <p>SCROLL DOWN FOR DETAILED INSTRUCTIONS WITH PICTURES !</p> <p>When using this flowerpot it's important to think about what plant you want to use it for, it's best to use it for a plant that needs alot of water. Don't only use dirt in the pot, as this will suck up way to much water. You should use clay or gel balls, maybe some rocks or grint or something that doesn't suck up water in the bottom of the inner pot. The material you end up using should suck up water at the rate the plant would ideally need it. If it's a plant that doesn't need alot of water you could fill the bottom with stones combined with a thick candle wick or clay etc. This would suck up water more slowly.</p> <p>As i mentioned before i made this with some input from one of my followers. I'm open to suggestions and tips ;). If you're a plant specialist, don't hesitate to leave a comment with a suggestion. If it's a good idea i might add it to the design !</p> <h3> Print Settings</h3> <p><strong>Printer Brand:</strong></p> <p>Prusa</p> <p><strong>Printer:</strong></p> <p>i3 MK3</p> <p><strong>Rafts:</strong></p> <p>No</p> <p><strong>Supports:</strong></p> <p>No</p> <p><strong>Resolution:</strong></p> <p>0.2mm</p> <p><strong>Infill:</strong></p> <p>10%</p> <p><strong>Notes:</strong></p> <p>It will take a while to print, but it will come out beautiful. I've printed it with a 0.4mm nozzle.</p> <h3> Instructions</h3> <p><strong>Place a wick in the center hole in a S shape and tape the ends so it's easier to work</strong></p> <p><strong>This is the wick i used, it's for candles. Make sure you use a natural wick and not a plastic one. You can test this by lighting it on fire. If it melts it's plastic, if it burns it's natural.</strong></p> <p><strong>Add hydro balls or stones or something on top of the wick. Make sure they are a bit higher than where the lower cilinder ends.</strong></p> <p><strong>These are the hydro balls i used.</strong></p> <p><strong>Add some dirt and lay one side of the wick on top of it</strong></p> <p><strong>Losen the other wick, add your plant and work the wick into the upper part of the plant. Now add some more dirt.</strong></p> <p><strong>Measure to where you more or less filled the lower half with hydro balls. Then subtract 0.5cm. I measured 3cm, so i'll be working with 2.5cm.</strong></p> <p><strong>Fill the outer pot with water to the height of your last measurement (mine was 2.5cm).</strong></p> <p><strong>If you used transparent or natural PLA like i did, you can see the waterline trough it. This will make it easy to know how full the pot is. Add a line with a permanent marker to the height the water is at after previous steps. Done !</strong></p> <p><strong>FYI mine holds about 400ml ;).</strong></p> Category: Household
With this file you will be able to print Self-Watering Flowerpot Large Remake with your 3D printer. Click on the button and save the file on your computer to work, edit or customize your design. You can also find more 3D designs for printers on Self-Watering Flowerpot Large Remake.
