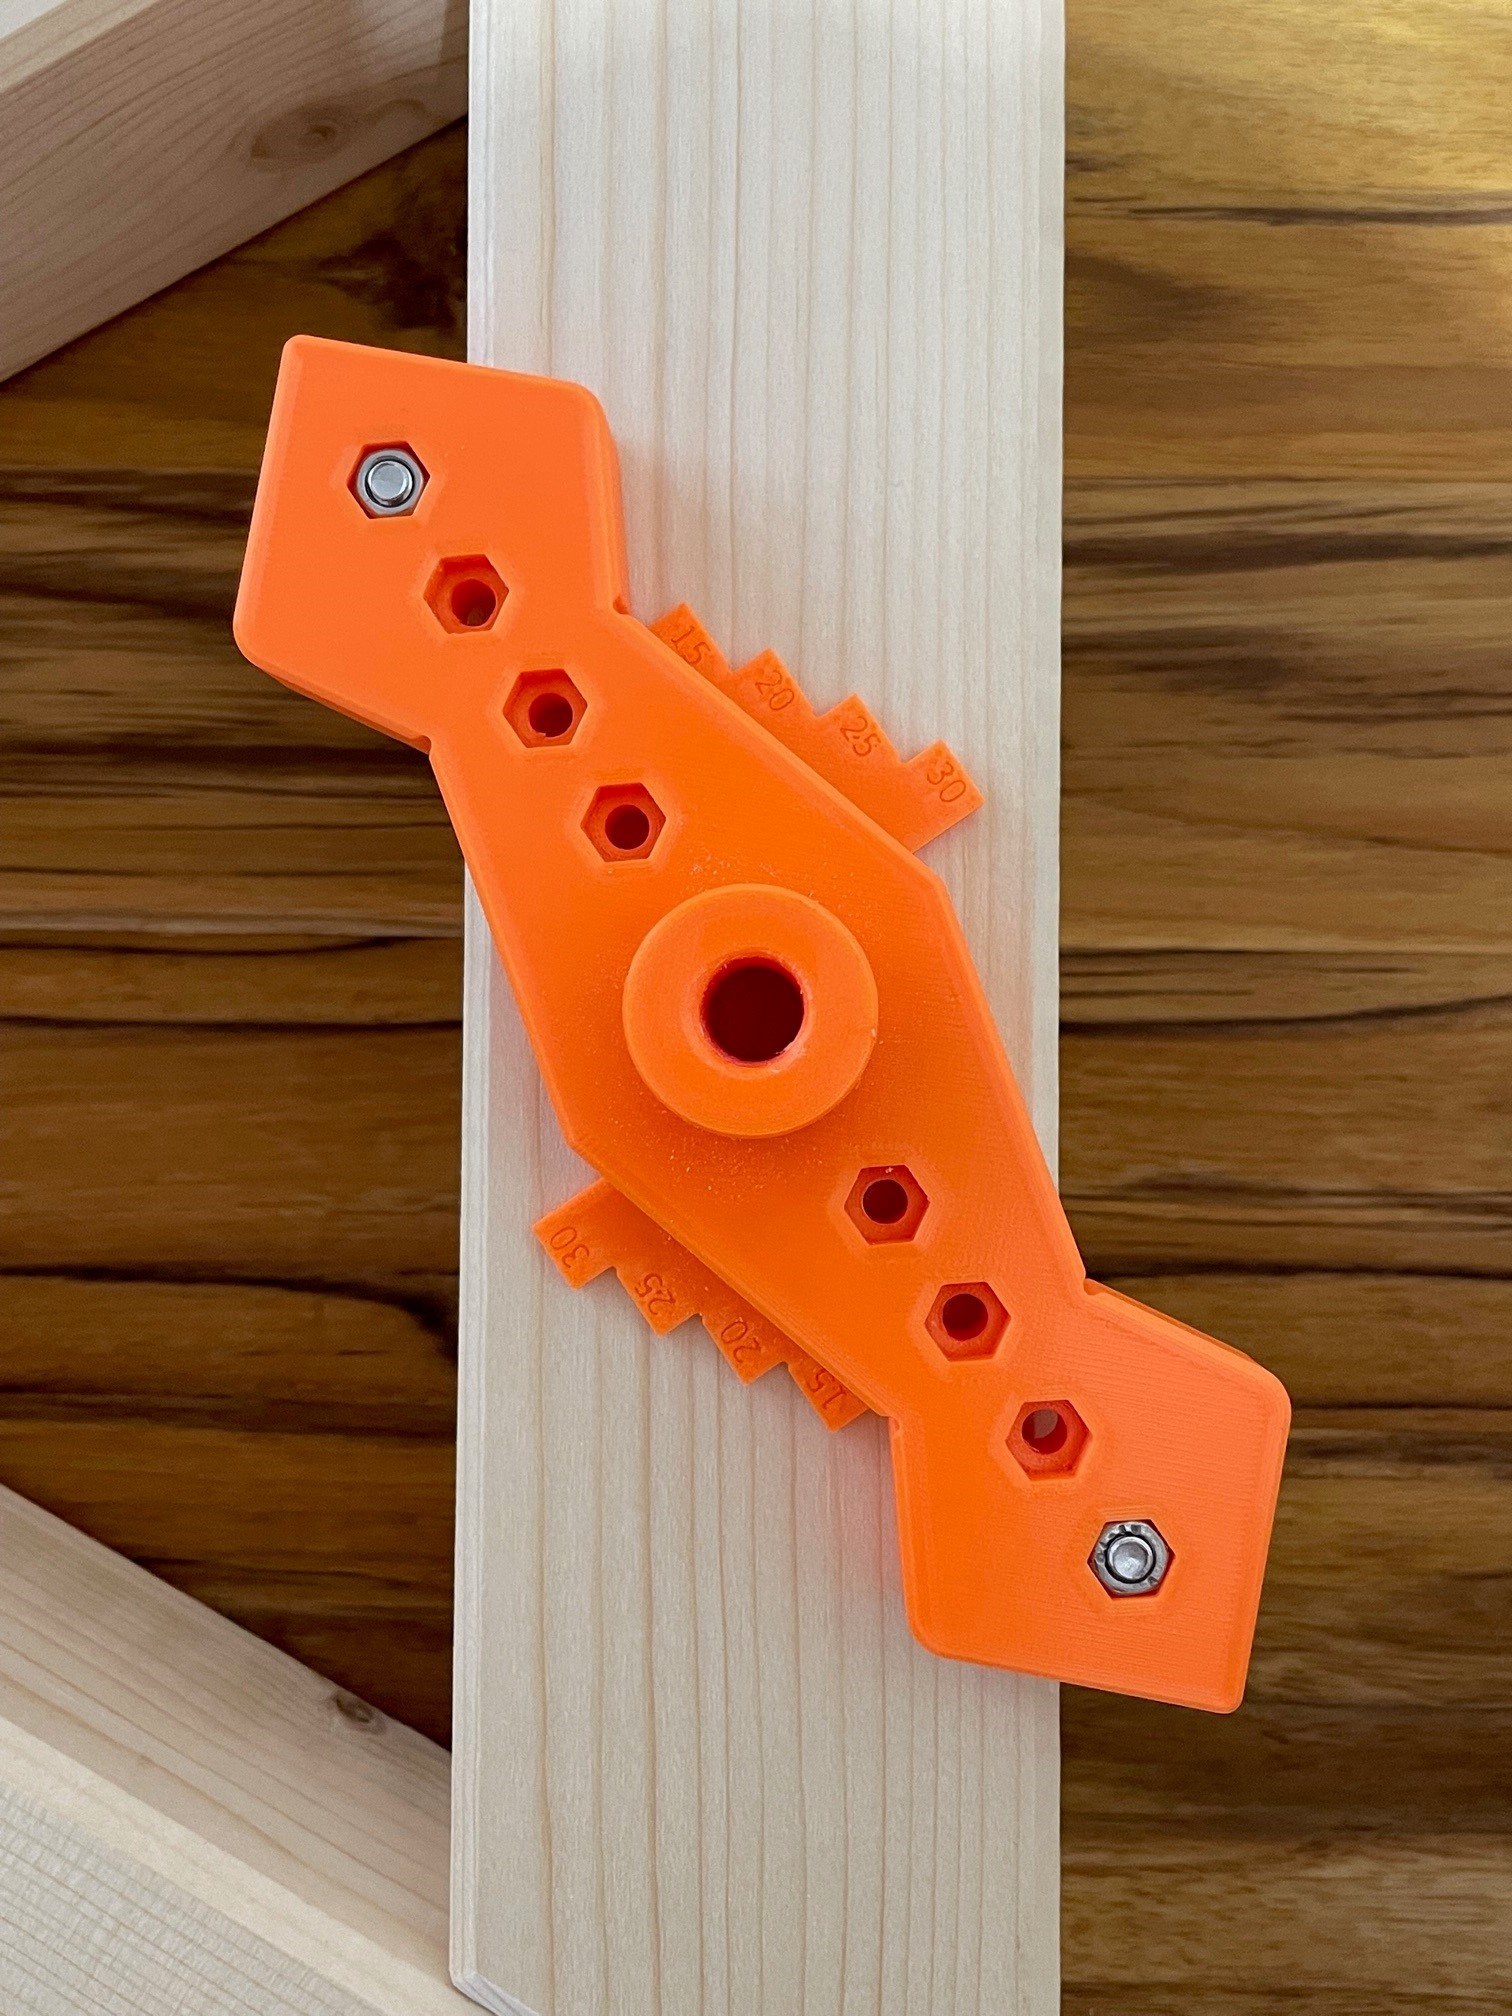
Self Centering Drill Guide
prusaprinters
<p><strong>Details</strong></p><p>This is a device to get a centered hole, regardless of the width of whatever you want to drill into. It works by placing the stopper on either side of the beam, bar, etc. and twisting the device until both stoppers touch the sides. The geometry of the drill guide ensures that the hole is then centered between the stoppers. You can make the gap between the stoppers wider and smaller to accomodate a wider range of component widths. Make sure to place both stoppers at the same distance from the middle, otherwise it will not give you a centered marking.</p><p><br>You can use this to mark the center, or drill directly. For the latter I also made several drill guides you can match with the drill you are using. The center holes in the inserts should barely be wide enough to fit the drill (otherwise carefully drill out the bore to make a perfect fit) to prevent movement out of the normal of the plane. In other words, use the correct inserts for the hole you want to dril to get a centered and straight hole.</p><p> </p><p>It can also be used to get a marking along the edge of something at a distance of 15-30mm (in 5mm steps) from the edge. For this, place both stoppers on the same side, place a pencil or something similar at the distance of your choosing and slide along the edge. The distance marking plates also provide a larger support surface for the drill guide in general. The edges might also be useful occasionally when measuring angles, so I incorporated commonly used angles into the design of the edges.</p><p> </p><p><strong>Printing and assembly</strong></p><p>I printed this model with a 30% cubic infill and 4 perimeters to ensure it doesn't deform while pressing it against a piece of wood or with other forces acting on it, for example from wood shaving piling up underneath while the guide is held in place. The bore for the inserts is slightly conical (20,2 mm diameter at the top, 20mm at the bottom), while the inserts are 20mm exactly. I did this to get a nice fit when pressing the insert all the way in. On my Ender 3 V2 this turned out exactly how I wanted it, but your milage may vary, depending on your printer. But there is always the option to sand the insert down a bit, if it doesn't fit all the way in. Don't simply adjust the printing size of the guide itself as this will change marking distances, etc.</p><p>An option to consider when printing this is also “Print external perimeter first”, as it is called in Prusa Slicer. This may also help with dimensional accuracy. But this also comes down to your personal printer and printing experiences, but it may be worth considering for a nice and accurate print.</p><p>When your prints tend to warp use a brim on all parts. Otherwise it should be fine to just use on with the stoppers, as their contact area with the bed is quite small. </p><p>Things you will need to print:</p><p>1 x Drill guide</p><p>2 x Stoppers</p><p>1..n x Insert with the right diameter bore for your purpose</p><p>Measure your pen or pencil if you want to use this for marking. Most likely the 8mm bore insert will be the best in this case. Make sure the pen is not loose inside the insert, as this will make the marking unprecise.</p><p>To assemble you will need two M5x30 allen bolts for the stoppers (and fitting nuts of course).</p><p>When you want this especially for marking with a pen or often use just one drill diameter, you can also glue the fitting insert in place to prevent it from coming loose with time or as you work.</p><p><strong>About the model</strong></p><p> </p><p>The model was inspired by commercially available self centering </p><figure class="image image-style-align-right image_resized" style="width:27.67%;"><img src="https://media.printables.com/media/prints/317471/rich_content/dbdbe359-7a22-4866-8ffa-c9e5da3b9115/image.png#%7B%22uuid%22%3A%225209204d-354c-4131-bdf0-7a2b89eca858%22%2C%22w%22%3A407%2C%22h%22%3A461%7D"></figure><p>drill guides, like the one in the picture. I needed this for a project and thought I would give it a try printing it first. One reason was it's cheaper and I didn't know wether I would need something like this again. The other was that I wanted to see first, wether something like this is actually useful or just a gimmick. I used my printed drill guide to great success, that's why I thought it a good idea to share the model. But I also found a few things that would improve the design, so I will definitely work on a version 2.0 at some point.</p><p>But if you need a guide like this occasionally for a few holes that need to be precise, it's absolutely worth printing. And since most of the improvements I thought of will only be noticable when drilling, for marking it should serve very well, even if you used frequently.</p>
With this file you will be able to print Self Centering Drill Guide with your 3D printer. Click on the button and save the file on your computer to work, edit or customize your design. You can also find more 3D designs for printers on Self Centering Drill Guide.
