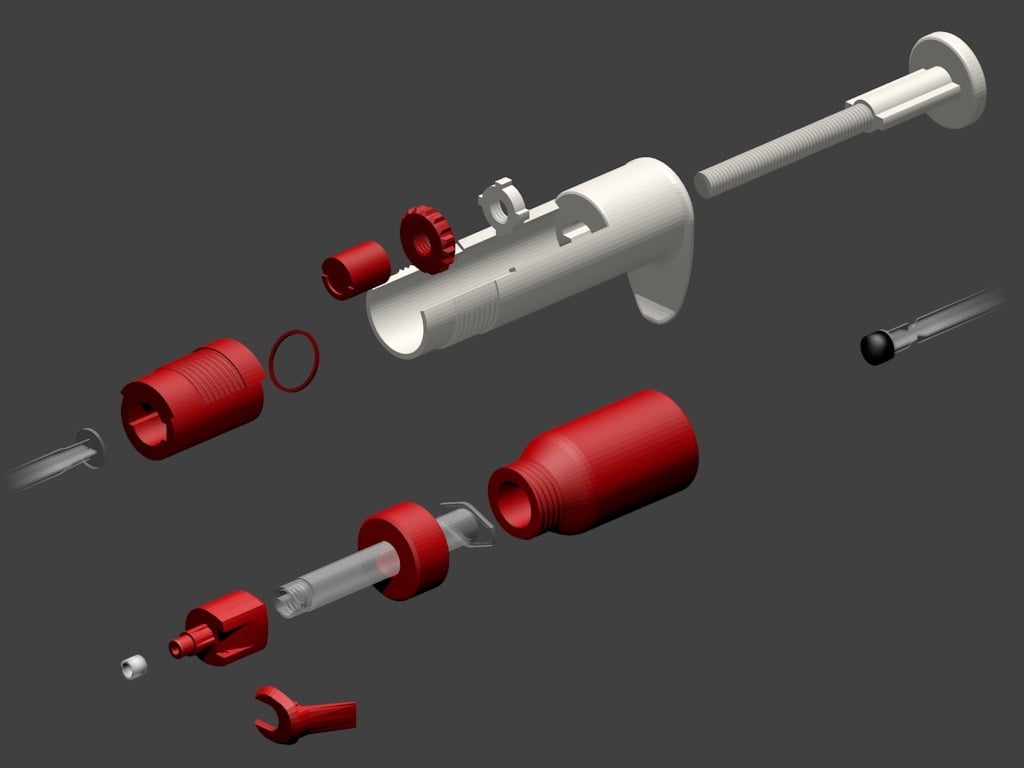
Seiken's laboratory micropipette
thingiverse
This precision pipette is engineered for accurate measurement, and fits standard 1 ml pipette tips universally. You can read the scale on the syringe directly, or use distilled water and a microbalance for even greater precision. It features an innovative eject button design. ### Demonstration Watch this video to see it in action: https://youtu.be/qquyA_rF-24 ### Components To assemble this pipette, you'll need the following components apart from the printed parts: 1. A 3 ml plastic syringe with luer taper(screw locker) 2. A rubber band with a diameter of approximately 16 mm (or about size #8 or #9 will work) 3. A silicone or rubber tube with an outside diameter of 6 mm, inside diameter of 4 mm, and length of 5 mm ### Assembling To assemble the pipette, you'll need something that can drill holes in the plastic syringe and some regular white glue. Follow these steps: 1. Assemble the gears. The groove on the bottom part should be aligned horizontally. 2. Install the rubber band, which will fit perfectly into the groove. 3. Remove the syringe plunger and drill 4 holes in the handle. Secure it to the previous parts using the rubber band. 4. Attach the previous parts to the outer case, then install the syringe tube. 5. Assemble the last 2 parts and the silicone tube, then seal the luer taper with some white glue. Finally, attach the last parts into the luer taper to complete the pipette. ### Printing Tips 1. Designed for no-support printing. 2. There are many threaded parts in this design, so make sure your machine can handle threads easily. 3. The part 9 and part 10 may require different size compensation in your slicer software than other parts to fit standard products precisely. 4. You may want to print the part 9 first and check if it fits pipette tips perfectly. ### Additional Information 1. For the tested product, all white parts were printed with PLA, and red parts were printed with PETG. 2. I'm planning to create a module for 200 μl tips using a 1 ml syringe later. 3. This design has considered using a spring as the elastic source; however, I haven't been able to obtain a spring for testing yet.
With this file you will be able to print Seiken's laboratory micropipette with your 3D printer. Click on the button and save the file on your computer to work, edit or customize your design. You can also find more 3D designs for printers on Seiken's laboratory micropipette.
