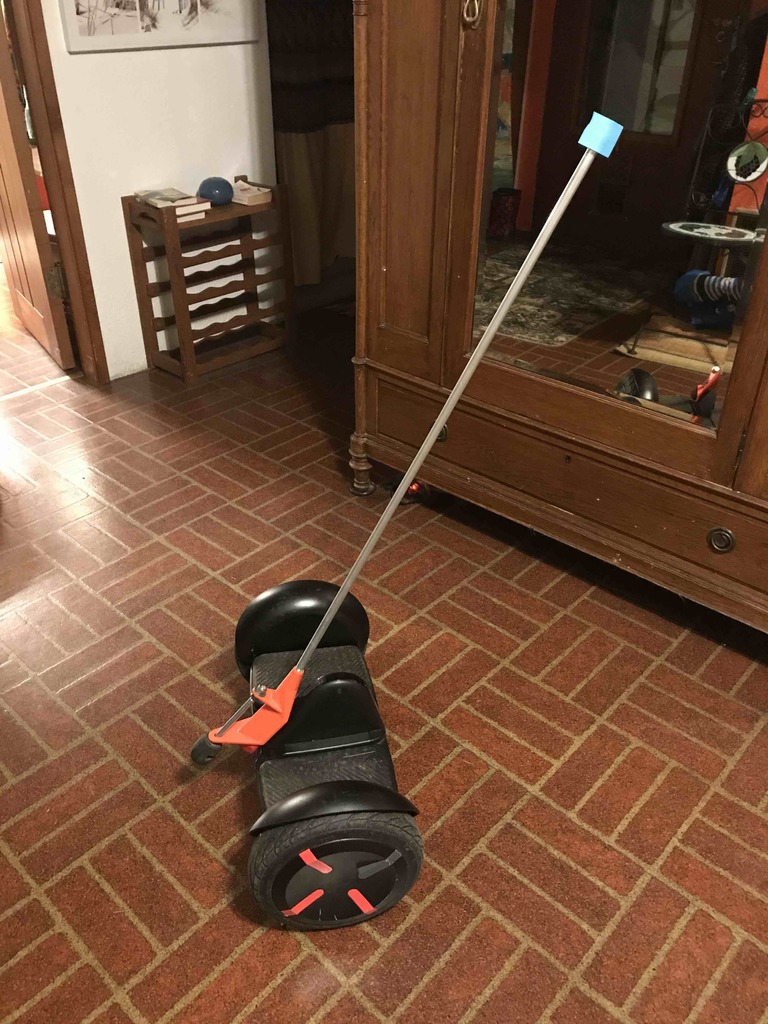
Segway Minipro Control Bar
thingiverse
This new handle replaces the knee control of the Segway Mini-Pro. As a rural resident with gravel and dirt roads, I need more control than the knee bar offers. Having previously ridden the original Segway, I preferred its handlebar control system. The Mini-Pro's more delicate control arm construction led me to design this new control bar to avoid stressing the original mechanism. This new arm achieves four objectives: better control, balance like the original, a built-in stand, and a built-in carry handle for the MiniPro. It is also lighter, locks in place easily, and is simple to remove. Three feet of 1/2-inch aluminum rod and seven inches of 3/8-inch aluminum rod or similar non-printing materials are needed. The top knob is small, designed for gripping with two fingers. It doesn't require much side-to-side force to steer, and forward and reverse are handled by balance as before. The paddle handle works best in my opinion. The plastic fitting needs to be strong, so it was printed with no fill except for 30% on the bottom plate. The rest is six top layers, six bottom layers, and six perimeter layers. I printed in ABS, then brushed it with acetone, followed by two hours in an acetone fume chamber to fully bond the layers and produce a glossy finish. Two drain holes are located inside, allowing liquid to fill up between the inner and outer wall before draining. The lock is made from 1/8-inch thick or less flat bar bent at a 90-degree angle, drilled, and secured with a flat head 3mm bolt screwed from the inside through the lock, a small spring, and secured with a nut and washer. Please see the photo for details. Before printing the entire handle, I recommend printing a 1-inch test section to check for fit on the MiniPro. I printed at 90% extrusion rate, 2400 feet per minute, sitting on the bottom plate, with cooling set to 10% fan after the bottom plate. The aluminum rods can be either threaded or glued in place. I chose to thread mine, using a 1/2-13 thread. The seven-inch rod is for the handle and stand, while the control bar hole will need to be altered or drilled to 1/2 inch if glued. The little Tee handle is for the original control bar as mine broke on first use, and I needed something stronger. It's not necessary otherwise.
With this file you will be able to print Segway Minipro Control Bar with your 3D printer. Click on the button and save the file on your computer to work, edit or customize your design. You can also find more 3D designs for printers on Segway Minipro Control Bar.
