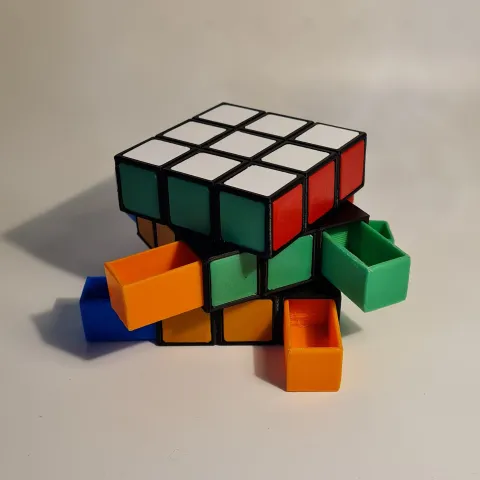
Secret Rubik's Cube Box
prusaprinters
EDIT: I have added correctly oriented models for the Main Body – Bottom and Main Body - Mid and if printed in that orientation you shouldn't need support for any files This is an idea I've been working on for several years off and on. I had hoped to sell this as an actual product but for various reasons I've yet to be able to do that so for now I've giving you all the most up to date version for free!Be warned, this has lots of tight tolerances and some fragile parts but if you use the test model to scale the drawers and tiles correctly it should work great. PrepStart first by printing the test body as well as one drawer and at least one tile. Once printed test that the tile fits snugly and the drawer can move freely. Tiles will be glued in the end so don't stress about getting them perfect. ALL PARTS SHOULD PRINT WITHOUT SUPPORTHint: Use a small screw driver or piece of filament to move it using the slot at the back of the drawerOnce you have the correct scale for everything and all fits properly you can start the process of printing everything out, in total you'll need:8 drawers with 2 for each colour on their respective sides(only 4 sides have drawers, the top and bottom colours need no drawers but instead require 2 extra tilesOne of each of the body pieces2 pins7 tiles in each of your selected colours with an additional 2 for the top and bottom colours(Or 46 total in any colour if you would prefer to paint them)AssemblyStart by Gluing in all the tiles, this part takes by far the longest but it's important you get it out of the way first.Next you need to place all your drawers in their respective slots and make sure they all fit and move properly. Now you can push the pins into the holes in the middle layer and you're ready for the final stepTake the bottom layer and make sure all the drawers are as far back in their slots as possible, then take the middle layer and line up the small posts with the channels in the back of each drawer, once they're lined up just press the layers together until they click together. Repeat these steps for the top layer once again being careful to align each post with its drawer.With all that work you should finally be done, I know tolerances are a bit sloppy in this version of the box but this is where the project has stagnated so I hope you can make one for yourself and enjoy it's imperfections.
With this file you will be able to print Secret Rubik's Cube Box with your 3D printer. Click on the button and save the file on your computer to work, edit or customize your design. You can also find more 3D designs for printers on Secret Rubik's Cube Box.
