Sears Halogen Light Switch Box
thingiverse
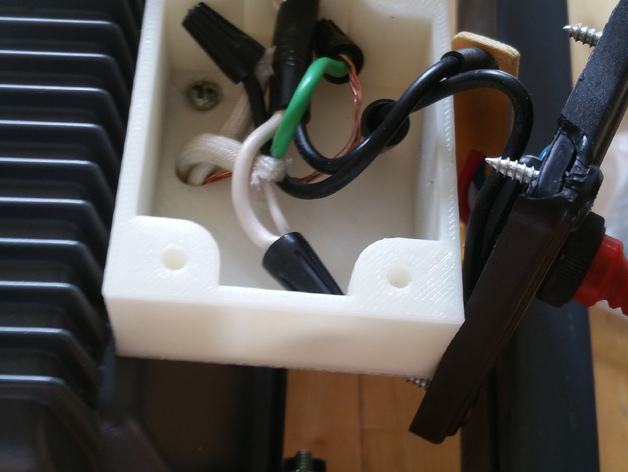
I'm experiencing some issues with my Halogen Light, so I decided to repair it myself. Maybe someone in the future will need assistance, but if that's the case, this fix might come in handy. The screw holes for the cover ended up being a bit larger than they should be, which resulted from measuring incorrectly, leading to a different-sized screw being used initially. To rectify the situation, I filled those extra spaces with glue before installing the screws. If you decide to utilize this guide in the future, you might consider slightly shrinking those holes by 0.5-1mm to ensure proper fitment. **Printing Instructions:** * **Rafts:** Set this option to No for a smoother print process. * **Supports:** Also, opt out of this feature to maintain optimal structural integrity. * **Notes:** This spacer is printed separately as one unit; feel free to merge and incorporate supports according to your preference. It was successfully printed using my Da Vinci 1.0 printer with standard print settings. **Post-Printing Operations:** After printing the parts, I snapped a photo for future reference or comparison.
With this file you will be able to print Sears Halogen Light Switch Box with your 3D printer. Click on the button and save the file on your computer to work, edit or customize your design. You can also find more 3D designs for printers on Sears Halogen Light Switch Box.