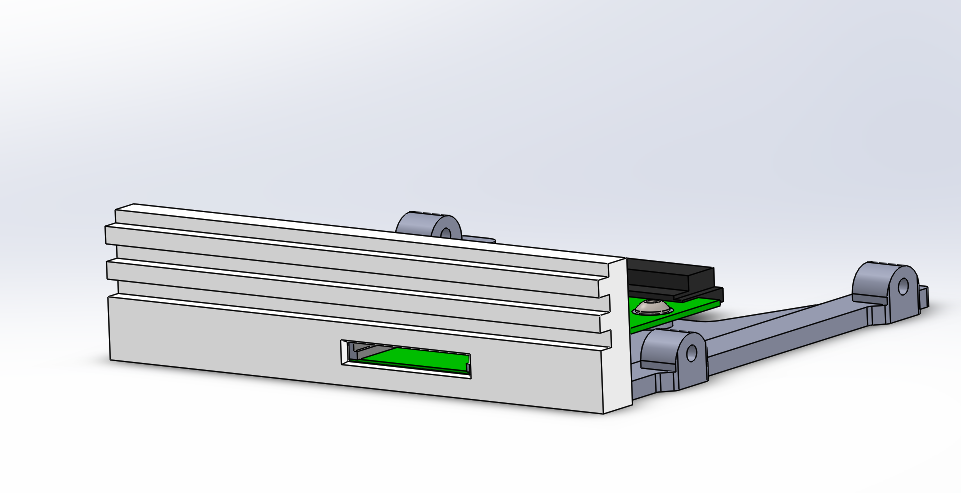
SD Card to SATA Adapter Tray for an Amiga A4000
prusaprinters
<h4>Overview:</h4><p>This is a tray to hold a SD Card to SATA interface adapter in the lower floppy bay of an Amiga A4000. The SD Card to SATA adapter was purchased from Amazon, I used this <a href="https://www.amazon.com/Wendry-Adapter-Converter-Transmission-Memory/dp/B07SNV5H52/ref=sr_1_3?crid=3IUQKH1XEEMU3&keywords=sd+card+to+sata+adapter&qid=1659911165&sprefix=SD+Card+to+sata%2Caps%2C154&sr=8-3">device</a> in the photo.</p><figure class="image image-style-align-center image_resized" style="width:50%;"><img src="https://media.printables.com/media/prints/255063/rich_content/92ec014d-ea9c-4ffe-9f1a-9ded36da1f2e/wendry-sd-to-sata-adapter.png#%7B%22uuid%22%3A%223b63513a-f583-48e5-b228-a3c7b4a1827a%22%2C%22w%22%3A689%2C%22h%22%3A491%7D"></figure><p>You'll need nine screws and some glue (optional).</p><h4>Items needed: </h4><ol><li>(2) M2x5 Flat Socket Head screws</li><li>(2) M2 Hex nuts</li><li>(2) M2 Flat washers (optional)</li><li>(3) M3x4 Button Head Cap Screws</li><li>(3) M3 Red fiber washers (optional) These are the same red fiber washers that typically come with aftermarket computer cases or PC motherboards.</li><li>(4) M3x6 Button Head Cap Screws (To mount this in the A4000)</li></ol><h4>Printing:</h4><ol><li>Two sets of files are included. One in STL format and the other in 3MF format.</li><li>You will need supports as you will be printing the bezel with the two ‘ribs’ facing away from the print bed.</li><li>The filament I used was PLA+ from eSUN</li><li>Infill was set at 25%, but anything above that should be fine.</li><li>I used a 5mm skirt around both parts to minimize corner lift.</li></ol><h4>Assembly:</h4><ol><li>Clean up the parts, as you desire. Sanding and painting might be your thing.</li><li>Countersink the M2 holes in the bezel from the bottom of the part, such that the M2 flat head screws sit flush or nearly flush.</li><li>Overlap the sled over the lower bezel wall and align the two M2 holes.</li><li>Insert the M2 screws through the holes, from the bottom of the bezel, and install the M2 nuts and optional M2 flat washers.</li><li>Tighten nuts for a secure joint. Some may also prefer to glue the joint, that is optional.</li><li>Next, place the adapter unto the tray assembly such that the SD Card slot aligns with SD Card slot in the bezel and also aligning the three holes in the PCB with the three bosses on the tray assembly.</li><li>Use the three M3 screws to secure the PCB to the tray assembly. Place a red fiber washer on each screw and then use to secure the PCB to the tray assembly (the washer is option). <i><strong>NOTE:</strong></i><strong> </strong>Do not over tighten the M3 screws. You are only tightening into the plastic, but this should be more than adequate.</li></ol><h4>Installing in the A4000:</h4><ol><li>Install in the lower floppy drive bay and secure with four M3x6 screws. <i><strong>NOTE:</strong></i><strong> </strong>Do not over tighten the M3 screws. You are only tightening into the plastic, but this should be more than adequate.</li></ol><h4>Remixing:</h4><p>If you remix this project please include attribution in your remix, thank you!</p><p>Enjoy!</p><p> </p><p> </p>
With this file you will be able to print SD Card to SATA Adapter Tray for an Amiga A4000 with your 3D printer. Click on the button and save the file on your computer to work, edit or customize your design. You can also find more 3D designs for printers on SD Card to SATA Adapter Tray for an Amiga A4000.
