SCX Tunnel
prusaprinters
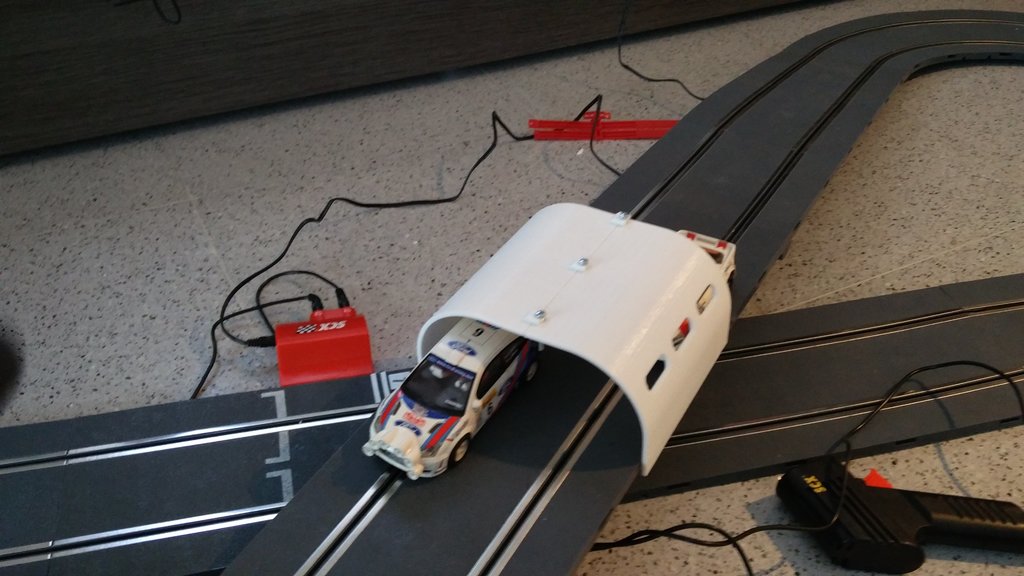
<p>I created a tunnel for the new SCX track (Be aware, mine is 160mm wide and is a little bigger than older SCX track, so is too big for the old model ones). The tunnel is split in two parts because it's too big for my printer to print in a single part. I will upload it to use with bigger printers (DONE).</p> <p>You can print it without supports, but it's a tall part, so use a brim or be confident that it will remain fixed in your printer bed. I used only hair spray to keep it in place in my bed.</p> <p>Extra: I also included a little part to camber the circuit. I'm working on it to get a family of parts.</p> <p>You can join different tunnels to create a really long one.</p> <p>A co-worker just suggested me to add leds... I will study it... later.</p> <h3>Print Settings</h3> <p><strong>Printer:</strong></p> <p>Overlord Pro</p> <p class="detail-setting rafts"><strong>Rafts: </strong> <div><p>No</p></div> <p><strong>Supports:</strong></p> <p>No</p> <p class="detail-setting resolution"><strong>Resolution: </strong> <div><p>0.2</p></div> <p><strong>Infill:</strong></p> <p>20%</p> <p><br/> <p class="detail-setting notes"><strong>Notes: </strong></p> </p><div><p>I don't use a Brim, but it's a tall and thin part so maybe you will require it.</p></div> Post-Printing ============= <p><strong>Tunel join</strong></p> <div><p>Use M3 screws and nuts to fix the tunel.<br/> New version V2 should work without nuts, but I have not tested it yet. <p>There is a file to print all the tunnel as a single part.</p> </p></div></p></p> Category: Toy & Game Accessories
With this file you will be able to print SCX Tunnel with your 3D printer. Click on the button and save the file on your computer to work, edit or customize your design. You can also find more 3D designs for printers on SCX Tunnel.