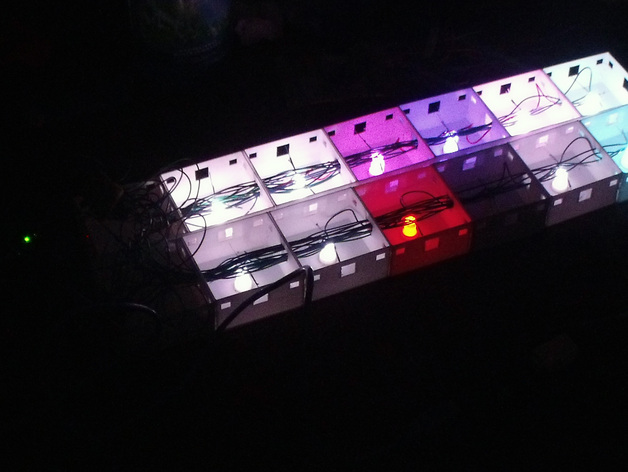
Scalable-RGB-LED-Matrix
thingiverse
Check out this fascinating 4x6 RGB LED matrix video on YouTube: [http://www.youtube.com/watch?v=DeNzGhN-fe8](http://www.youtube.com/watch?v=DeNzGhN-fe8). The cubes are 8cm x 8cm x 3cm, and the WS2803 chip controls each LED with 18 channels for RGB capabilities. With a constant current driver like the WS2803, you don't have to worry about setting voltages individually, as it automatically sets them based on the set current. The chips are SPI controllers, so they only require two wires for input and output, making it easy to chain multiple LEDs. For a 15x6 RGB LED matrix project, you'll need six WS2803 chips connected in a column, drawing a total of 90 LEDs, each requiring up to 20mA. This means you'll need a powerful power source, around 5V at 6A. The Arduino UNO is used for controlling the WS2803 chip, though other microcontrollers like Picunio or STM32 can also be used. To build the LED matrix, print six LED cubes and connect them together, then add one LEDElectricCube at the bottom of each column. Insert a RGB LED into each cube, ensuring the contacts are bent away in a cross shape. Solder the anode connections of all RGB LEDs together, and solder the left contacts (18) to the WS2803 chip, using an organized method for easier troubleshooting if needed. Connect the WS2803 to the power source (5V) and the anode of the LEDs. You can find sample code on this thread: [http://www.mikrocontroller.net/topic/269588](http://www.mikrocontroller.net/topic/269588). Don't forget to connect a 1400 Ohm resistor from IREF to GND on the WS2803, as this determines the current output for the LEDs. Note that you'll also need a separate 5V power supply for powering the LEDs.
With this file you will be able to print Scalable-RGB-LED-Matrix with your 3D printer. Click on the button and save the file on your computer to work, edit or customize your design. You can also find more 3D designs for printers on Scalable-RGB-LED-Matrix.
