Sanding Plane
prusaprinters
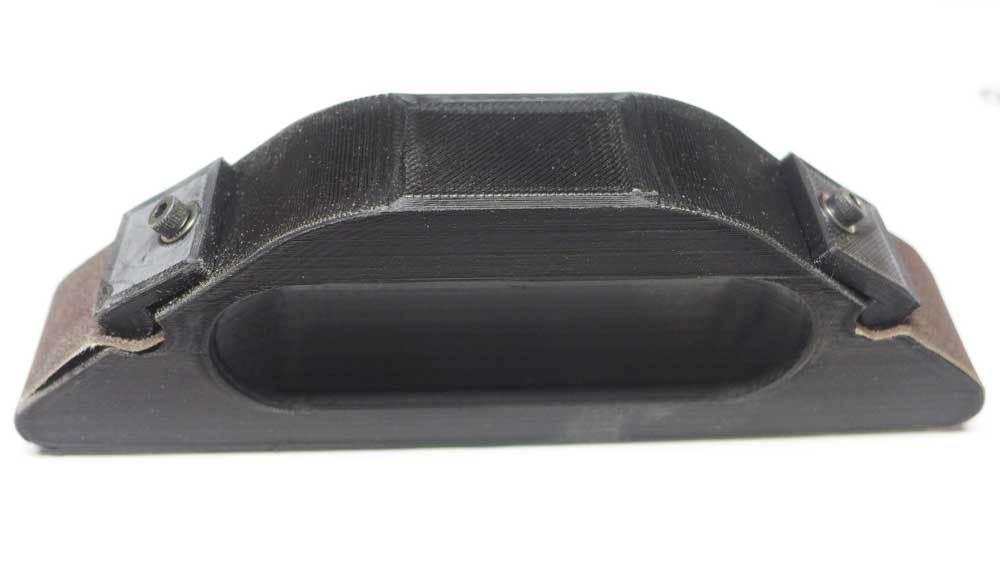
<p>Small sanding plane I designed for 1" (25mm) sandpaper.</p> <p>Overall size is 150mm long by 25mm wide by 50mm tall.</p> <p>You will need the following hardware (or similar)</p> <p>(2) 3mm x 10mm screws<br/> (2) 3mm washers<br/> (2) 3mm heat set nut inserts (used in building some 3D printers).<br/> Sandpaper 25mm wide by 23.5mm long.</p> <p>I suggest printing with 6 top, bottom & perimeters (you want it to be strong) and 40% infill with .20mm layer height.</p> <p>Print 2 of the Sanding Block Pins and 1 sanding block. Assemble as shown in the photos.</p> <p>Insert sandpaper strip into 1 end (into the circular cutout) and tighten down the screw. Next wrap the sandpaper around the bottom and insert into other side. Make sure to hold the paper stretched as tight as you can while screwing down the second screw.</p> <p>Enjoy!</p> <h3> Print Settings</h3> <p><strong>Printer Brand:</strong></p> <p>LulzBot</p> <p><p class="detail-setting printer"><strong>Printer: </strong> <div><p>TAZ 5</p></div><strong>Rafts:</strong></p> <p>Doesn't Matter</p> <p><p class="detail-setting supports"><strong>Supports: </strong> <div><p>No</p></div><strong>Resolution:</strong></p> <p>.20mm</p> <p><p class="detail-setting infill"><strong>Infill: </strong> <div><p>40%</p></div></p> <p><strong>Notes:</strong></p> <p>6 each bottom layer, top layer & perimeter.</p> <h3> Post-Printing</h3> <p><strong>Sand any sharp edges before assembly.</strong></p> </p></p></p> Category: DIY
With this file you will be able to print Sanding Plane with your 3D printer. Click on the button and save the file on your computer to work, edit or customize your design. You can also find more 3D designs for printers on Sanding Plane.