S500 - No-Frustration Landing Gear
thingiverse
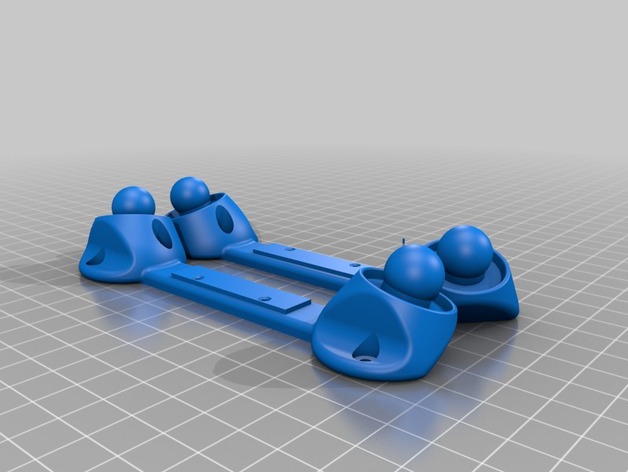
Problem S500 frame is great, mainly for its carbon-fiber reinforced arms. However, there are several things I don't like about it. One of them is the terrible landing gear. I have a version with plastic landing gear - separate legs that are prone to cracking on any relatively hard landing. It's also tedious to replace them, even though there are only two screws involved. When you're at the field, it takes time to do so. Solution I came up with an idea for ball-socket attachments for the legs. This way, they won't crack on harsh hits. If the dynamic load is too much for the ball joint to handle, it will simply pop off. However, even if the leg breaks (due to a straight axial hit), you can just push in a new one and you'll be flying again in no time. The ball-socket itself should never break, especially when printed from ABS with high infill - it will be stronger than any other part of your frame. There are two versions of the ball mounts: one is full-frame, while the other is side-only. I had to limit my print size for this project, so I went with the side version, which has a more compact footprint and is easier to put on (you don't need to remove the battery mount CF rods). The side-only version also includes a stump for an RGB LED stick (a nice touch for Cleanflight users!). The stick mounts nicely using M2.5 screws - the same ones used to assemble the drone frame itself. You can choose between two different leg lengths: 100mm or 200mm (in case you have a huge camera gimbal). This way, you can switch between leg lengths momentarily without having to make any major changes. The legs are hollow inside, with a thickness of 0.6mm and only reinforcement at the socket area. Don't be fooled by their thickness - they're actually quite light. However, please be careful when putting on the 200mm legs, as they might be a bit hard to handle after printing. It's recommended to print the legs from PLA, as it is more springy than ABS and holds better. Both materials seem to work well with this design (I'm using Hatchbox). One of the best features of these ball-socket attachments is that you can remove them when moving your quad around, making transportation much easier. You can even put your quad in a big laptop bag! Be sure to check out my other thing - a low-profile battery mount. I tested this design in the field and flew it over 20 times with harsh landings - no legs broke! However, there is one disadvantage: these ball-socket attachments are heavier than the original landing gear. The weight difference is around 55 grams (75 grams for the original vs 130 grams for the ball joint mounts). But the saved time of flying at the field is priceless. Since you're here... If you've got an S500 frame, you might also be interested in my programmable LED boards: https://www.ebay.com/itm/112821970650 Happy Flying! Print Settings Printer Brand: RepRap Printer: Delta Kossel Mini Rafts: No Supports: No Resolution: 0.2 Infill: 70-100 Notes: Use a brim when printing legs! Clean them off with a knife and sandpaper when done. I've tried both Hatchbox ABS and PLA, but PLA seems to work better since it's more springy and less prone to layer separation (which is very good for a legs socket design). Enable cooling when printing legs from PLA, especially if you're printing just one leg. The leg design, except its socket section, is just a thin 0.4mm shell (two passes of the nozzle), so layers stack up quickly and it might deform under its own weight if not cooled.
With this file you will be able to print S500 - No-Frustration Landing Gear with your 3D printer. Click on the button and save the file on your computer to work, edit or customize your design. You can also find more 3D designs for printers on S500 - No-Frustration Landing Gear.