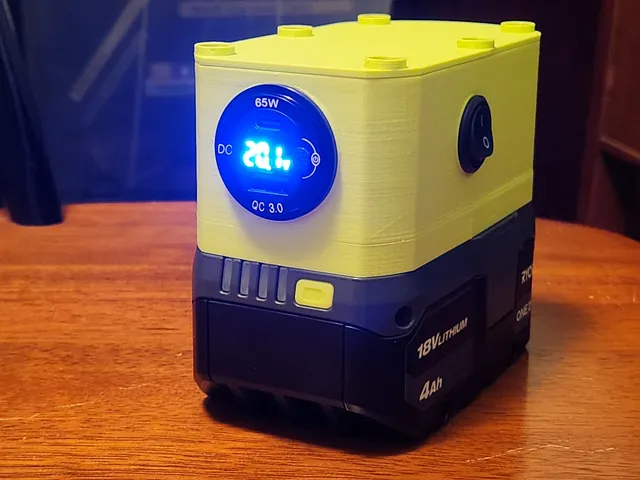
Ryobi Battery USB Power Bank
prusaprinters
Based on donutcat's model, but I made a lot of tweaks: Improved fit and attachment point to battery, prints as 2 pieces instead of 4, the underside is enclosed, no threaded inserts needed, added physical side switch (the electronic switch on the USB adapter draws 3mA when “off”).When printing the body piece, make sure to flip it upside down so that the screw holes are touching the print bed. Some tricks to enhance printability are integrated into the model such as an internal brim for bed adhesion and layered bridges. No supports needed! Intended for 0.2mm layer height. I used 4 perimeters. Internal brim can be cut away to make more room for part install.It's hard to get the tolerance for the screw holes correct, they may print a bit small so I recommend drilling the holes with a 1/8" bit to avoid the screws cracking the plastic.I used Overture's Grass Green PLA which is a pretty close match to Ryobi's color, I included some Ryobi tools in the last picture for color comparison.Required parts:Qidoe USB Outlet / Ouffun USB Outlet / Linkstyle USB Outlet (I've ordered all, they're identical, get whichever is cheaper)OR other car USB outlet of your choiceOR Car Socket (USE ONLY WITH 12-24V CAPABLE DEVICES)Round SwitchKeystone 209 Battery Contact#8 3/4" Flat Head Wood ScrewOther recommendations:Overture Matte Grass Green PLA
With this file you will be able to print Ryobi Battery USB Power Bank with your 3D printer. Click on the button and save the file on your computer to work, edit or customize your design. You can also find more 3D designs for printers on Ryobi Battery USB Power Bank.
