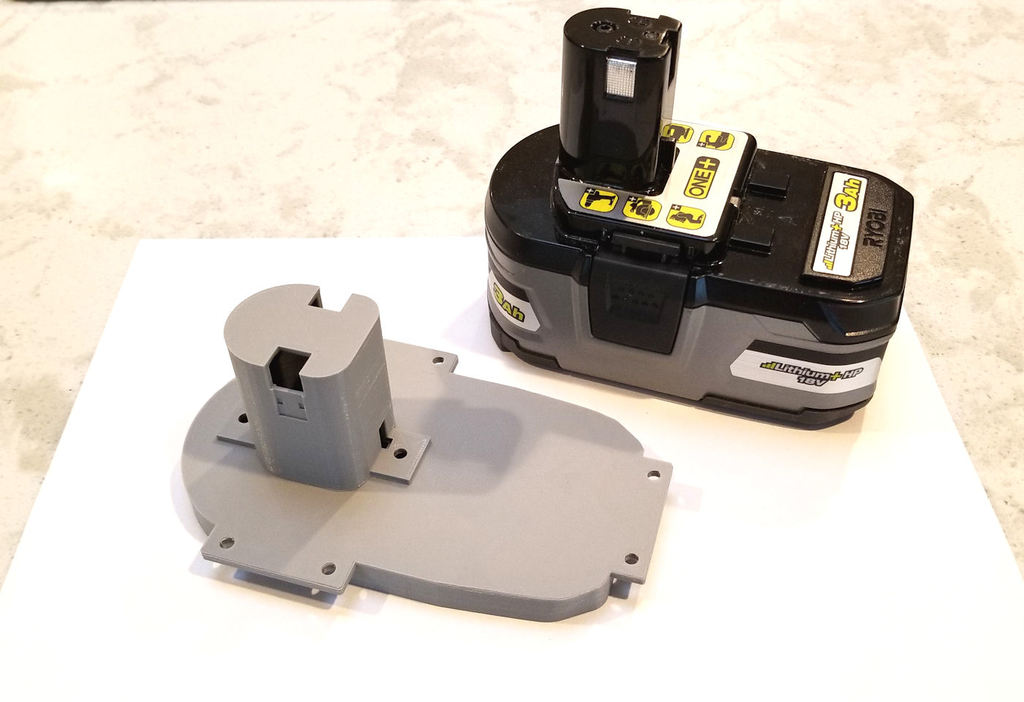
Ryobi 18V Battery Connector
prusaprinters
<p>This Ryobi 18V Battery Connector allows you to power any device or power tool with Ryobi 18V Batteries. This connector can be used as the basis of an adapter to power non Ryobi power tools or to power your electronic projects with Ryobi batteries. I am using this adapter to power single board computers and a planned mobile robot.</p> <p>Update 3-7-2020: I added photos of a portable radio that I converted to use Ryobi 18V batteries. This is an example of how this connector can be used. I also added a version of the base without ears.</p> <p>Here's a video showing the completed Ryobi Battery Connector: <a href="https://youtu.be/abT4txqD0Zs">https://youtu.be/abT4txqD0Zs</a></p> <p>I took the source design and added mounting tabs, improved the latching of the battery into the holder and redesigned the tower to use Keystone 209 contacts. This new holder now clicks the battery into place positively and has features to lock the battery contacts into place without sliding up.</p> <p>For the contacts, do a search for "Keystone 209" on <a href="https://www.amazon.com?linkCode=ll2&tag=thingiverse09-20&linkId=e4759bff1fa9a55a0f897d801ce2d765&language=en_US&ref_=as_li_ss_tl">Amazon</a> or EBay. Here's one supplier: https://www.amazon.com/KEYSTONE-209-BATTERY-CONTACT-pieces/dp/B00LPOVJHS</p> <p>I suggest that you print the parts at 75% fill and 0.1 mm layers. PLA is fine for this design. You should use supports around the base clip points. Before installing the Keystone 209 contacts, collapse them just a small amount with a pair of pliers for a perfect fit (see photo). Solder your wires onto the battery tabs before sliding them into the tower pockets otherwise the heat may damage the PLA (or other plastics). Install the contacts by pressing them over the pockets until they lock into place. Assemble the base and tower with either 4 mm or 6-32 flat head screws and matching nuts.</p> <p>I plan to use high efficiency DC-DC converters to generate 5V, 12V and 9V from the Ryobi 18V battery.</p> <p>Update 5-3-2021:</p> <p>A few people have asked for design source files so they can modify this design. I originally started with an STL and modified it using TinkerCAD. I would be glad to give access to the TinkerCAD files but you would not be happy with how I modified the original design. My changes are a Frankenstein Monster set of cuts and pastes which would frustrate you. If you need to modify this design, you should start with the STL or unfortunately start a new design from scratch.</p> <h3>Print Settings</h3> <p><strong>Printer:</strong></p> <p>HyperCube</p> <p class="detail-setting supports"><strong>Supports: </strong> <div><p>Yes</p></div> <p><strong>Resolution:</strong></p> <p>0.1mm</p> <p class="detail-setting infill"><strong>Infill: </strong> <div><p>75%</p></div> <p><strong>Notes:</strong></p> <p>The tower needs supports and the base needs support for the clip area.</p> </p></p> Category: Electronics
With this file you will be able to print Ryobi 18V Battery Connector with your 3D printer. Click on the button and save the file on your computer to work, edit or customize your design. You can also find more 3D designs for printers on Ryobi 18V Battery Connector.
