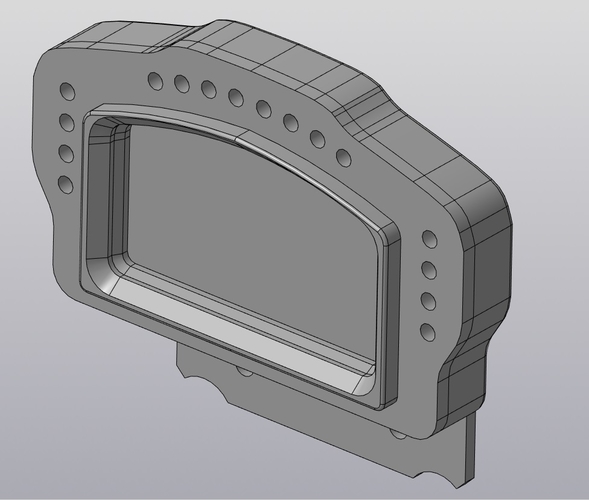
(rus) DIY Cosworth OICD (01P-032953-Plus) replica dashboard
pinshape
Here is the rewritten text: I found a YouTube video: https://youtu.be/AxC_rBXtePY The original dashboard was based on Thingeverse, but I didn't like it and the assembly process was poor. So, I completely redesigned the model in AutoCAD and reworked it so that it could be printed without supports. A lot of time was spent refining the details. It works with the SimHub program: https://www.simhubdash.com/ For assembling the dashboard, brass standoffs are used, such as those found in laptops (14 pieces) and M3 (4 pieces). https://ru.aliexpress.com/item/32595518584.html?spm=a2g0s.9042311.0.0.274233ednVNAG4 Also, M2 bolts can be found on AliExpress. The hood is printed separately due to the lack of supports and has 4 holes for inserting brass standoffs M2 on hot (with a soldering iron). To attach the hood without damaging the display, 4 M2 screws with a hidden head are used: https://ru.aliexpress.com/item/32804352919.html?spm=a2g0s.9042311.0.0.274233edYAnc46 It's better to use this type of display: https://ru.aliexpress.com/item/32827687469.html?spm=a2g0o.productlist.0.0.6c27571f0uBBc0&algo_pvid=b0f4c895-82ec-4a26-85e9-217f465ba7c9&algo_expid=b0f4c895-82ec-4a26-85e9-217f465ba7c9-2&btsid=63542f63-248b-41c9-b3f4-6a9a7f0d73a4&ws_ab_test=searchweb0_0,searchweb201602_10,searchweb201603_55 In contrast to the standard display, enhanced displays are faster and better respond to changes in readings. The original model used SMD LEDs, but since we don't have a printed circuit board, I redesigned the sockets for 5mm PL9823 LEDs: https://ru.aliexpress.com/item/32825363423.html?spm=a2g0v.12010612.8148356.2.2ede2c84qNdhr9 The connection is made in series, each LED has a plus, minus, input, and output contact. The photo shows how I connected the wires for mounting on the board. After assembly, it's highly recommended to solder a 16V, 1000µF capacitor, as LEDs and displays consume a lot of current, and we need to smooth out voltage fluctuations. An Arduino Pro Micro is used in bridge mode to control everything. You can find information on how to flash it on the SimHub forum: https://github.com/SHWotever/SimHub/wiki/Nextion-Display It's connected according to this scheme: GND -> GND VCC -> 5V RX1 -> TX TX0 -> RX PIN6 -> Input contact 1 of the first LED. It's also highly recommended to install a jumper wire J1 by splicing the contacts. The line that controls the number of LEDs is WS2812B_RGBLEDCOUNT 16 I'll send you the archive with the LED map and Nextion template on my email gtstig@gmail.com. There's a group with ready-made devices: https://vk.com/glcustoms
With this file you will be able to print (rus) DIY Cosworth OICD (01P-032953-Plus) replica dashboard with your 3D printer. Click on the button and save the file on your computer to work, edit or customize your design. You can also find more 3D designs for printers on (rus) DIY Cosworth OICD (01P-032953-Plus) replica dashboard.
