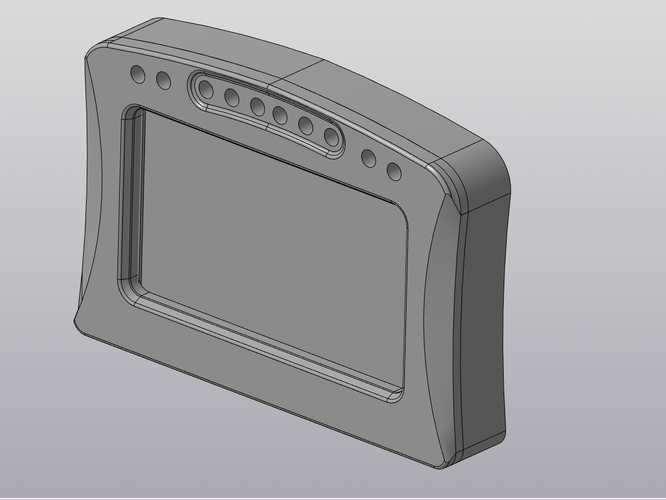
(rus) DIY Bosch DDU 9 replica dashboard
pinshape
To assemble the dashboard, we use embedded brass nuts, the same as those installed in laptops m2 (14pcs) and m3 (4pcs). We also need to install m2 bolts, which can be found on aliexpress. The display is better to take this: https://aliexpress.com/item/32827687469.html?spm=a2g0o.productlist.0.0.6c27571f0uBBc0&algo_pvid=b0f4c895-82ec-4a26-85e9-217f465ba7c9&algo_expid=b0f4c895-82ec-4a26-85e9-217f465ba7c9-2&btsid=63542f63-248b-41c9-b3f4-6a9a7f0d73a4&ws_ab_test=searchweb0_0,searchweb201602_10,searchweb201603_55 PL9823 LEDs: https://aliexpress.com/item/32825363423.html?spm=a2g0v.12010612.8148356.2.2ede2c84qNdhr9 The connection is made sequentially, each LED has a plus, minus, incoming and outgoing contact. See the data sheet. It is highly desirable to solder the capacitor to 16V, 1000mkf after installation, since LEDs with the display consume large currents and voltage surges need to be smoothed out. For control, we use Arduino pro micro in bridge mode. How to flash, there is information on the SimHub forum: https://github.com/SHWotever/SimHub Connected according to the scheme: GND -> GND VCC -> 5V RX1 -> TX TX0 -> RX PIN6 -> Input pin of 1 LED. It is also highly desirable to install the jumper j1 by soldering contacts. String responsible for the number of LEDs WS2812B_RGBLEDCOUNT 16 Link to the archive with a map of LEDs and a template for nextion will be sent to the mail. To write on gtstig@gmail.com Group with ready-made devices https://vk.com/glcustoms
With this file you will be able to print (rus) DIY Bosch DDU 9 replica dashboard with your 3D printer. Click on the button and save the file on your computer to work, edit or customize your design. You can also find more 3D designs for printers on (rus) DIY Bosch DDU 9 replica dashboard.