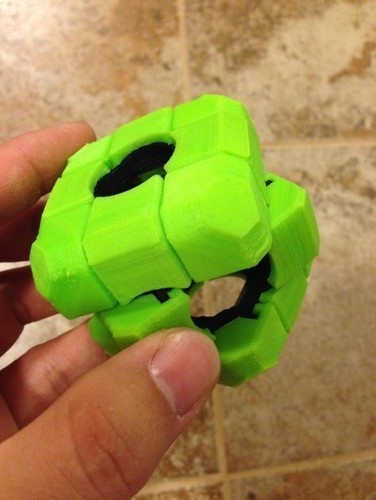
Rubiks Void Cube
pinshape
Summary Update 10/03/2013: It turns out I didn't actually need to print the inner track ring with support, as I initially thought the overhang would be too steep but it turned out it wasn't. Update 09/26/2013: I've cleaned up existing models and added a few beveled edges that should make it easier to maneuver. However, it didn't improve it as much as I wanted, there is an improvement but not much. I've uploaded all the updated pieces with a '_v2' postfix. Update 09/25/2013: I'm in the process of updating some new, improved models that have been cleaned up and rounded to make them move much easier. Once I print them out and am satisfied with them, I will upload them here as version 2. This is a replica of the Rubiks Void cube, which moves exactly like a normal Rubiks cube except it has no core. The lack of the core is actually a benefit for us since that means there are no springs or other parts to deal with. The entire cube, minus coloring the sides, are plastic parts that can be printed! All of the parts were modeled with printing in mind. The 'grain' of the layers factor into how the pieces move together to maximize its smoothness and practical strength. The final cube is a bit rougher to move, as expected since pieces aren't all perfectly smooth, but it still moves well. I suspect a dip in acetone or proper sanding will make the cube move even smoother. Once printed and assembled, all you need to do is slap some colored stickers or paint on it and you have a fully functional void cube! I hope you enjoy! Instructions The models do not have any tolerance between the parts, so you will need to set up your slicer so the printed parts can actually fit within each other snugly without binding. I've managed to make most of the pieces in such a way that you can print them without support. The track ring is the most challenging, but with a well-calibrated printer, dry filament, and printing with a raft, it can be done without support. x6 track rings x12 inner edges x12 edge pieces x8 corner pieces Assembling this cube is rather complicated, so instead of trying to explain every little detail, I've included a sequence of pictures that show my build process. Also, here are a few tips to keep in mind: The pieces will feel quite loose while you are assembling and will fall apart very easily until that piece has been fully connected to all the tracks that they connect to (e.g., corner pieces need 3, edge pieces need 2). In most situations, twisting one track around will allow you to insert more pieces to that track as it turns. When you get towards the end, where you actually have to use some force to snap the pieces together, be very careful about breaking the pieces. You shouldn't need very much force and in most cases, just changing where you put the pressure on the piece will make it snap into place easier and with less chance of damage. Once assembled, I recommend taking a minute on each side and rotating it back and forth allowing any little obstructions and imperfections on that track to wear and smooth out.
With this file you will be able to print Rubiks Void Cube with your 3D printer. Click on the button and save the file on your computer to work, edit or customize your design. You can also find more 3D designs for printers on Rubiks Void Cube.
