Rubik's Cube Braille Tiles
thingiverse
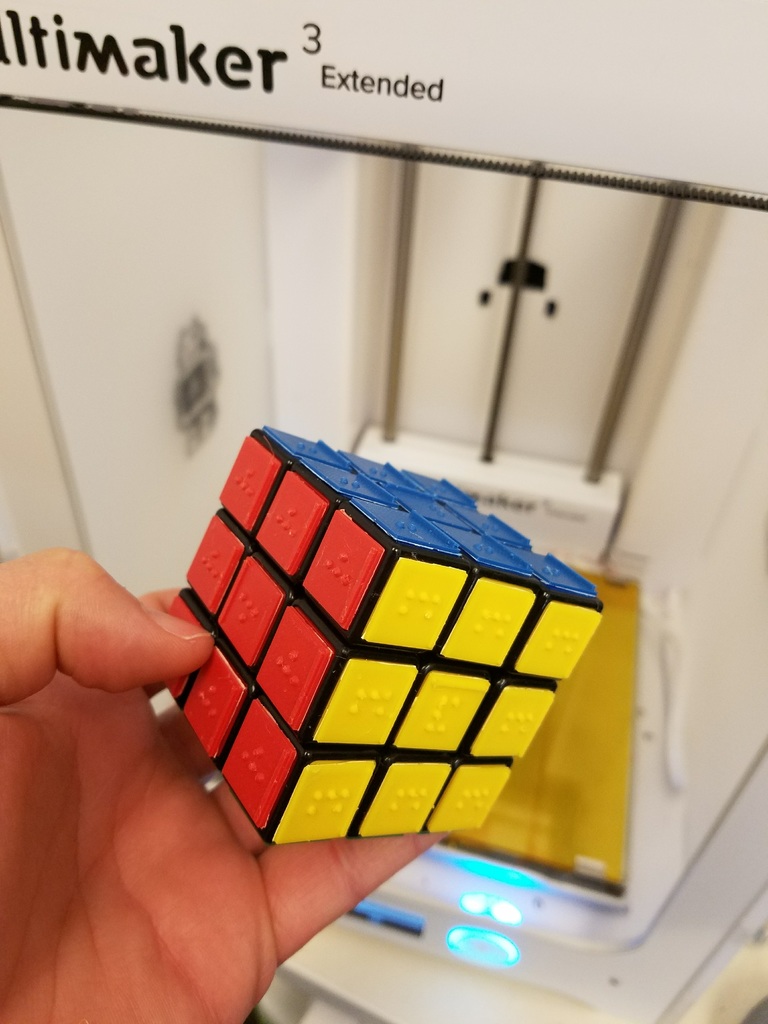
My 9-year-old daughter and I designed and assembled these braille tiles that can be glued to a Rubik's Cube, making it possible for sighted individuals and those who are blind to work together seamlessly. This is in line with the principles of Universal Design, which encourages creating things that cater to people's diverse needs, such as curb cuts that benefit both wheelchair users and parents pushing strollers. By doing so, we aimed to design something that can be used by everyone, regardless of their visual abilities or color perception. For instance, individuals who are color blind can use different colored plastic to accommodate for the colors they struggle to differentiate. The braille on these tiles follows Grade 1 and only includes the first letter of each color: Green is represented by G, Yellow by Y, Orange by O, White (with red often being confused with white, T could be substituted), Red by R, Blue by B. We also added an orientation line at the bottom of each tile, allowing users to easily identify where the bottom of each tile is as they turn the cube. If you notice in my picture, I've already mixed it up so the orientation lines are not perfectly aligned (bonus points if you can get them back to their original position). To create these tiles, I used an Ultimaker 3 extended printer, modifying the settings to print 10 tiles at a time (with one extra just in case). I increased the bed temperature to 100c and set the layer height to 0.06mm, with 20% infill (although it wasn't necessary). The filament used was Matterhacker ABS PRO, which printed exceptionally well and should withstand the high temperatures of my area.
With this file you will be able to print Rubik's Cube Braille Tiles with your 3D printer. Click on the button and save the file on your computer to work, edit or customize your design. You can also find more 3D designs for printers on Rubik's Cube Braille Tiles.