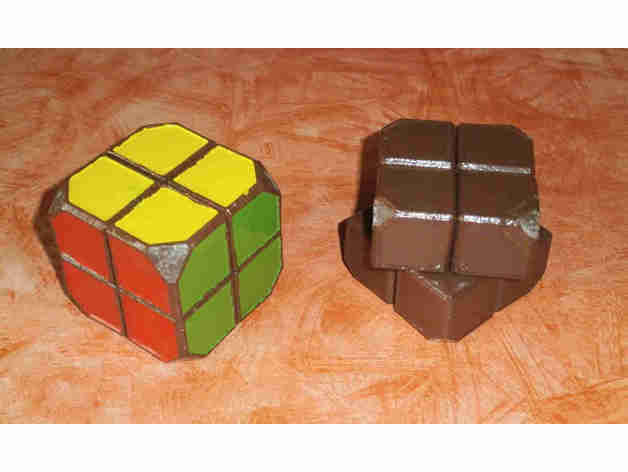
Rubik's 2x2x2 twisty puzzle cube
thingiverse
Design goal was a simple 2x2x2 cube that prints easily and perfectly. At the start of this project, I couldn't find any other 2x2x2 cubes on this platform (although one existed, the search function here didn't turn it up). If you're looking for another option, try searching Google for "www.thingiverse.com rubik 2x2x2." Step 1: Print the calibration cube first and check if your printer is calibrated correctly. If your measurements are scaled in X and Y, then everything should be fine. But if the outline of the cube is bigger than it should be and the hole inside is smaller, you'll need to adjust this in your slicing software. Slic3r 1.2.9 and RepSnapper both have adjustment parameters for this purpose. If your slicer doesn't offer these adjustments, consider switching to a different one because of the tolerances involved with the screws. This design can tolerate some minor mismatches. Step 2: Don't rotate the STL file at all during slicing. Keep it in the same orientation as shown here. Since we're dealing with a small footprint, you might need to use additional glue on your print bed to keep everything in place. I used ABS-juice after reaching a Z-height of 5mm. Now, go ahead and sandpaper off any excess material, including blobs. Be very gentle when sanding PLA cubes because they can be prone to damage. If you have an ABS printer that also uses acetone vaporization, then this is the preferred method for printing twisty puzzles like this one. But if your machine only handles PLA, you'll need to use that instead. Step 3: Paint the outside of the cube (or apply stickers) as desired. Since we're recommending grease, it's better to paint before applying any lubricants. Step 4: Assembly Add an M3 nylock nut to its designated position and pass a M3 rod through the middle of the cube, catching the nut in the process. Pull the nut into the core and then through the center of the core. Immediately unscrew the rod and replace it with an M3 screw. Be careful not to lose anything inside the core, as this can be difficult to retrieve later. Continue assembling the rest of the puzzle while remembering to apply grease where necessary. I recommend using Vaseline, although you can use standard ball bearing grease if that's all you have. Twin project: https://www.thingiverse.com/thing:3219527
With this file you will be able to print Rubik's 2x2x2 twisty puzzle cube with your 3D printer. Click on the button and save the file on your computer to work, edit or customize your design. You can also find more 3D designs for printers on Rubik's 2x2x2 twisty puzzle cube.