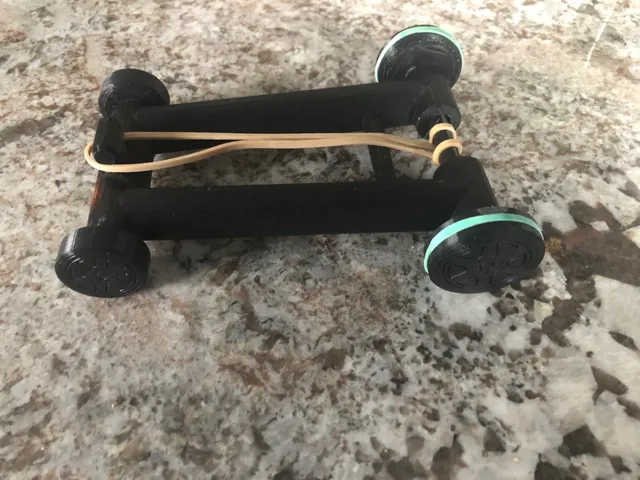
Rubber Band Powered Car
prusaprinters
instead of using popsicle sticks, straws, dowel rods and glue like we did in elementary school this one requires only some filament and a bit of glue.easy to assemble, but please take a few minutes, and read the instructions. Print Settingsall parts have been uploaded individually as well as all parts in one stl, please be advised you will be unable to re-orientate individual parts in the slicer software using the all-in-one stl.Parts required:BodyFront axialRear axialSmall wheel (x2)Large wheel (x2)Pin ***Important***From past experience, I highly recommend printing the axials laying flat, with supports, the resulting print will require sanding but the axials will be much stronger than if printed upright.I also recommend printing all parts with 100% infill as less will not provide the weight need to perform well, this model does use a substantial amount of filament (203g) as an alternative, you can print the body and front wheels with 25% infill and tape a small stack of coins or washers to each side of the rear axial hub to add weightPrinter settings used in the model shownMaterial - PLA+layer height - .2mminfill -100%supports - everywhere, you may be able to print with supports only touching the build plate, but I have not tried (please see my note on removing supports from axial hubs)print speed 50mm/snozzle temp 200bed temp initial layer - 65 final - 60 AssemblyGlue short axial to small wheel and allow glue to setGlue long axial to large wheel and allow glue to setinsert axials and glue the other two wheels and allow glue to setglue the pin into the hole in the center of the large axial and allow glue to setwrap a #64 rubber band around the grooves on each of the rear wheels, this is important to provide sufficient traction. (you could probably print the rear wheels with TPE or TPU instead of using rubber bands, but I didn't have any on-hand to try this out)6. the last step is installing the rubber band providing power, I used a #117B sized rubber band.you can connect it two different ways1. Fixed - rubber band is looped around the entire axialsimple operation, but doesn't go as far -probably best for small children2. Unfixed - rubber band is looped around only the pin, slightly more difficult to windbut the car can go much further. Fixed Unfixed Additional assembly notesI designed the hole in the wheels 0.5 mm larger than axial to compensate for print anomalies, so you will need to glue the wheels and real axial pin. I used CA (super glue) and accelerator 2. the print supports in the axial hubs can be difficult to remove, I found the easiest way to remove them is drilling them out with a 21/64" or 8mm bit, the key is to go slow with moderate pressure, using this method, the supports should easily come out.you can also use a small pair of needle nose pliers to twist them out, but this is somewhat more difficult than just using a drill. I found that the car seems to perform better on low pile carpet, rather than tile or hardwood floors. Please share your makes and let me know if you have any suggestions Happy building!
With this file you will be able to print Rubber Band Powered Car with your 3D printer. Click on the button and save the file on your computer to work, edit or customize your design. You can also find more 3D designs for printers on Rubber Band Powered Car.
