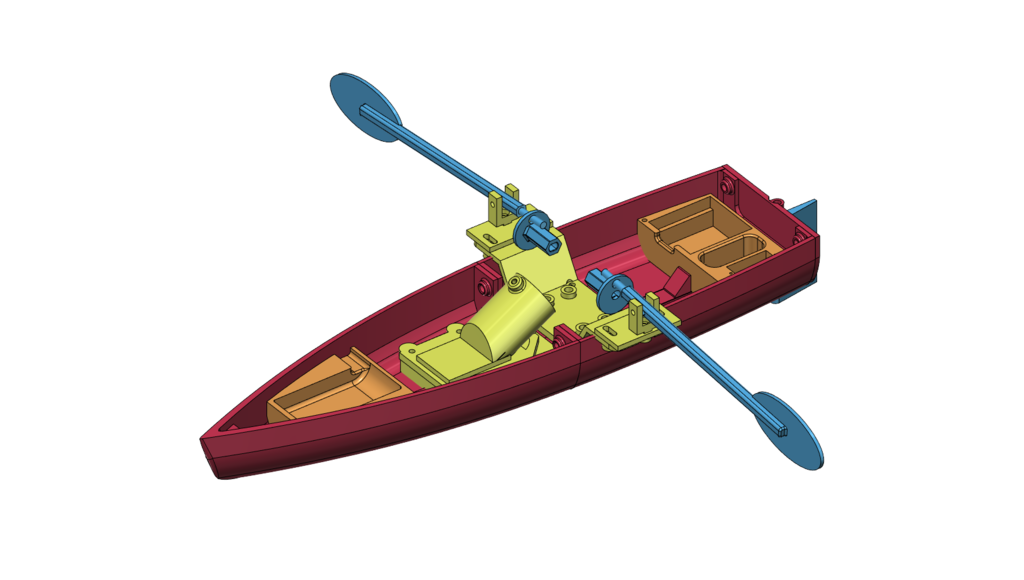
Rowboat
thingiverse
Intro: Here’s a boat that can row itself. I’ve designed a mechanism that will fit in this or in any other model with a suitable beam. In addition to the printed parts you will need the following: Tools: M3 tap Soldering iron or a heat set rig Hex keys 5.5mm socket wrench Rout-a-Burr tool Coarse file Fasteners, etc: Various: M3 SHCS 4: M3 x 10mm Flat head screws 2: M3 Nyloc nuts (or use Loctite and normal nuts) 10: M3 x 5mm long heat set inserts 1: 4mm dia x 50mm length of steel or brass rod for the rudder post The only thing to buy is a small motor with an attached worm drive. I used one from this set of four; so cheap that what the heck and I’ve got three spares: https://www.aliexpress.us/item/3256804335856929.html?spm=a2g0o.productlist.main.5.2df723a7d13dDo&algo_pvid=8cb89108-2f1f-46e7-8cff-db1d67120281&algo_exp_id=8cb89108-2f1f-46e7-8cff-db1d67120281-2&pdp_npi=3%40dis%21USD%212.46%212.31%21%21%21%21%21%40211be3cd16846399127041359d07b1%2112000029463157204%21sea%21US%212394886246&curPageLogUid=FvLRaNR2yb9K Printing: -Print the following pieces with support touching buildplate: Bow Mid Oar Rowing_Frame -Print these parts with support in critical places: RC_Holder Small_Motor_Mount -Use 100% fill for: Bow Mid Oar Oarlock Oarlock_Mount Rowing_Frame Rudder Small_Motor_Crank_Disk Tiller Transom -Use minimum fill for: Battery_Holder Bed Bow_Deck Bow_Holder RC_Holder RC_Holder_Lid Assembly Instructions: Clamp the motor in the printed mount with an M3 SHCS Install the heat set inserts in the bed Attach the rowing frame to the short end of the bed Attach the motor mount to the long end of the bed The Bow Holder is a ‘third hand’ to steady it on its point while installing heat set inserts in the bulkhead. Make sure the inserts are a little below the outer face of the bulkhead Install 4 more heat set inserts in the back of the stern Join the two halves of the hull Using the 4: Flat Head screws attach the transom to the stern Press the bed assembly into the hull, straddling the bulkhead joining the two halves. Tap the 4: M3 holes in the oarlock support frame Attach the oarlock support brackets to the rowing frame with 4: M3 x 8mm SHCS Attach the two oarlocks to the support brackets with 2: M3 x 18mm SHCS Thread M3 Nylocs onto the ends of these bolts but don’t snug them down: leave them a little loose so the oarlocks can swivel. Press a crank disk onto either end of the motor output shafts, making sure the oar holes line up. Insert the handle of each oar into the hole in each crank disk, then lay the oar in the oarlock and fasten it in place with the .long M3 bolts and Nylocks Sailing: –I’m setting mine up for radio control with a cheap two channel rig for model cars. Just get the smallest stuff you can find and have a go. Put the battery in the bow and the rest in the stern to ballast the boat evenly. I designed a couple of holders for the bits I’m using but feel free to leave them out if your rig doesn’t fit in them.
With this file you will be able to print Rowboat with your 3D printer. Click on the button and save the file on your computer to work, edit or customize your design. You can also find more 3D designs for printers on Rowboat.
