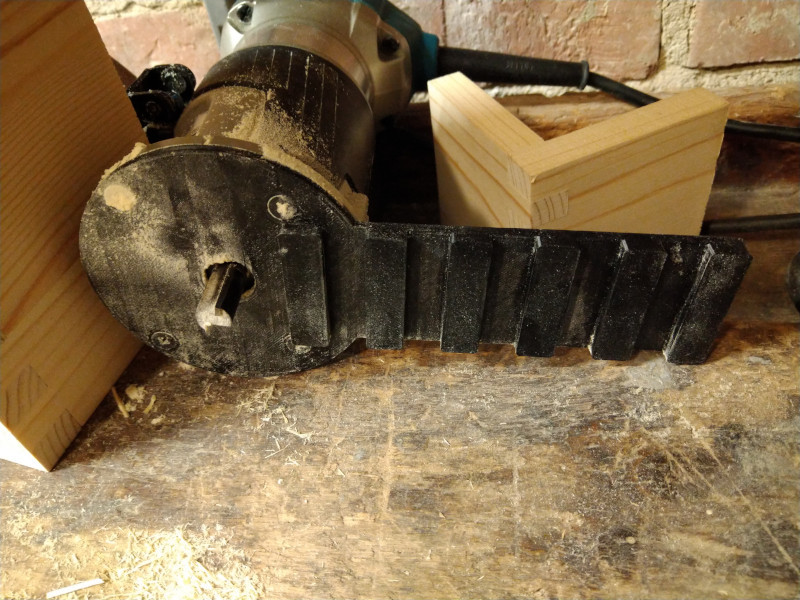
Router finger joint jig
thingiverse
A really simple finger joint jig for a makita RT0700 router with a simple 12mm straight cutter. No guide bearings nor template bushings needed. It fits the standard trim base of the router, just unscrew the four screws that hold the plastic bottom plate in place and replace with this part. I had an idea that something like this could work, so I had to test it and I was pleasantly surprised by the results, I could make almost perfect finger joints in boards with basically unlimited width (and length) with minimal setup. This makes it practical for instance for joining the corners of large cabinets. It required some practice though, the jig has to be kept in parallel to the board during the cuts, and the jig can only help somewhat with that. Some eyeballing and a steady hand is required. The two boards can (and should) be both cut at the same time, with one board exactly 12mm offset. It helps to cut a scrap piece with the same thickness as the board to 12 mm width and use that to set the offset. Clamping it in place also helps with making the cuts at 90 degrees as there is a wider surface to align the first guide against. The depth of the cutter is to be set to exactly the thickness of the board. I tested with a pine board, 40cm width, 18mm thickness. The result is nice enough for me to be usable, and I didn't even use a sacrificial board at the backside to avoid splintering. The cutter must be exactly 12mm for this jig. Freecad source included if you want to modify it for another cutter.
With this file you will be able to print Router finger joint jig with your 3D printer. Click on the button and save the file on your computer to work, edit or customize your design. You can also find more 3D designs for printers on Router finger joint jig.
