Round foot for #6 bolt square nut (parametric)
prusaprinters
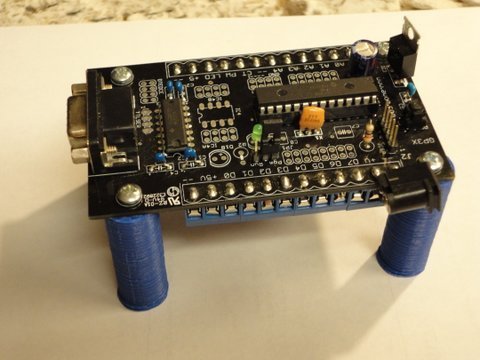
<p>A foot suitable for a PCB or other item. A #6 square nut goes in the bottom and a bolt in the top.</p> <h3>Instructions</h3> <p>Best to start with the SCAD unless you just happen to need the exact thing I did.</p> <ol> <li><p>Open foot-6-round.scad</p> </li> <li><p>Adjust parameters according to comments.</p> </li> <li><p>The current settings are for #6 hardware, a square nut, and a 1/2" bolt hole (which does not mean you need a 1/2" bolt -- see below).</p> </li> <li><p>Change as needed, save as STL, slice, print</p> </li> <li><p>Say you have a 1/2" bolt hole and a 1/16" PCB. Then a 3/4" bolt will leave 3/16" for the nut to grab. Pick your bolt size appropriately. You may also need a very long bolt for installation (see below).</p> </li> </ol> <ol> <li>If your printer is a little "tight" on holes, you may want to drill out the bolt hole. On mine, I can drive the bolt in and it "feels" threaded but it doesn't need a drill.</li> <li>However, the nut is square and not drillable. If it is tight (like mine is), push it in flush. Temporarily put a long bolt through the bolt hole and use it to pull the nut up through the hole. If it is too tight for that, you may have to hack the scad file to make a slightly bigger nut (nutsize) or take a file to the square hole (hard because the holes need to be concentric). You can also shove the nut down with something stiff but be careful not to tip it so it is on its side.</li> </ol> <ol start="8"> <li>Once you have the nut down to the bolt hole, remove the temporary bolt (if used) and put your PCB (or whatever) on top of the bolt hole. Pass the real bolt through the mounting hole on the PCB and into the bolt hole. Tighten.</li> </ol> <p>If you are an OpenSCAD guru this is probably not too exciting but I'm learning it and thought if not useful itself, might help someone else getting started.</p> <p>These should print vertically with the wide end up so you are printing on support. However, if you print them upside down the squash on the bottom makes a pleasant little "micro foot" (yeah, I meant to do that...) Or if you leave the squash at the top it makes a little ledge for the PCB. In either case, the squash is likely to take a little mechanical force to get the nut or bolt past.</p> Category: Electronics
With this file you will be able to print Round foot for #6 bolt square nut (parametric) with your 3D printer. Click on the button and save the file on your computer to work, edit or customize your design. You can also find more 3D designs for printers on Round foot for #6 bolt square nut (parametric).