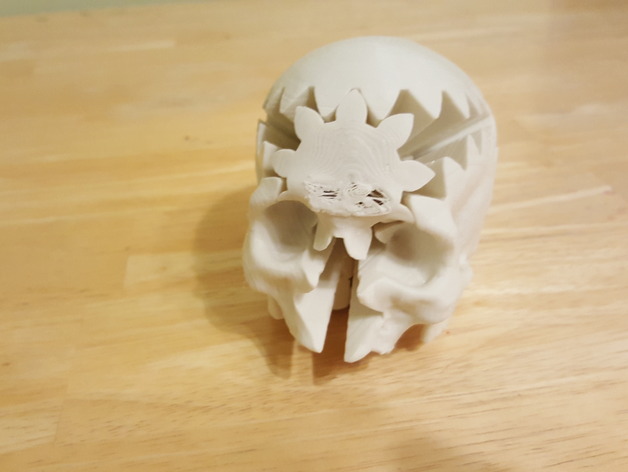
Rotating Skull Gear with snap pins
thingiverse
I've got a thing for printing geared objects in 3D and decided to tackle CarryTheWhat's Rotating Skull Gears. This mashup of Emmett's gear code and skull image by bothacker is a real winner. I tried this print out two years ago, but my machine wasn't tuned up right and it didn't turn well at all. After having great success with Emmett's new parametric snap pins, I thought this design might benefit from an upgrade to the new pin type, so I loaded the files into Tinkercad and got to work. I made a small mistake when converting the design - I used the standard pin size, which was just a little too long for the center piece. No big deal though, I did some testing and found that all I had to do was trim off the tip of the pins going into those holes. Long story short, it all came together nicely and works like a charm! Just add a bit of your favorite lubricant - I recommend silicone spray or white lithium grease. Big shoutout to CarryTheWhat for creating such an awesome design! Print Settings: Rafts: No Resolution: .2mm Infill: 10% Notes: Print one of each gear piece, one center piece and eight pins. It's a good idea to print an extra pin or two just in case. I printed all the pieces with no support, which is what I always do. If you choose not to use support, you might get some stringing when it prints the jawbone below the ear, but that should clean up okay. Alternatively, you could go for support if you prefer. The rest of the parts don't need any support. Post-Printing: First things first - make sure to clean up any stringing and give those gears a good once-over. I also like to take an exacto knife and tidy up the edge of the rotating hole on each gear where the plastic sticks out slightly from squishing the first print layer. Now it's time for assembly! I started by inserting the pins into the skull gears, pointing them in the right direction. Make sure that the end of the pin sticking out is the cut-off end - you don't want any gaps. I used white lithium grease spray to lubricate them and gave them a few turns to work in the lube. Next up was assembling the skull by connecting all the pieces to the center piece. Check out the original model on Thingiverse (http://www.thingiverse.com/thing:3400) for guidance on orientation - it's easier that way! First, I connected all four large pieces to the center. They fit onto the big sides of the center piece, making sure they were lined up properly in relation to each other. Then I added the nose bridge and the bottom pieces because they're easy to line up. The last two corners are different sizes, so you can easily tell which one goes where. And that's it - your Rotating Skull Gears are ready to roll!
With this file you will be able to print Rotating Skull Gear with snap pins with your 3D printer. Click on the button and save the file on your computer to work, edit or customize your design. You can also find more 3D designs for printers on Rotating Skull Gear with snap pins.
