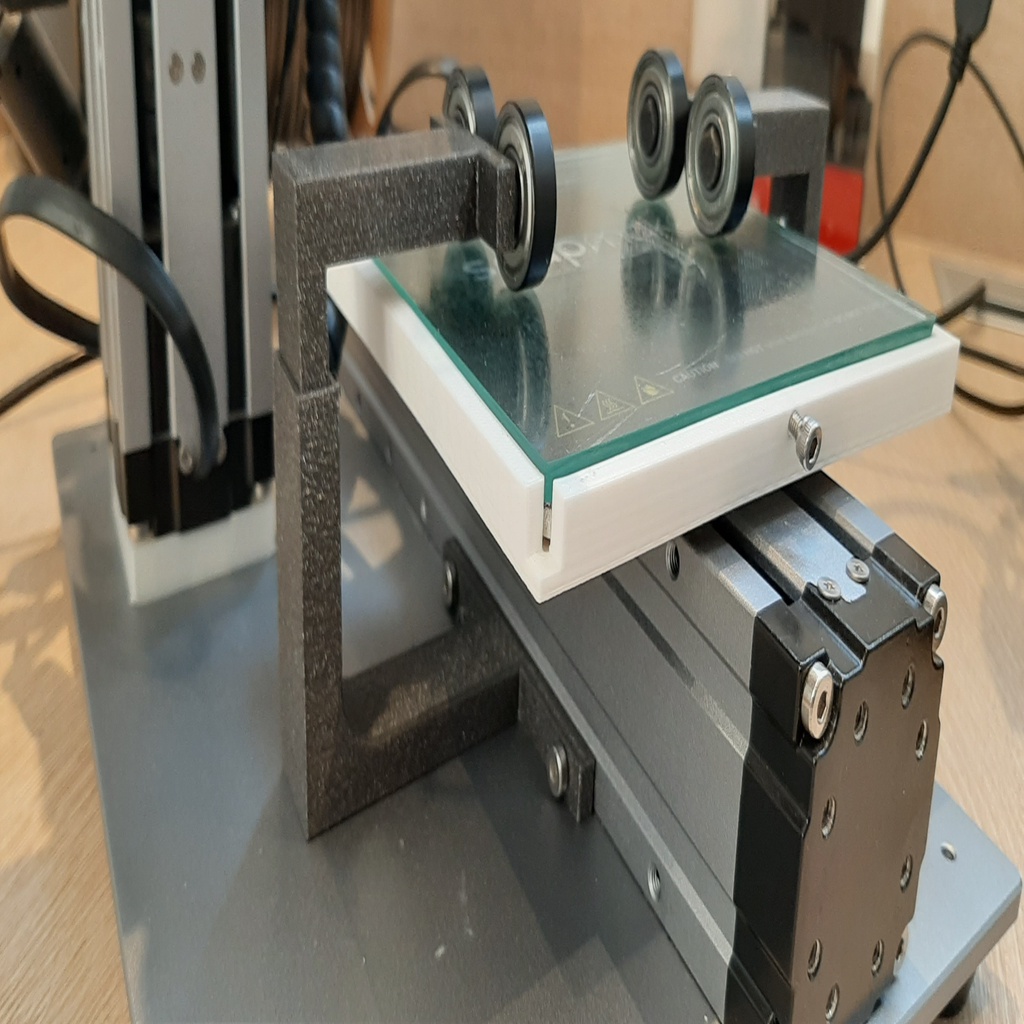
Rotary Y-axis for Snapmaker 3d printer.
thingiverse
Rotary Y-axis for Snapmaker 3d printer. This is a must-have if you need to laser engrave on a cylindrical object, as it keeps the focal point at the same distance. Print 2x Rotary Y-Axis part 1.stl and 2x Rotary Y-Axis part 2.stl. Hardware consists of: 4 M4 screws 4 608 bearings, measuring 2.2 x 0.8 x 0.7 cm To assemble, attach Rotary Y-Axis part 1 to the left and right sides of the Y-AXIS with 4 M4 screws. Next, push bearings onto Rotary y-Axis part 2. Slide Rotary Y-Axis part 2 into part 1 until it rests on the printer bed. For better grip, attach some electrical (insulating) tape to the bearings.
With this file you will be able to print Rotary Y-axis for Snapmaker 3d printer. with your 3D printer. Click on the button and save the file on your computer to work, edit or customize your design. You can also find more 3D designs for printers on Rotary Y-axis for Snapmaker 3d printer..
