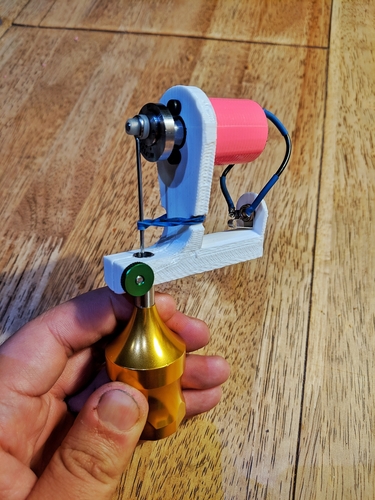
Rotary Tattoo Machine
pinshape
MAKING AND USING YOUR OWN TATTOO MACHINE ON A HUMAN WITHOUT PROPER TRAINING AND APPRENTICESHIP IS DUMB. DON'T DO IT. Screws Required: 2x - M3-0.5 x 6 - Motor Mount 1x - M3 x 20 - Tube Vise 1x - M3 Thumb Nut - Tube Vise 1x - M3 Lock Washer Extra Parts Needed: Motor - This is the best one I've found so far. You'll need to trim a few millimeters off the output shaft with a Dremel cutoff wheel or something to get the cam wheel to sit against the motor and line up correctly. I used some duct tape to wrap the motor, but that's up to you. Tattoo Cartridge Grip - This one works, but should work with any 8mm diameter tattoo grip. Rotary Needle Cam Female 3.5mm Jack Male 3.5mm Jack - These are good, sturdy jacks you can use to convert an existing clip cord to 3.5mm. You may have to drill out some of the printed holes to make the parts fit better. I've found that it's helpful to drill out the grip hole on the clamp, then let the smooth part of the drill bit spin quickly in the hole until it heats up and smooths out the plastic. This allows the grip to slip in and be moved around very smoothly. Any tattoo power supply should be able to run this machine. Seems to be fine with less infill but some sections, especially the clamp, are under quite a bit of stress, so setting it to 100% doesn't hurt. The machine should be printed laying horizontally on its side with supports for maximum strength. Feel free to hit me with any questions and to take it and make it better.
With this file you will be able to print Rotary Tattoo Machine with your 3D printer. Click on the button and save the file on your computer to work, edit or customize your design. You can also find more 3D designs for printers on Rotary Tattoo Machine.