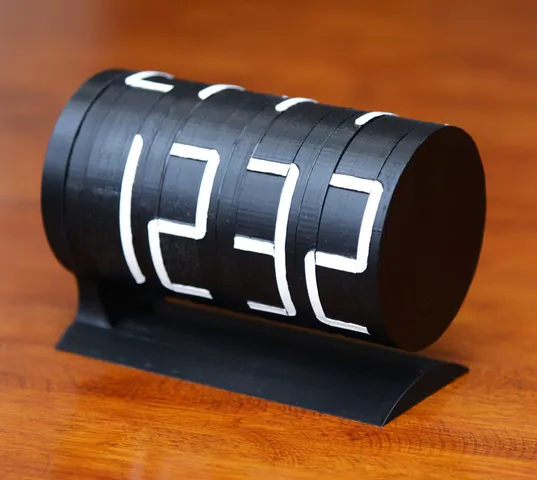
Rotary 7-segment clock
prusaprinters
Jan 8, 2021 : Improved version is released, https://www.thingiverse.com/thing:5242321 Rotary 7-segment mechanical clock, driven by a single stepper motor and ESP32. It acquires current time from network (ntp) It consists of only 7 types of parts (total 14 parts) Attractive cantilever-type design. Now circuitry and motor are in the cylinder Complex and interesting motion note: this clock takes a long time to show current time (up to 4 minutes) if all digits are changed, because it has 12 wheels. Usually it takes around 10 seconds to change the rightmost digit. Update Jan 17, 2022 : WiFi setting from your smartphone is now possible. Use smartConfig.ino for your ESP32 microcomputer. This is based on the code by airtcp, https://github.com/airtcp/esp32_demo_for_lolinlite and I added some motions to show the current status of the clock. Design The mechanism is similar to "Minimal Mechanical Digital Clock" with 4 or 8 wheels, https://www.thingiverse.com/thing:4931539 but this 7-segment clock has 12 wheels (3 wheels per each digit). The principle to set the wheel position independently is also similar to "Time Twister 3", https://tiltedtwister.com/timetwister3.html but the main difference is the segment arrangement. My design has 9 positions for each wheel, and segments are shared each other. Therefore It can show relatively larger digit compared to the radius of the wheel. Details are as follows. How to make You can print all parts without support. Place on the build table as supplied. Circuitry is exactly as same as former thing named "Minimal Mechanical Digital Clock with Network Time Acquisition", https://www.thingiverse.com/thing:4931539 Motor is placed inside-out, so the rotation direction is reverse. I connected ESP32 ports to the driver in the opposite direction to rotate reversely. Initial state is showing "8888" in front of the clock. So stick black adhesive at the top of the "wheel-first.stl" when the longer segment is placed at front. Datasheet of RPR-220 is available at https://www.rohm.com/products/optical-sensors/reflective-type-photosensors/rpr-220-product Cathode of IR LED (pin no.2) and emitter of photo-transistor (pin no.3) are connected to GND. Between VCC (+5V) and Anode of IR LED (pin no.1), put 220-330Ohm resistor. Between VCC (+5V) and Collector of photo-transistor (pin no.4), put 10k - 20kOhm resistor. Connect this point to ADC input of microcomputer. Black material with white lettering looks better because gaps between wheels are less visible. SmartConfig You can set SSID and password of your WiFi using smartphone app. This code is a back-ported version from newer "Rotary Digital Clock", https://www.thingiverse.com/thing:5191668 This function is named SmartConfig. The apps for setting are at Android: https://play.google.com/store/apps/details?id=com.khoazero123.iot_esptouch_demo&hl=ja≷=US iOS: https://apps.apple.com/jp/app/espressif-esptouch/id1071176700 The status of WiFi connection is indicated by the motion of the rotor. Large reciprocal motion : connecting to WiFi of previous setting stored in non-volatile memory. Small reciprocal motion : SmartConfig mode. If 30 seconds of WiFi connection trial fails, it automatically moves to the the smartConfig mode (waiting for the setting from smartphone app.) Please not that your smartphone should be connected to 2.4GHz WiFi. Acknowledgement: Thanks to airtcp. Original source code (for the other project) is at https://github.com/airtcp/esp32_demo_for_lolinlite (This code is not for this clock. Please download and use "smartConfig.ino" provided by this thing's page for this clock) Category: Gadgets
With this file you will be able to print Rotary 7-segment clock with your 3D printer. Click on the button and save the file on your computer to work, edit or customize your design. You can also find more 3D designs for printers on Rotary 7-segment clock.
