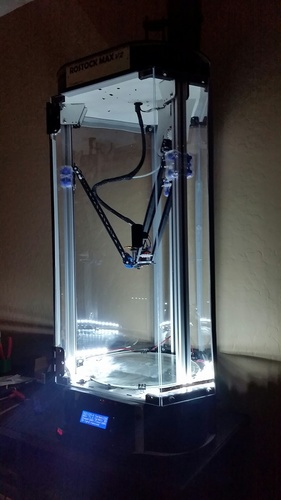
Rostock Max v2 Enclosure
pinshape
These are the brackets required for building an enclosure for your rostock max v2. To complete this project, you will need three base pieces and three top pieces, which can be printed simultaneously using your printer's build area. Locate the brackets on the extrusions and secure them to the rostock's top and base using 6-32x.75" bolts with nuts (M3 x20mm bolts are also suitable). You will need to drill holes in your printer for this purpose. I used one sheet of 36" x 48" x .093" acrylic, available at The Home Depot (http://www.homedepot.com/p/OPTIX-36-in-x-48-in-x-093-in-Acrylic-Sheet-MC-09/202038045), and another piece of 1/8" x 12" x 36" acrylic for the door. Cut all sheets to 29" in length using a plastic scraping cutter or saw, and cut the .093" sheet into 3-6" widths and 2-12" widths for the enclosure sides. All hardware used is 1/4-20 nyloc nuts and 1/4-20 x 7/8" SHCS, but I recommend using 1" length bolts as mine were too short to reach the nylon in the nuts. To seal the case, apply silicone and foam tape on the seams to eliminate gaps for optimal insulation. For the door, purchase hinges at your local depot and use a soldering iron to drill holes in the acrylic, as it tends to crack easily with a standard drill. You will need to utilize my layer fan mount to clear the cabinet. If you're interested in learning how I installed lighting in the cabinet, visit this link: https://pinshape.com/items/200...
With this file you will be able to print Rostock Max v2 Enclosure with your 3D printer. Click on the button and save the file on your computer to work, edit or customize your design. You can also find more 3D designs for printers on Rostock Max v2 Enclosure.
