Rostock Extruder Maximus
thingiverse
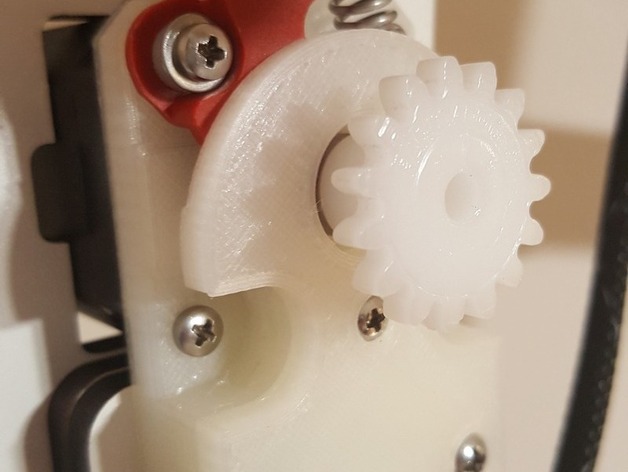
I was experiencing frustrating issues with the standard EZ Struder setup. After scouring various designs online and delving into a few promising concepts, I decided it was time to take on the challenge of creating my own custom struder from scratch. Several weeks of tinkering later, and after using nearly an entire roll of plastic, I've tweaked the design until I'm happy with the results and eager to share them with the community! UPDATE 2016-06-02 - Version 7 Since I first shared this project several people have reported that the hob gear had grown in diameter. In response, I made a few tweaks to v7 Extruder Maximus: I expanded the hole for the hob gear to fit the larger 12.4mm gear. Note that this will still work fine with smaller gears as well. To give additional support to the tensioner arm and spring, I carried the restraint all the way around on top of the design. The diameter of the top was increased so that it rests comfortably against the hob gear during operation. I decreased the size of the screw holes for a tighter fit in place. The mounting screws were recessed into their slots to ensure they stay secure. Support was built directly into the spring nub and tweaked the pinch-point before removing its integrated support since it proved unnecessary. High definition cylinders were used throughout my 3D model, and all parts were separated out into individual STLs for a smoother printing experience. Print Settings Brand: SeeMeCNC Printer: Rostock MAX Rafts: No Supports: Yes Resolution: .20mm Infill: 80% Notes: Taulman 910 filament (Heat Extrusion @ 240F; Bed @ 50F) was used. Support was generated with Simplify3D, using hairspray at 30mm/s. V5 Makes Compatibility If you prefer to use v7 but still want the excellent performance of v5, I'm happy to report that the top is compatible and can be easily installed. Post-Printing Installation Instructions You won't need any additional hardware for this upgrade as the existing components from the stock EZ Struder have been utilized throughout. The spring nub's built-in support should be carefully removed using a razor. Depending on print quality, run a 5/64 drill bit down the feed tube to smoothen it out if necessary. Parts - v7 Before moving forward, double-check that your tension bearing is touching the filament inside the feed tube. A quick tweak with a knife may be needed; in some cases, version seven will likely not require as much adjusting. Don't forget to align the hob gear so that it lines up correctly with the tension bearing. On one side you'll notice an additional hole designed for adjustments or for cleaning out waste as it exits during printing. Final Product I'd like to give a special shout-out and nod of appreciation to Dave Singh, whose Rostock Max V2 TPE / Ninjaflex Custom Extruder got my gears spinning on creating one of these myself!
With this file you will be able to print Rostock Extruder Maximus with your 3D printer. Click on the button and save the file on your computer to work, edit or customize your design. You can also find more 3D designs for printers on Rostock Extruder Maximus.
