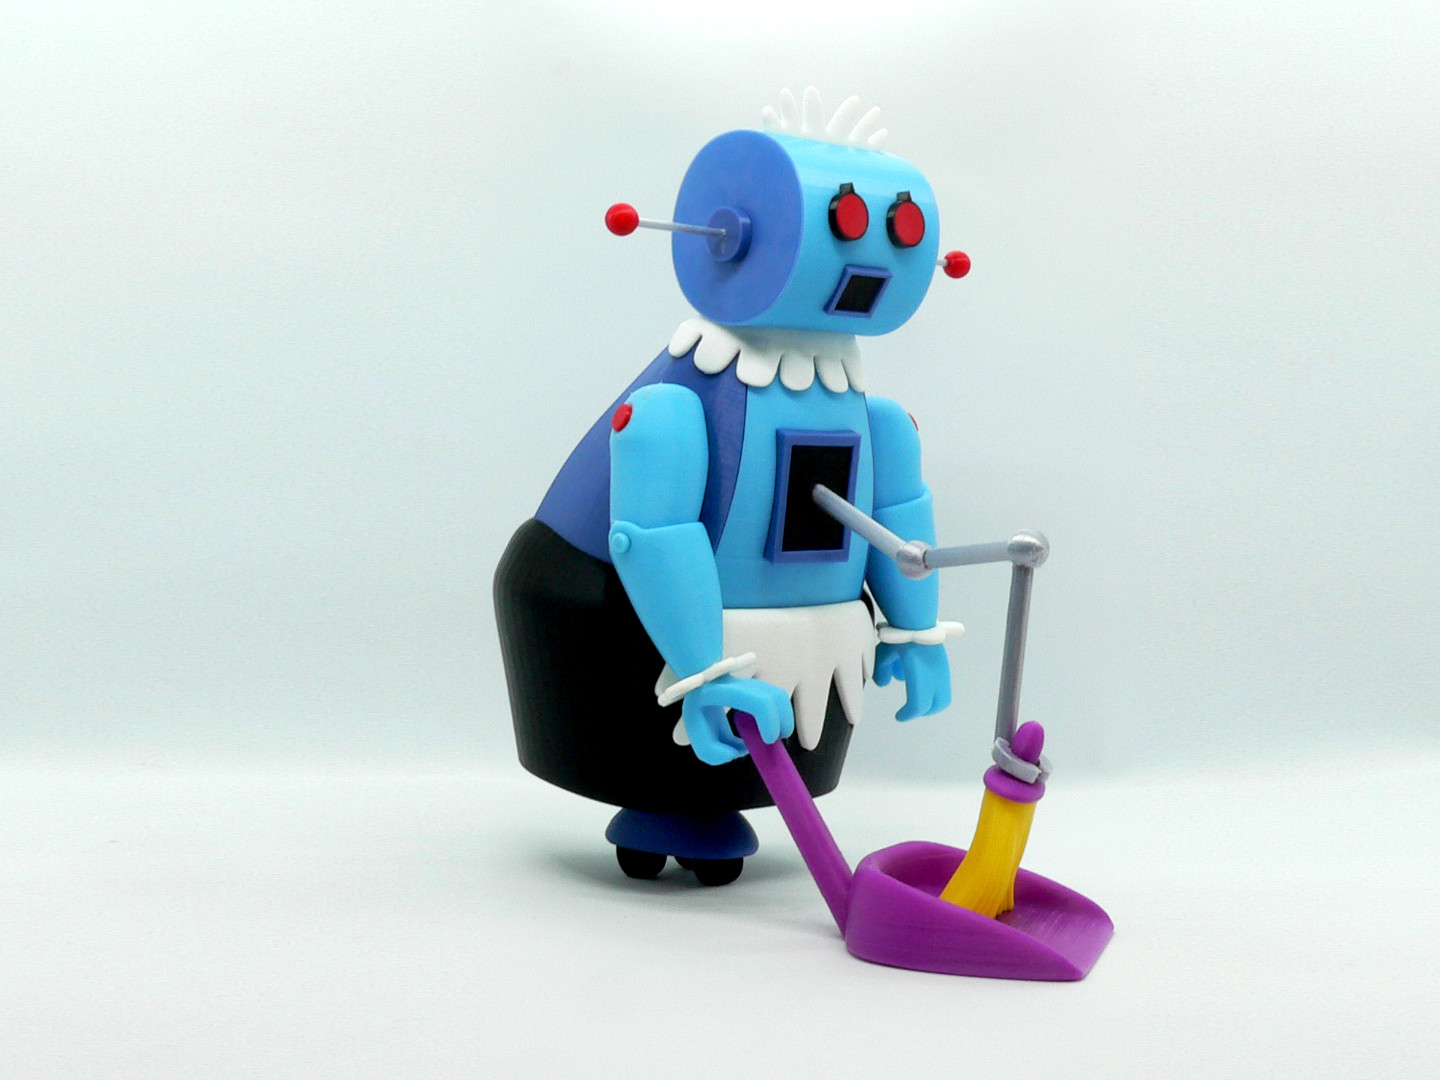
Rosie the Robot
prusaprinters
<p>Rosie the Robot, from the cartoon The Jetsons, by Hanna-Barbera.</p> <p>Rosie is a robot and the maid and housekeeper of the Jetson family. She is a model XB-500, an older model, but the only one U-Rent A Maid had that Jane could afford. There is an unconfirmed rumor exists that her middle name is Uniqua and she shares the surname Jetson.</p> <p>No supports are required. If you have the proper filament colors, no painting is needed.</p> <p>The assembled model is 225mm tall and is in proportion to my other Jetsons models.</p> <p>Enjoy!</p> <p>...........................................................................................................</p> <p><strong>Print Instructions:</strong><br/> Supports: No<br/> Resolution: .2mm<br/> Infill: 10%</p> <p>Notes:**</p> <p>Refer to the notes below for a few helpful printing and assembly instructions.</p> <p>...........................................................................................................</p> <p><strong>Building the model</strong><br/> Colors</p> <p>Black: (Paramount3D PLA - Black)<br/> eye_blacks (contains two pieces)<br/> wheels (contains three pieces)<br/> body_bottom<br/> mouth_black<br/> body_hole_black<br/> ..</p> <p>Yellow: (Paramount3D PLA - Simpson Yellow)<br/> broom_bottom<br/> ..</p> <p>Blue: (Paramount3D PLA - Cadet Blue)<br/> head_sides (contains two pieces)<br/> ears (contains two pieces)<br/> body_sides (contains two pieces)<br/> body_hole_blue<br/> mouth_blue<br/> wheel_base<br/> ..</p> <p>White: (Paramount3D PLA - White)<br/> hat<br/> apron<br/> apron_bow<br/> cuff_left<br/> cuff_right<br/> collar<br/> ..</p> <p>Red: (Hatchbox PLA - True Red)<br/> eye_reds (contains two pieces)<br/> ear_balls (contains two pieces)<br/> arm_bolt_reds (contains two pieces)</p> <p>Purple: (Gizmo Dorks ABS - Purple)<br/> dustpan<br/> broom_top<br/> ..</p> <p>Light Blue: (Solutech ABS - Aqua Blue)<br/> head<br/> body_middle<br/> arm_lower_left<br/> arm_lower_right<br/> arm_upper_left<br/> arm_upper_right<br/> arm_bolt_blues (contains two pieces)<br/> hand_left<br/> hand_right<br/> ..</p> <p>Silver: (Polyalchemy Elixer - Silver)<br/> pipe_a<br/> pipe_b<br/> pipe_c<br/> pipe_d<br/> pipe_e<br/> ear_poles (contains two pieces)</p> <p>Any color: (hidden piece)<br/> cuff_pins: (contains two pieces)</p> <p>...........................................................................................................</p> <p><strong>Printing and assembly tips</strong></p> <p>Printing tips<br/> 1-No supports are required.</p> <p>2-There are some pieces that may need brims, use your discretion.<br/> I used brims on the eye_blacks, ear_balls, pipe_b, pipe_d, arm_lower_left and arm_lower_right.</p> <p>3-Many left/right parts are exactly the same. STL files that end in 's' all have two pieces in them (as noted in the colors section) which fit either on the left or right side.</p> <p>..<br/> Assembly tips:</p> <p>1-Take your time gluing the model together and enjoy the process. There are many pieces to this model, however none of the pieces are extra small and all the parts are easy to handle and fit in place.</p> <p>2-I used E6000 sticky craft glue to put this model together. The sticky glue allows more time to position the parts than a fast drying superglue. I have 'fat fingers' and a shaky hand, so the sticky glue works out best for me.</p> <p>3-If you have any confusion about the position of the pipe pieces, all those parts have the print bed side facing down or away from the front. Try and keep the completed pipe fairly straight once glued. However, there is plenty of leeway to attach it later if it is not straight.</p> <p>4-Personally, I glued the model together in sections and then glued the sections together. I wound up with three main parts for the final assembly. The pipes, the dustpan/broom and the completed Rosie. The final assembly is to join those three sections together.</p> <p>5-Refer to the assembly diagram in the pictures section as well as the uploaded pictures for putting the model together. The model is meant to be glued.</p> <p>Do not hesitate to ask questions, feedback is essential to making better models.</p>
With this file you will be able to print Rosie the Robot with your 3D printer. Click on the button and save the file on your computer to work, edit or customize your design. You can also find more 3D designs for printers on Rosie the Robot.
