Room intake/exhaust system (MODULAR)
prusaprinters
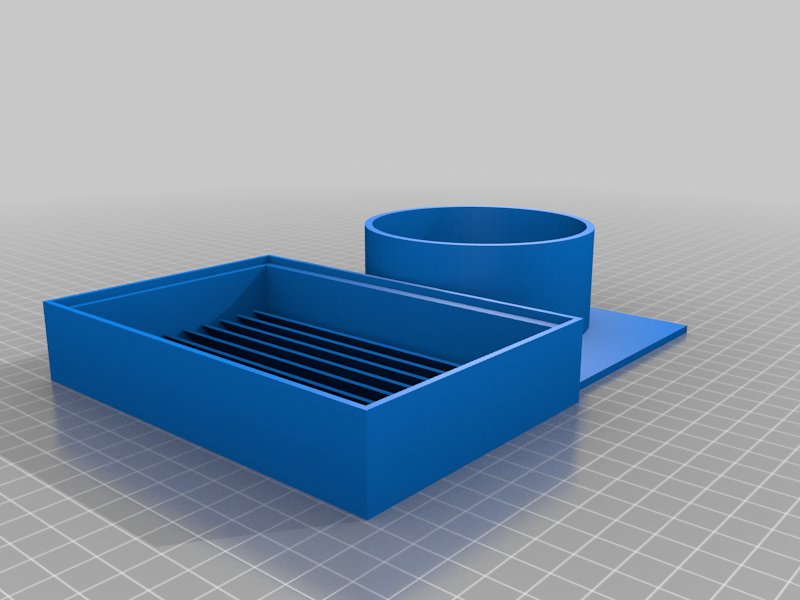
<p>READ THE WHAT TO PRINT SECTION AT THE BOTTOM</p> <p>READ ALL OF THIS SUMMARY</p> <p>This machine is designed to rapidly intake or expel air from a room. It is designed for use with 150mm fans, particularly the SanyoDenki San Ace 150. The tube parts are designed to fit a 4-inch tube.</p> <p>Use a combination of the parts provided. Intake / exhaust mode can be determined by the direction the fan is inserted. Drill a hole in one corner of the fan enclosure, to allow the fan wire to come out.</p> <p>In addition to the main machine, it also has parts for using a tube and/or mounting it in a window.</p> <h3>Print Settings</h3> <p><strong>Printer Brand:</strong></p> <p>Creality</p> <p class="detail-setting printer"><strong>Printer: </strong> <div><p>Ender 3</p></div> <p><strong>Rafts:</strong></p> <p>No</p> <p class="detail-setting supports"><strong>Supports: </strong> <div><p>Yes</p></div> <p><strong>Resolution:</strong></p> <p>0.2</p> <p class="detail-setting infill"><strong>Infill: </strong> <div><p>25%</p></div> <p><strong>Filament:</strong> Overture PLA / ABS / PETG Black Post-Printing =============</p> <p><strong>How to assemble</strong></p> <div><p>Drill a hole into the Fan Enclosure</p> Insert the fan into the Fan Enclosure, putting the wire through the hole you just drilled <p>Add Couplers on either side</p> <p>Add Fan Vents or Tube Adapters as needed</p> <p>Hold it together with sticky glue or hot glue</p> <p>Seal it with duct tape, make sure to cover the wire hole!</p> <h3>What to print</h3> <p><strong>For indoor use</strong></p> <p>Fan Enclosure</p> <p>Coupler</p> <p>Coupler</p> <p>Blower End (Fan Vent or Tube Adapter)</p> <p>Blower End (Fan Vent or Tube Adapter)</p> <p>Tube End (Radial - RadialSquare - BoxRadial - BoxVent - None, if not using tube)</p> <p><strong>For window use</strong></p> <p>Fan Enclosure</p> <p>Coupler</p> <p>Coupler</p> <p>Blower End (Fan Vent or Tube Adapter)</p> <p>Blower End (Fan Vent or Tube Adapter)</p> <p>Window Mount Part 1</p> <p>Window Mount Part 2 (As many as needed to fit your window)</p> <p><strong>Example configurations</strong></p> <p>Circulation - 1x Fan Enclosure, 2x Coupler, 2x Fan Vent</p> <p>Circulation with tubes - 1x Fan Enclosure, 2x Coupler, 2x Tube Adapter</p> <p>Exhaust / intake - 1x Fan Enclosure, 2x Coupler, 1x Fan Vent, 1x Tube Adapter</p> <h3>Parts</h3> <p><strong>Included Parts</strong></p> <p>Fan Enclosure - The part containing the fan.</p> <p>Coupler - Connects the 150 mm Fan Vent and Tube Adapter pieces to the larger Fan Enclosure.</p> <p>Tube Adapter - Used to connect the main machine to a 4 inch duct tube.</p> <p>Fan Vent - Used as a direct intake / outlet vent.</p> <p>Tube End Radial - Keep debris out of your tube with this low-profile grate.</p> <p>Tube End RadialSquare - Same as above, but with a square rim to make mounting easier.</p> <p>Tube End BoxRadial - A rectangular box that can be used as a decorative finish for your tube.</p> <p>Tube End BoxVent - A rectangular box with angled slats that can be used to direct the airflow out of your tube.</p> <p>Window Mount Part 1 - Contains a tube connector and a flat piece.</p> <p>Window Mount Part 2 - Contains two flat pieces.</p> <p>Window Mount Tube Connector - Connects your tube into a window.</p> <p>Window Mount Flat Piece - Blocks the rest of your window so air can't get back in.</p> <p><strong>Planned parts</strong></p> <p><strong>Tube setup</strong></p> <p>Tube Connector - Connects two flexible tubes together</p> <p>2WC90 - 2 Way Corner part, connect two tubes at a 90 degree angle</p> <p>2WC60 - 2 Way Corner part, connect two tubes at a 60 degree angle</p> <p>2WC45 - 2 Way Corner part, connect two tubes at a 45 degree angle</p> <p>2WC30 - 2 Way Corner part, connect two tubes at a 30 degree angle</p> <p>3WT - 3 Way Tee part, connect two tubes to one perpendicular</p> <p>3WI - 3 Way Intersection part, connect three tubes intersecting</p> <p>3WY - 3 Way Splitter part, split airflow from one tube into two</p> <p>3WC - 3 Way Corner part, connect three tubes to one at an angle</p> <p>4WI - 4 Way Intersection part, connect four tubes intersecting</p> <p>4WT - 4 Way Tee part, connect two tubes to two perpendicular.</p> <p>4WY - 4 Way Splitter part, split airflow form one tube into three</p> <p>5WI - 5 Way Intersection part, connect five tubes intersecting</p> <p>5WP - 5 Way Perpendicular part, connect four tubes with one perpendicular</p> <p>6WI - 6 Way Intersection part, connect six tubes intersecting</p> <p>6WP - 6 Way Perpendicular part, connect four tubes with two perpendicular</p> <p><strong>Dampers</strong></p> <p>Tube damper - Control the airflow through a tube</p> <p>Fan damper - Control the airflow from the fan</p> <p><strong>Grilles</strong></p> <p>Basic Single - Single direction vent, direct airflow in one direction</p> <p>Basic Double - Double direction vent, direct airflow in two directions</p> <p>Basic Quad - Quad direction vent, direct airflow in four directions at once</p> <p>Adjustable - Adjustable vent</p> <p>One-way - A one-way vent that opens when air is flowing one way but closes the other way</p> <h3>Ideas</h3> <p><strong>Some assembly and setup ideas...</strong></p> <p>Use multiple hoses together for a longer reach</p> <p>Chain modules together for more power</p> <p>Place it in a window</p> <p>Use it to pull cold air from the basement</p> <p>Use it as a soldering / painting / anything fume extractor</p> <p>Use it as an air conditioner</p> <p>Use branch pieces (coming soon) to branch out in multiple directions at once</p> <p>Use tube ends to create a vent system</p> <p>Build a crude vacuum</p> <p>Use it as a leaf blower / sucker</p> <p>And lots more</p> </div></p></p></p> Category: Household
With this file you will be able to print Room intake/exhaust system (MODULAR) with your 3D printer. Click on the button and save the file on your computer to work, edit or customize your design. You can also find more 3D designs for printers on Room intake/exhaust system (MODULAR).
