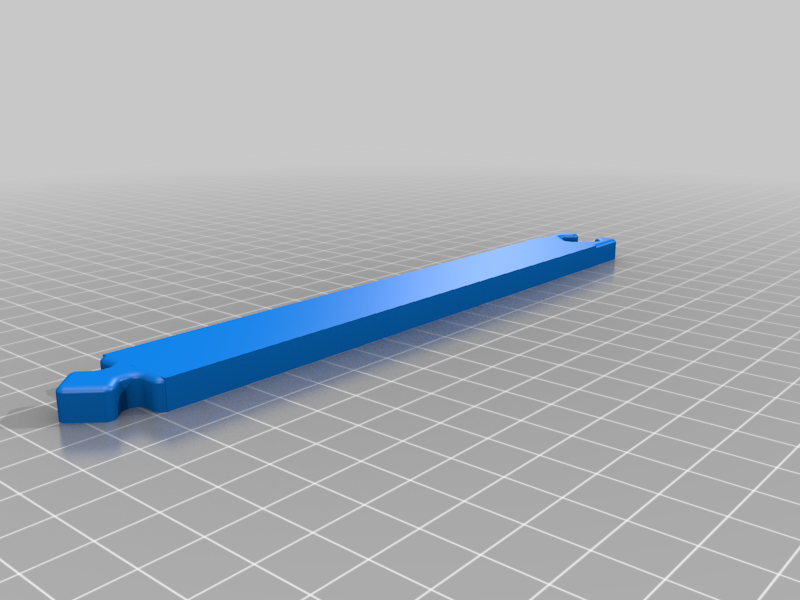
Rolling pin spacer, 1/4" high
prusaprinters
<h3>NOTE: THIS IS A REMIX.</h3><h3>This is a remix of a model on Thingiverse, but the remix attribute didn't allow a non-PrusaPrinters object link. The object remixed is the <a href="https://www.thingiverse.com/thing:2996626">Lucky Extrusion Gauge</a> by <a href="https://www.thingiverse.com/kwaad2/designs">Kwaad2</a> over on Thingiverse.</h3><p> </p><p>While getting ready to make some cookies, I thought about my poor skills rolling dough to a precise height. I know about the guides that you can buy to put on either side of one's rolling mat to hold up both ends of the rolling pin to ensure a specific height. But why buy when I have a 3D printer in my basement? The only thing is, I wanted a length that is easy to store but can be connected together to make arbitrary different lengths. I don't have much experience modelling good interference fits that don't fall apart but are still easy to take apart. I already print a pair of the <a href="https://www.thingiverse.com/thing:2996626">Lucky Extrusion Gauge</a>s with each filament when I tune my profiles so I know it works.</p><p>If you want a different height, simply scale or resize this model along the Z axis and print.</p><p>I'd advise printing out a couple of the lucky extrusion gauge models with any new filament to make sure you have a good fit. If not, re-tune your settings until you get the gauges to fit together tightly and are able to be separated. Then use those settings on this model.</p><h3> </h3><h3>Print Settings</h3><p><strong>Printer Brand: </strong>Prusa</p><p><strong>Printer: </strong>I3 MK3S</p><p><strong>Rafts: </strong>No</p><p><strong>Supports: </strong>No</p><p><strong>Resolution: </strong>Variable Layer Height</p><p><strong>Infill: </strong>20</p><p><strong>Filament:</strong> Prusament PETG: Prusa Orange</p><p><strong>Notes: </strong>Any filament type should work. I chose PETG so I could hand-wash these between uses with hot water, and this specific PETG happened to be in my printer at the time. These should be fairly safe to use as long as you cook what ever you are rolling out. If there is any biologic contamination breeding in the cracks and crevices of the print, it should be killed by cooking as long as you cook soon after rolling.</p><h3> </h3><h3>How I Designed This</h3><p>Using PrusaSlicer I modified the Lucky Extrusion Gauge to something longer with this process:</p><ul><li>Scale the extrusion gauge to 1/4" (6.35mm) in Z.</li><li>Set the open end to be down on the bed.</li><li>Cut the model using the cut tool preserving both parts.</li><li>Rotate the two resulting objects back to normal printing orientation with the puzzle parts pointing along the X axis.</li><li>Combine the two new objects to parts of a single object.</li><li>Add a primitive cube part to the object.</li><li>Resize the primitive cube to 6.35mm in Z, and 20mm in Y (leave X alone for now).</li><li>Align all 3 parts along the X axis (change each part's Y position to 0 and then move the result back to the middle of the print bed).</li><li>Move the original two parts apart along the X axis to roughly a good distance between then.</li><li>Scale the primitive along the X axis to it touches or barely overlaps the original two pieces, bridging them together.</li><li>Save the object out from PrusaSlicer as a stl.</li><li>Load in the stl, and then I needed to run it through the NetFabb fixer.</li></ul><p>Save the fixed object as a stl again. If you look closely at this object, you should see that in my added part there isn't a radius along the top edge. But for my quick and dirty remix, I didn't think that was necessary.</p><p>I hope the above steps help other people doing a quick and dirty remix for their own purposes.</p><p> </p><p>Category: Kitchen & Dining</p>
With this file you will be able to print Rolling pin spacer, 1/4" high with your 3D printer. Click on the button and save the file on your computer to work, edit or customize your design. You can also find more 3D designs for printers on Rolling pin spacer, 1/4" high.
