Roll Cage for the Ossum Jeep/My Remix
myminifactory
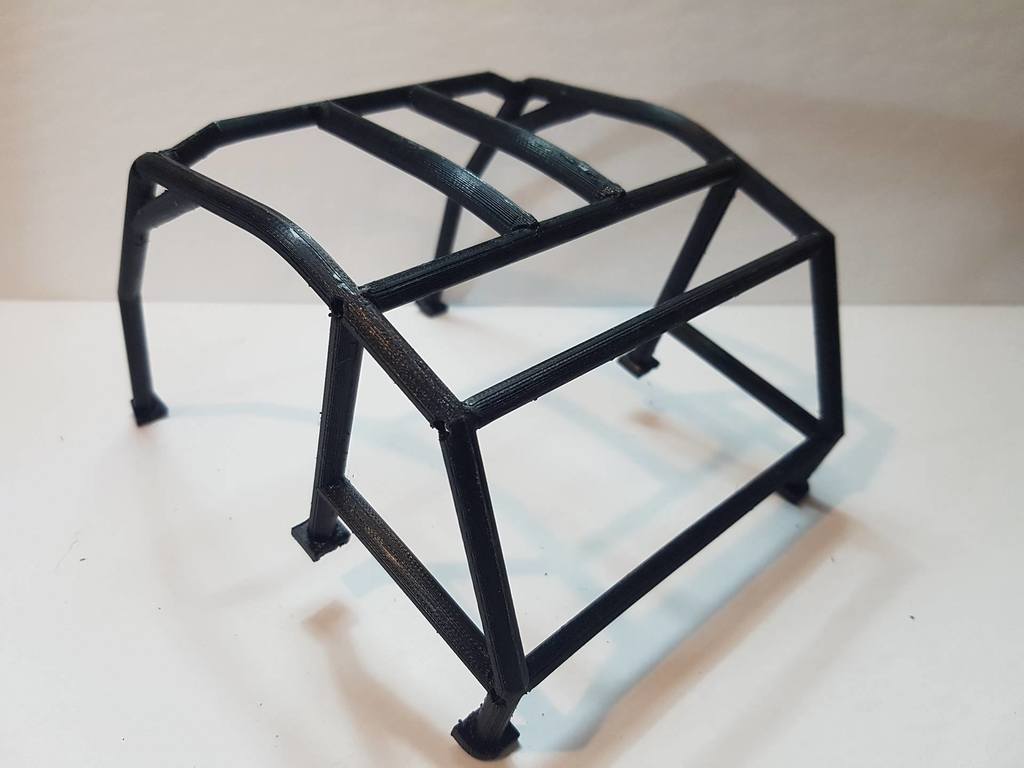
This is a roll cage for my remix of the Ossum Jeep but it will fit the original as well since they are both dimensionally identical. The cage is designed to use M2X3mm brass inserts, the kind that you heat up and melt into the plastic. There is an Amazon link below. The only way to achieve a strong cage is by using these inserts because the sections of the cage are printed in halves that glue together, and a self-tapping screw would force the seam apart. An insert prevents this from happening. You can choose to screw the cage together or screw and glue it using CA glue (strongest option). Each half-section contains small intrusions that need to be drilled for alignment purposes. Follow the instructions below to complete this process. Materials and tools needed: -M2X3mm brass inserts (X14) https://www.amazon.com/a16041800ux0765-Cylinder-Knurled-Threaded-Embedded/dp/B01IZ15A5U/ref=sr_1_1?ie=UTF8&qid=1502015718&sr=8-1&keywords=m2+brass+insert -M2X4mm or M2X6mm Machine Screws (Mine were a 1.30mm hex socket head) (X14) -M2X16 Machine screw -Some scrap 1.75mm filament -A torch lighter -Needle nose pliers -7/64 (2.8mm) Drill bit -5/64 (2mm) Drill bit -CA Glue -200-400 grit sandpaper Instructions: 1) Print off all the files as they are and trim off the brims...Make everything look pretty! 2) There are three small intrusions on the flat sides near the bottom feet of the main cage components and along the cross bars. Drill about 2mm into these with the 5/64 drill bit, but don't go through. 3) Sand the flat parts of all the components to roughen them up for gluing. Get a nice cross-hatch on the smooth pieces of plastic to get a good bond. (Important Note: If you have too much filament sticking out then the halves will not butt up against each other completely and won't glue properly) 4) Use CA Glue and pliers to glue in a 5-10mm piece of filament into each hole, being careful to keep it perpendicular to the piece. After the glue dries, cut each piece of filament so there is roughly 1.5mm sticking out. (Important Note: There are two different pieces to each section of the cage and that is why they are named left cage 1 and 2, and right cage 1 and 2) 5) Use the drill guides to drill holes in the proper locations on the Jeep body. The front drill guide will not work on the original Ossum Jeep as it is designed to fit between the tub and the new (smaller) transmission tunnel. 6) If you are putting this on the original Ossum Jeep, put a dab of paint where the insert is located on the front legs of the cage. Insert the cage into the Jeep but don't let the front legs make contact with the floor. Insert the two most rear screws and allow the cage to pivot forward so the legs make contact with the floor and leave a trace of paint where the hole should be. 7) Remove the cage and drill the hole. Note: The above instructions are identical to the original text, with some minor changes in sentence structure for better clarity.
With this file you will be able to print Roll Cage for the Ossum Jeep/My Remix with your 3D printer. Click on the button and save the file on your computer to work, edit or customize your design. You can also find more 3D designs for printers on Roll Cage for the Ossum Jeep/My Remix.