Roland MDX-15 dust collection system
thingiverse
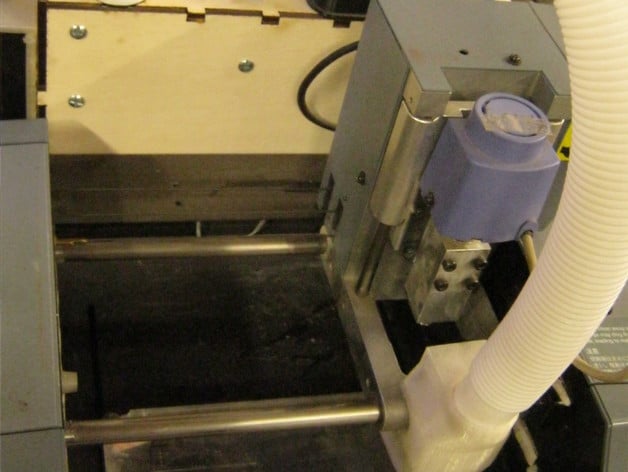
Remove cuttings from the work surface and gather them at the rear. This movement dislodges the cuttings using air blown from both front and back ends, while dust is redirected downward due to a slight incline in the dust case. A basic filter is necessary for the blower to function. Some parts are also available on the Roland MDX-20 dust collection system. There is an additional bonus component: a power supply bracket designed to organize the wiring efficiently. Instructions: Obtain: 1) blower from SparkFun, https://www.sparkfun.com/products/11270 2) birch plywood material 3) 1.125" hose available at The Home Depot http://www.homedepot.com/p/Watts-1-1-8-in-I-D-x-6-ft-PVC-Bilge-and-Pump-Hose-HSBBO6/204407907 4) 12-Volt power supply unit Use 3D printing to manufacture hose adaptors. Utilize laser cutting technology for the box and cover. First, assemble the box and apply adhesive while taking care not to affix the cover; its mounting system is based on friction fit. Slightly countersink the screw holes destined for the blower's mounting point. Next, install the blower within the assembled box using three #8-32 x 1.5-inch long or longer flat head machine screws along with their corresponding nuts or a button-head with wood inserts. Employ the "rolandfanback.dxf" model to mount an optional filter onto this device. Lastly, fix the dust collection assembly's upper body in its intended location using two back-plate attached fasteners. Conduct all necessary electrical connections from blower unit towards the twelve-Volt power source.
With this file you will be able to print Roland MDX-15 dust collection system with your 3D printer. Click on the button and save the file on your computer to work, edit or customize your design. You can also find more 3D designs for printers on Roland MDX-15 dust collection system.