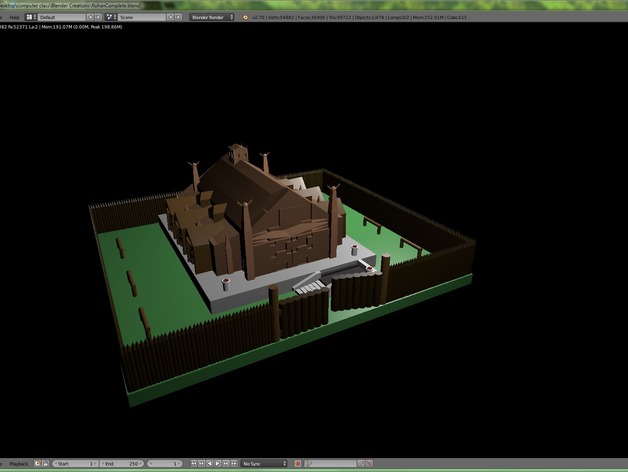
Rohan
thingiverse
Hi everyone! Meet Rohan, my custom creation brought to life from images alone. Being an ardent enthusiast of Middle Earth's magical realm - the work of Peter Jackson still blows my mind! I hope you'll appreciate the care and attention that went into crafting this digital realm within Blender. Below are the step-by-step instructions I used to bring Rohan into being, along with some helpful hints to consider for your own projects. Step One: Start by firing up Blender. Yes, you read that right – patience is essential when working in a powerful yet intricate 3D software such as Blender. Get comfortable – it's worth the time spent figuring things out. Once inside, use a base shape to work off of. This doesn't need to be overly complicated - an everyday shape works wonders here! In my case, I employed something much like that from my imagination so all that remained was deciding how it should evolve once more. Step Two: Refine and add depth - there's really no substitute for hours spent mastering your chosen skills until those little touches feel instinctive enough to achieve anything within the world. And believe me when saying mastering the details can make or break the outcome of whatever endeavour you may find yourself immersed within. Here’s my approach broken down step by step: Begin adding geometry as required - add curves wherever they help bring out lines, and remember sometimes fewer details do in fact lend character just fine, whereas excessive will inevitably fall short (this being especially true considering today’s viewers with varying tolerance levels). After this comes time for colours - select an atmospheric palette one you know works – personally I enjoy warm sunsets mixed within misted dawn. With hues such as gold over cool, blues plus whites blend rather than just blue for atmosphere purposes (it truly makes world stand alive). Adding materials will add some level of visual flair since lighting often goes without saying though do notice subtle touches matter most where people aren’t really sure how important certain details may become unless clearly defined themselves so go forth but carefully consider that first then take action towards crafting an end piece unlike what any normal software has been capable thus far before - or just use some inspiration yourself if inspired by nature like say landscapes – though there shouldn't really be comparison anyway. Next task would certainly revolve round making animation more interesting which I did. Add motion graphics so these aren’t only about the static images displayed during scenes - animations do catch audience’s attention immediately hence including all parts such that every second does contain visually appealing transitions or visuals themselves adds a certain dimension which simply stands unique without overloading on quantity as there always lies space where some viewers appreciate fewer options but they work for viewer differently nonetheless; each case presents value beyond typical. Last steps involve exporting this beauty out. You have many choices here, with output dependent upon final goals you've set prior working. Choose what works best depending whether aiming high end video productions targeting audiences hungry seeking something fresh versus quick projects designed mainly serving low res viewing scenarios online through various platforms (consider bandwidth issues if so) then all else being equal save files where required according nature – just think creatively! Hope that helps and good luck with any projects ahead!
With this file you will be able to print Rohan with your 3D printer. Click on the button and save the file on your computer to work, edit or customize your design. You can also find more 3D designs for printers on Rohan.
