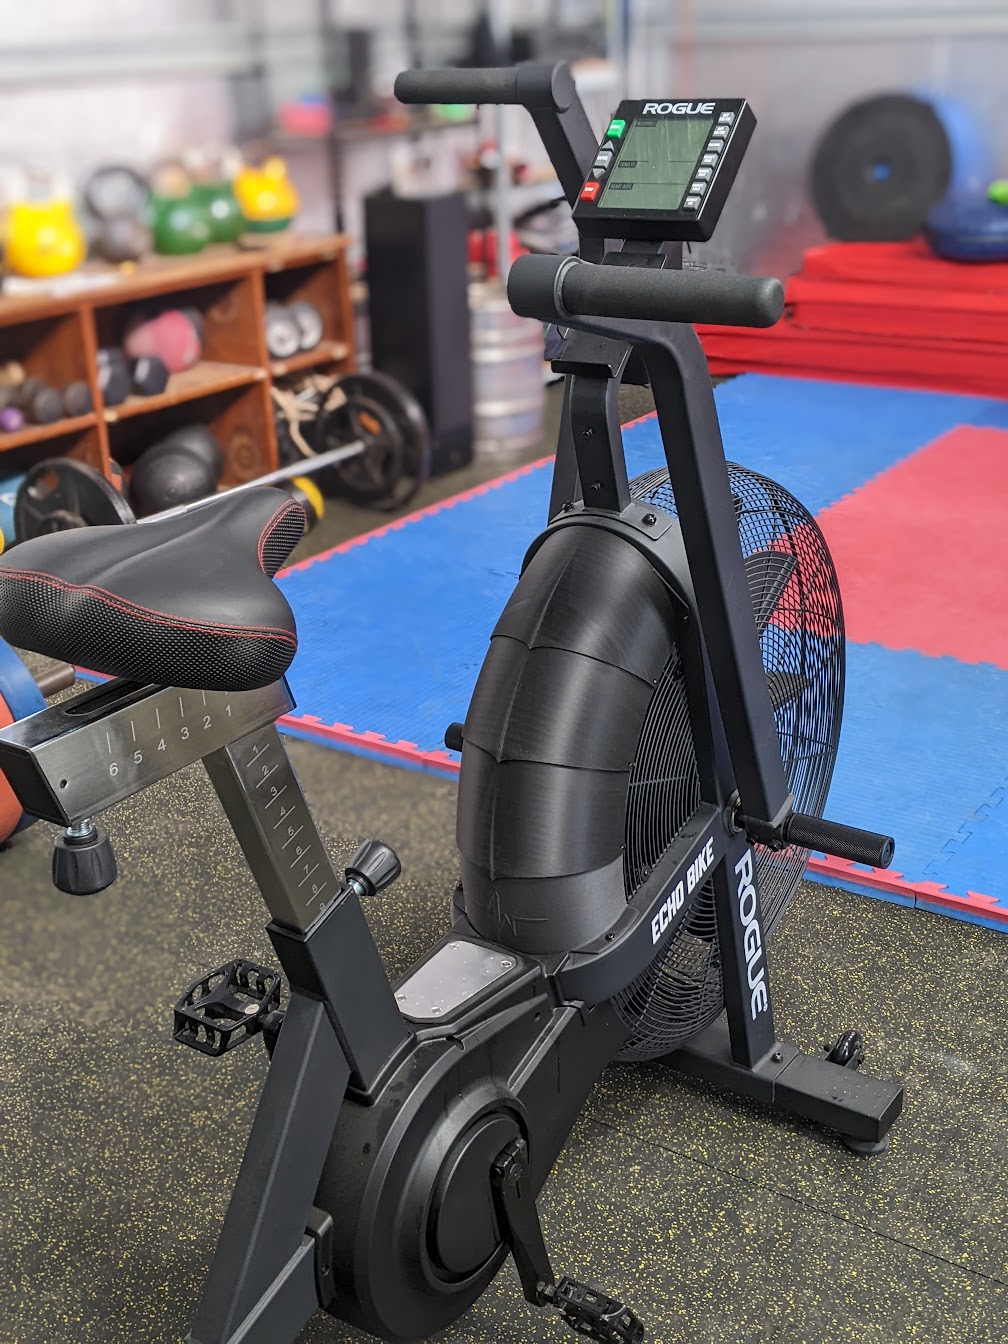
Rogue Echo Bike - Wind Guard
prusaprinters
<p>Ah, there's nothing like feeling the wind in your face as you fly along, ticking away the kilometers. The wind is a lie. I pedalled for a disgustingly long time, only to find that I ended up <i>exactly</i> where I started, abiet sweaty and tired. Recalibrate your experience back to reality with this wind guard.</p><p>Actually, in the freezing shed in winter "warming up" for training seems like a fail when you reliably drop in temperature for the first five minutes (at least, according to my wife).</p><p>The design is for the <a href="https://www.rogueaustralia.com.au/rogue-echo-bike-au">Rogue Echo Bike</a>, and is segmented so that it can fit on a <a href="https://www.amazon.com/3D-Printer-Prusa/s?k=3D+Printer+Prusa&linkCode=ll2&tag=thingiverse09-20&linkId=28c787aef7c5a20cf2004b821dd161bf&language=en_US&ref_=as_li_ss_tl">Prusa</a> <a href="https://www.amazon.com/3D-Printer-Prusa/s?k=3D+Printer+Prusa&linkCode=ll2&tag=thingiverse09-20&linkId=28c787aef7c5a20cf2004b821dd161bf&language=en_US&ref_=as_li_ss_tl">i3 MK3</a> comfortably in four print sessions. It can be printed without supports.</p><p>The design features a nod to armour plating, you are, after all, riding into battle on this steed. The lapped segments also helps keep bodily fluids (e.g. tears) out of the fan and other workings.</p><p>Assembly is straightforward and could ideally be carried out by an aging, sleep deprived orangutan, or even the average crossfitter.</p><h5>Additional Materials</h5><ul><li>6x Cable Ties (2.5mm ideally)</li></ul><h3>Printing</h3><ul><li>When printing no supports should be required if the parts are placed on their flat surfaces. Tabs should be placed directly on the build plate when appropriate.</li><li>The use of a brim can be helpful for the two middle sections to ensure plate adhesion.</li></ul><h3>Assembly</h3><p>If you actually need to read this, I shake my head at you. More fool me for writing it, I guess.</p><p>It's pretty obvious, but the pieces should be assembled in order from the topmost (<code>1.</code>) to to the bottommost (<code>4.</code>), as per my unnecessary rendering below.</p><figure class="image image_resized" style="width:50%;"><img src="https://media.printables.com/media/prints/249051/rich_content/36b54c92-03f5-4983-8186-4c2df008d66c/echobike_windguard_v21_colour.png#%7B%22uuid%22%3A%224e495be4-c6de-4377-970b-deb046891287%22%2C%22w%22%3A1000%2C%22h%22%3A1000%7D"></figure><ul><li>Align the top section (<code>1.</code>) so that it covers the next section (<code>2.</code>).</li><li>Add a cable tie through the aligned slot on each side (orient to hide the mechanism part)</li></ul><figure class="image image_resized" style="width:50%;"><img src="https://media.printables.com/media/prints/249051/rich_content/cf64d5a6-9b42-41ad-9912-0341b44787dd/pxl_20220726_234956226.jpg#%7B%22uuid%22%3A%220ad3fdf3-e076-4d24-b72c-2bd1ce2660f4%22%2C%22w%22%3A1460%2C%22h%22%3A1946%7D"></figure><ul><li>Repeat until all four sections are connected in order with the cable ties, as per the images below.</li></ul><figure class="image image-style-align-center image_resized" style="width:50%;"><img src="https://media.printables.com/media/prints/249051/rich_content/c03fc63f-dce7-422c-9c7c-93ce32242f44/pxl_20220726_235241786.jpg#%7B%22uuid%22%3A%22b9fab033-c087-4b3d-a11f-245af14e56ab%22%2C%22w%22%3A2595%2C%22h%22%3A1946%7D"></figure><figure class="image image_resized image-style-align-center" style="width:50%;"><img src="https://media.printables.com/media/prints/249051/rich_content/619dbc4f-c8cf-4d49-8ebd-260d08cd70cf/pxl_20220726_235324096.jpg#%7B%22uuid%22%3A%225825874c-880f-4c5c-a5b4-ce87213a0bc0%22%2C%22w%22%3A1460%2C%22h%22%3A1946%7D"></figure><ul><li>Fix it to the Echo Bike using the bike's screws and mounting holes, through the tabs on the top (<code>1.</code>) and bottom (<code>4.</code>) sections.</li></ul><figure class="image image_resized" style="width:50%;"><img src="https://media.printables.com/media/prints/249051/rich_content/c8744c44-ffad-4cf0-8c57-133e1298b92c/pxl_20220726_235453280.jpg#%7B%22uuid%22%3A%225d8be686-c51a-4ce1-8f9f-1523f10b3ee4%22%2C%22w%22%3A1460%2C%22h%22%3A1946%7D"></figure><figure class="image image_resized" style="width:50%;"><img src="https://media.printables.com/media/prints/249051/rich_content/fa457ddc-3996-46f6-be6d-50089f6b4ea1/pxl_20220726_235534050.jpg#%7B%22uuid%22%3A%22dcee735a-a0c9-4318-8893-a4e1fa9b9d65%22%2C%22w%22%3A1460%2C%22h%22%3A1946%7D"></figure><ul><li>Tighten the cable ties and trim the excess.</li></ul><figure class="image image_resized" style="width:50%;"><img src="https://media.printables.com/media/prints/249051/rich_content/0e2fa693-3261-402a-990f-fa14211a9994/pxl_20220727_000124227.jpg#%7B%22uuid%22%3A%22a6d16555-8790-4fdc-8295-07d19ec8ec9d%22%2C%22w%22%3A1460%2C%22h%22%3A1946%7D"></figure><p> </p><h3>Behold your creation! </h3><p>Now ride like the wind, but not in it.</p><figure class="image image_resized" style="width:50%;"><img src="https://media.printables.com/media/prints/249051/rich_content/d9089379-7f17-4a37-b267-4c77a954ffec/pxl_20220727_000345561portrait.jpg#%7B%22uuid%22%3A%2239d366d6-8167-4649-95c2-a8ed02916167%22%2C%22w%22%3A1460%2C%22h%22%3A1946%7D"></figure><p> </p><h3>Future upgrades</h3><h5>Project Armstrong</h5><p>Let's just say, I may or may not be working on a 15 subpart medieval lance accessory print for this project, complete with a firmware update for the Echo Bike that adds a new jousting feature in competition mode!</p><p><i>Hint: I'm not.</i></p>
With this file you will be able to print Rogue Echo Bike - Wind Guard with your 3D printer. Click on the button and save the file on your computer to work, edit or customize your design. You can also find more 3D designs for printers on Rogue Echo Bike - Wind Guard.
