Rocket Clock
prusaprinters
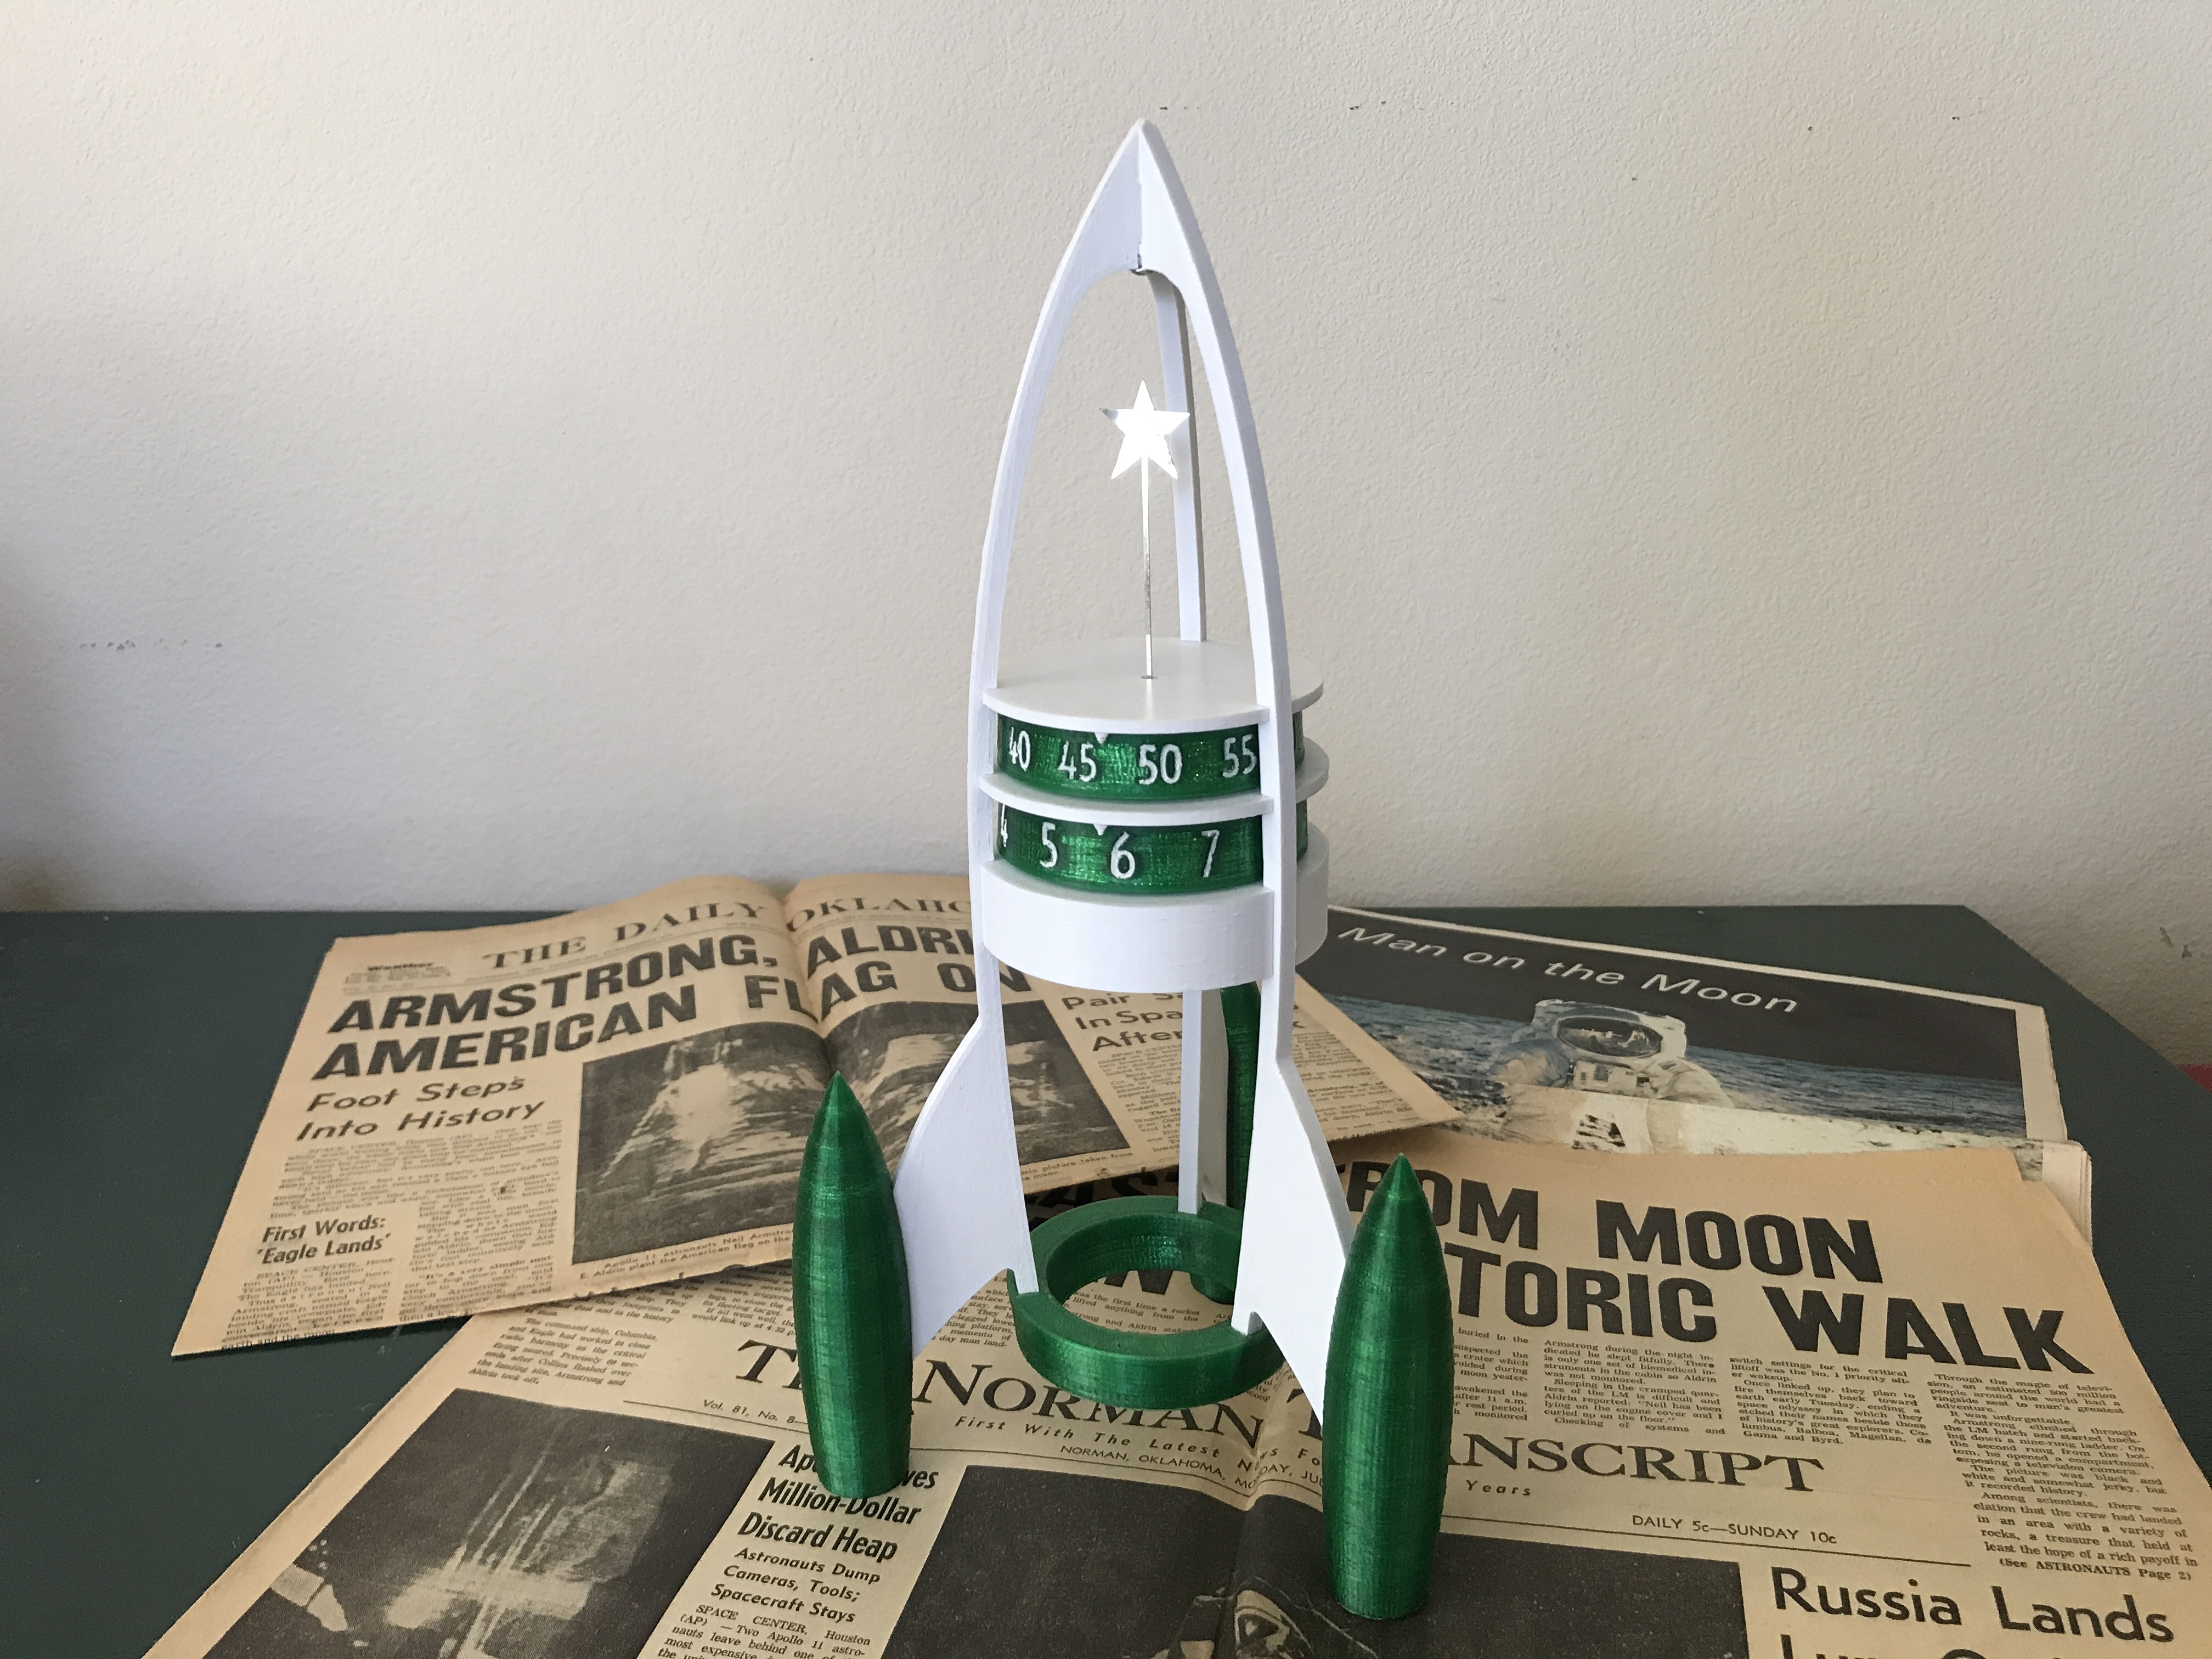
<p>This rocket clock shows the time on its spinning horizontal cylinders, and provides room at the top to install a small figure of your choice, which rotates once per minute. It is inspired by the <a href="https://www.mbandf.com/en/machines/co-creations/destination-moon">MB&F Destination Moon</a>. The typeface on the cylinders is the excellent <a href="https://fonts.google.com/specimen/Voltaire">Voltaire</a> by Yvonne Schüttler.</p><p>The base ring and the hour and minute cylinders must be printed upside down with supports and random seam location. The rest of the parts can be printed without supports (I think you can get away with it on the engines).</p><h5>Parts required</h5><ul><li>7× #2 × 3/8" screws (or similar)</li><li>Quartz clock movement with ~13mm shaft (~6mm threaded section, ~5mm hour shaft diameter), with second hand (optional, for installing a figure)</li></ul><h5>Build instructions</h5><ol><li>Print all parts. Pay careful attention to the small fixtures at the “tip” of the rocket sides. You may also need to tweak the holes in the hour and minute cylinders where they attach to the movement, in case your movement varies.</li><li>Fill in the numbers on the hour and minute cylinders, using something like a white enamel paint pen.</li><li>Install the movement into the movement housing.</li><li>Install the hour cylinder, and set the hour cap (with the larger hole) on top of it, with the indicator pointing down.</li><li>Install the minute cylinder.</li><li>If installing a figure, bend the second hand as shown, and attach it to the movement through the pipe in the middle of the minute cylinder (a long flat head screwdriver is useful for this). Ensure it does not rub on the side of the pipe.</li><li>Set the minute cap on top of the minute cylinder, with the indicator pointing down, and the second hand (if applicable) threaded through the small hole.</li><li>Attach an engine to the bottom of each of the three “sides” with a screw.</li><li>Attach the “sides” together at their tips with a screw.</li><li>Lift the movement and cylinder assembly into the rocket from below, and carefully guide the pieces into place until all notches align, as shown. Ensure that the indicators on the hour and minute caps line up with each other.</li><li>Attach the base ring to the “sides” with three screws.</li><li>If applicable, attach your figure to the tip of the second hand.</li></ol>
With this file you will be able to print Rocket Clock with your 3D printer. Click on the button and save the file on your computer to work, edit or customize your design. You can also find more 3D designs for printers on Rocket Clock.