Robotic drawing arm
thingiverse
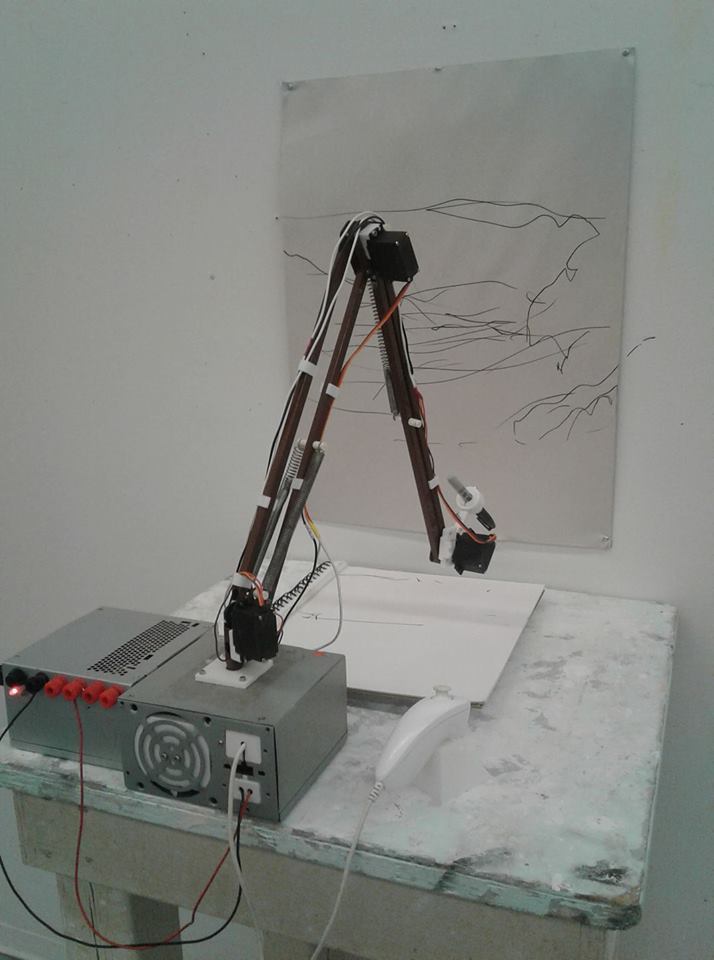
I decide to build an robotic arm as part of my school project. It can draw with precision using control from 4 servo motors and a Wii Nunchuk. More specifications will be uploaded later, but the process becomes straightforward once you learn how to work with Arduino. To get started, you'll need 4 servo motors and a Wii Nunchuk - I used a connector, but you can skip it if you prefer. The 4 servo motors are assigned specific tasks: one for left-to-right movement, one for forward-and-backward motion, one for up-and-down movement, and the final one controls the pen or marker. I chose an Arduino Uno, which works seamlessly with the Nunchuk connector. If you don't use a connector, any other Arduino model will do as long as it has 4 connections for the servo motors and 2 for the Nunchuk. The code file is available for download, along with more detailed specifications within it - this project combines elements from various others I've worked on.
With this file you will be able to print Robotic drawing arm with your 3D printer. Click on the button and save the file on your computer to work, edit or customize your design. You can also find more 3D designs for printers on Robotic drawing arm.