Robotic arm: arm (part 3/3)
thingiverse
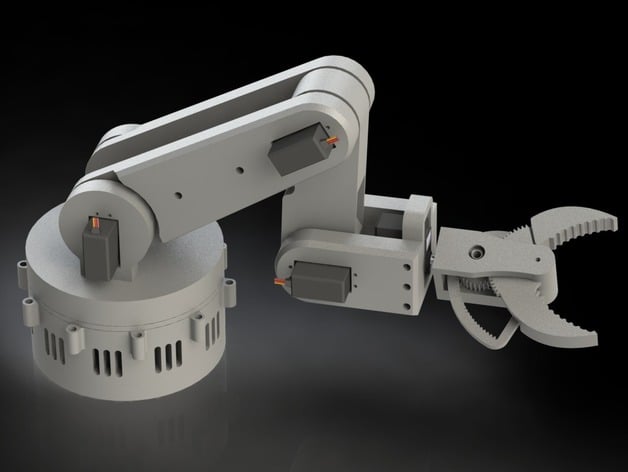
This is the third and final file publication of my robotic arm series, featuring the main component of the robotic arm itself. To assemble this crucial part, you'll need to gather the following hardware components: M3 x 8mm round head screws (22x), used for mounting servo horns including the gripper M3 x 10mm round head screws (34x) M3 x 63mm round head screws (2x) M3 x 16mm round head screws (4x) M3 nuts (2x) M4 x 16mm round head screws (4x) 8mm x 16mm x 5mm bearings, type 688zz (2x) For electronic components, you'll require: Standard size servos, such as the TowerPro MG995 (5x) Assembly is relatively straightforward; simply follow the exploded view diagram. If you have any questions or concerns, feel free to reach out and message me. Important notes: Print the base servo mount, bearing holder, center arm bearing guide, center arm bearing guide clamp, and lower arm bushing twice for a complete assembly. All critical holes are oversized by 0.25mm to ensure easy fitment. M3/M4 holes are sized at 2.8mm/3.8mm in diameter respectively; apply grease (optional but recommended) on bolts before screwing them into parts using proper tools for neat and tight thread creation. This design is still under testing, so it may undergo changes in the future. To achieve optimal printing results: Support round-shaped overhangs with additional prints if necessary. For example, place the center arm face down on the print bed, then add support structures. After printing, grind down any remaining support material using a Dremel tool or similar equipment. Print Settings: Printer: Craftbot Plus Resolution: 0.2mm Infill: 15% - 25%
With this file you will be able to print Robotic arm: arm (part 3/3) with your 3D printer. Click on the button and save the file on your computer to work, edit or customize your design. You can also find more 3D designs for printers on Robotic arm: arm (part 3/3).