RoboMaster S1 - DIY
prusaprinters
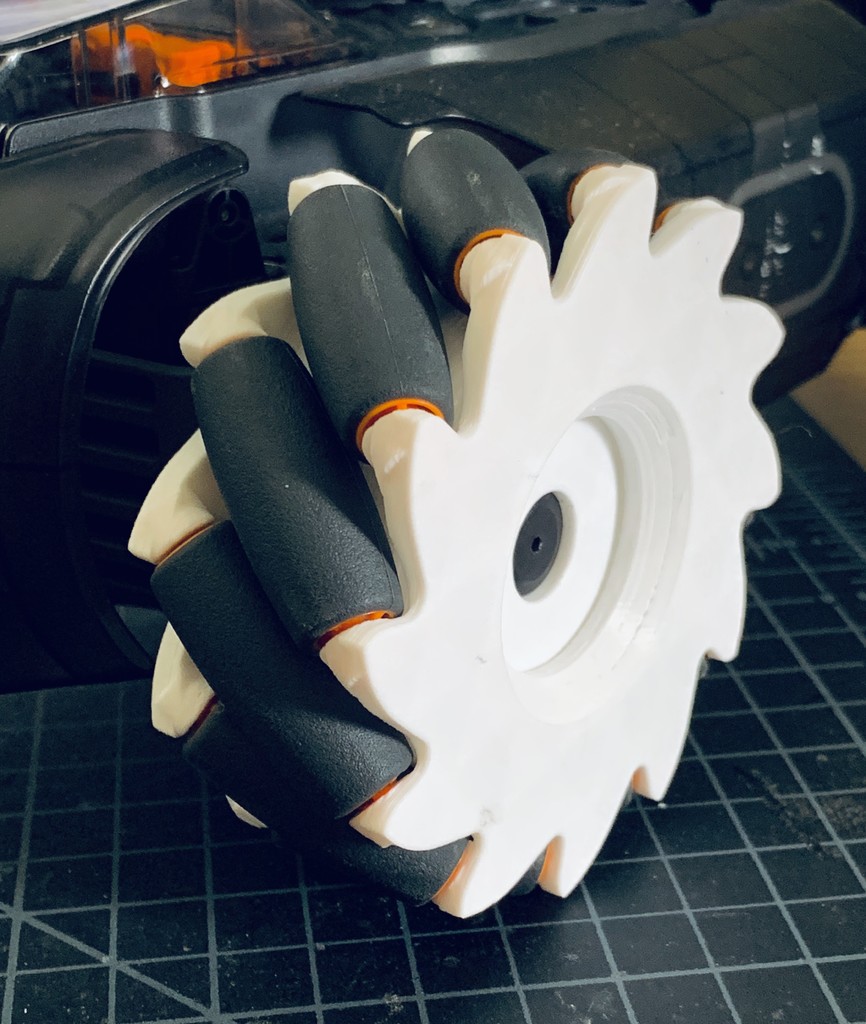
<h3>Updates</h3><p><strong>2019.07.18</strong> Printed, and it works spectacularly! I've got one fully compatible spare wheel. The 'wheel hub' is the only hard part to print (lots of overhangs no matter how you do it) so I've added designed-in supports. Refined the other designs a fair bit too. This thing is so cool. So satisfying to have every roller click perfectly into place on the<i>first prototype print</i>. *<strong>2018.07.19</strong> Heavily updated the hub to print 180º flipped from before. Allows for some needed geometry that was missing before. Prints great! + I've now switched to printing with a<i>0.6mm nozzle</i> for a large improvement in print speed and strength. As a side effect the added-in supports become small to slice/print since I'd designed them for single-width 0.4mm nozzles. If you want to use anything but a 0.4mm nozzle you'll need to edit the 'printable' tab in the OnShape, I made a<i>variable</i> just for such things.</p><p>The new Robomaster S1 is out, and it's a pretty freaking incredible design. BUT there aren't any spare parts available!? I'm fixing that with with my open-source S1 CAD modeling.</p><h3>Progress / completeness</h3><p>So far I've recreated my favorite part of the design: these incredible mecanum wheels. They're 12-wheel, 45º, and 96mm in diameter. They've got a unique internal rubber dampener that effectively gives this robot freakin' suspension.</p><p>More to come. Leave a comment with what you'd like to see.</p><h3>Using this in other robots</h3><p>If you'd like to use one of these wheels for your own system all you'll need to do is modify the<i>wheel hub</i> component to fit your motor, should be super easy.</p><h3>CAD design source</h3><p>I've designed this in onshape. <a href="https://cad.onshape.com/documents/2c84b32ce1668eeacff7cbbd/w/66c9dcf5386a5e4f75b72d97/e/1efc7cfd3562bb97d58b86bb">Here's the public document</a>,<i>anyone</i> can fork and extend the design free of charge. (<a href="https://www.onshape.com/products/free">here's the page</a> to get a free account, they keep it hidden from their main site)</p><h3>Follow along / community</h3><p>There's a fledgling <a href="https://www.reddit.com/r/RobomasterS1/">subreddit, r/RobomasterS1</a>, join-in over there and follow along!</p><h3>Printing & Building</h3><p>With the new 'printable' files nothing special is needed. No supports, no rafts, no brim. I've even rotated them down flat, they're ready to go!</p><h3>Materials</h3><ul><li><i>"wheel_hub_dampener"</i> should be printed in something super squishy. Ninjaflex, or TPU. Try printing with two walls and very minimal infill to keep it as flexible as possible.</li><li>All other parts: PLA works great. Nylon or PETG would be stronger but so far I've not had problems with impacts and stresses with simple PLA (and it's so easy and fast to print).</li></ul><h3>Hardware</h3><ul><li>Everything is designed to work with DJI's hardware, you can actually look at <a href="https://dl.djicdn.com/downloads/robomaster-s1/20190612/RoboMaster_S1_Quick_Start_Guide_v1.0_multi.pdf">their manual</a> for all the specs.</li><li>This wheel uses the "T2 Screw" to hold the two halves together.</li></ul><h3>Rollers</h3><p>The rollers are designed to be printed in half, and I've left a 0.5mm thickness slice to add some rubberized tread. Two methods should work:</p><ul><li>Heatshrink tubing</li><li>Rubberized paint, like 'plastidip' (amazon $5 spray can)</li></ul><p> </p>
With this file you will be able to print RoboMaster S1 - DIY with your 3D printer. Click on the button and save the file on your computer to work, edit or customize your design. You can also find more 3D designs for printers on RoboMaster S1 - DIY.
