Robo3d Titan Areo Upgrade Prusa Style
thingiverse
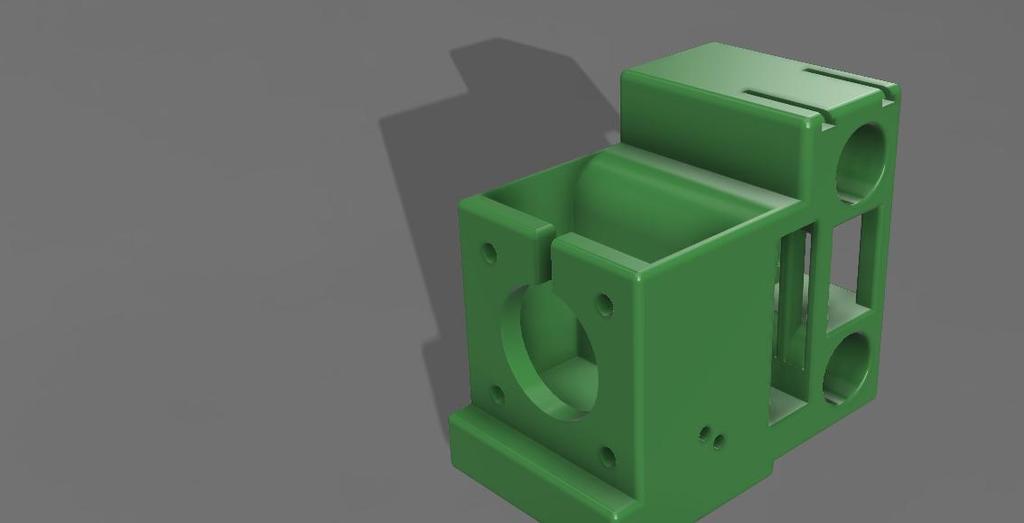
THIS IS A WORK IN PROGRESS - I have yet to print these out and test them. Recently, my stepper took a crap after I put on an aluminum bed. I'm releasing this here if you want to experiment with it. I'll update when I finally get up and running again. My goal was to maximize usable Z height without sacrificing any X or Y print area. I also wanted a clean design that fully utilized the Aero fan setup. To achieve this, I felt I needed to change to a Prusa style X axis. I also tried to incorporate some popular upgrades into the design. So, here's a rundown of the design: Prusa Style X Axis Redesign: I took from this and combined it with the counterweight upgrade. When assembling this, I recommend bolting up the motor to the right side part and weighing it with a kitchen scale. Then, add pennies to the left side until they both weigh the same and use CA glue to lock the pennies in place. Carriage: There are many considerations for the carriage: maximizing usable Z height while minimizing X and Y losses, parts cooling, belt tension, wire organization, aesthetics, and more. Wire Organization: First, I made it receive the same chain link wire loom that is used in this chassis. It's the same chain chassis and chain link I was using before. Also, in the realm of wire organization, I placed a couple of holes in the side of the chassis for running zip ties through. This allows you to neatly organize wires from the extruder fan, heater, and thermistor. Parts Cooling: I incorporated the parts cooling fan into the chassis to make everything fit in a nice clean package. Here's a cross-section view. Belt Tensioner: I wanted to incorporate options for belt tension. Many people like the zip tie method, which is compatible with this. But you can also use the designed belt tensioner that uses two bolts to tighten. When printing the chassis, I recommend printing it on its side and placing your own supports. Trying to take out the supports where the parts cooling fan duct is would be difficult. I also have a chassis for regular bearings and quiet bushings. And I provide a file for an X axis leveling tool. Print two of these out and snap them onto the X axis rods on opposite ends, then do a quick paper level. Well, there it is - I hope you like it. Don't forget to take into account thermal expansion and contraction when printing. If printing with a material that has a large amount of thermal expansion/contraction, such as ABS, you may need to scale up the print accordingly.
With this file you will be able to print Robo3d Titan Areo Upgrade Prusa Style with your 3D printer. Click on the button and save the file on your computer to work, edit or customize your design. You can also find more 3D designs for printers on Robo3d Titan Areo Upgrade Prusa Style.