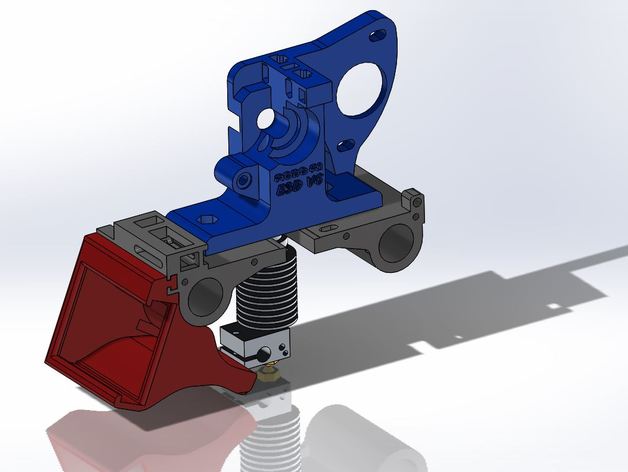
Robo 3D R1 Full Carriage / extruder assembly for E3D V6 and Hex(Screwless)
thingiverse
Fixed some things I didn't like about the original carriage/extruder, especially mounting an E3D V6. The screws that deform the E3D to lock it in are a bad idea; they deform the hotend metal (bad), eventually destroy the hotend if reinstalling multiple times, and the hot end always ends up crooked. So I created a new carriage and extruder where the hotend slides into the carriage and tightening the extruder locks it in. You do lose a few mm in z travel since the hotend sits lower and the carriage is thicker, but that's trivial. Also upgraded on the carriage is a new x belt mount design. This allows some tension adjustment by way of an adjustable 3mm screw T-nut slot. The carriage accommodates a T-slot fan mount on the back. A 40mm screwless fan mount is also included in files designed specifically for this carriage. Added: STL for Carriage specifically for Hexagon Hot end. Uses same extruder STL. Difference between other carriages is this one has a mounting depth 1mm shorter for the hex shorter length heatsink groove. The extruder is specifically designed for this new carriage. Hotend hole specs made for the E3D V6. Added a zip tie tab to hold wires. Fitment: The fan T-slot needed a little post process sanding to slide into the carriage easily. You can modify the SolidWorks file and make the T-slot slightly small to avoid post processing issues. The LM8UU bearing fits nicely in the carriage; just put it in a vice and it pops in with minimal force. Revisions: 3/15/16 Fixed the fan T-slot issue. New file _tslotADJ. Revisions 4/3/16 Added files for Wade's Hex extruder and Hex Carriage. Added 4/27/16: Herringbone gears I use with this setup. REVISION 2 10/7/2017 E3D carriage belt tensioner and T-nut upgrade (HARDWARE NEEDED: 1x 3mm x 6mm L screw, washer, and 1x 3mm nut) If you like the part, please donate. Thanks! Print Settings Printer Brand: Robo 3D Printer: R1 ABS + PLA Model Rafts: No Supports: Yes Resolution: 0.2mm Infill: 100% Notes: The carriage is best with 100% infill. It can be flipped upside on the bed if you prefer to print it that way. -Sliced in S3D Post-Printing It was brought to my attention that the belt tensioner can be a little weak. I haven't had any issues with the two I printed, but you may want to use washers at each end of the tensioner screw to cover more surface area and not compress and break the plastic. Another thing that will work is just printing a tube that can go over the screw between the plastic to give it more structure and allow more tightening. I will be modifying the file with a better tensioner design when I get a chance. Revision 2 10/7/2017 New belt tensioner design (Slide and lock T-nut).
With this file you will be able to print Robo 3D R1 Full Carriage / extruder assembly for E3D V6 and Hex(Screwless) with your 3D printer. Click on the button and save the file on your computer to work, edit or customize your design. You can also find more 3D designs for printers on Robo 3D R1 Full Carriage / extruder assembly for E3D V6 and Hex(Screwless).
