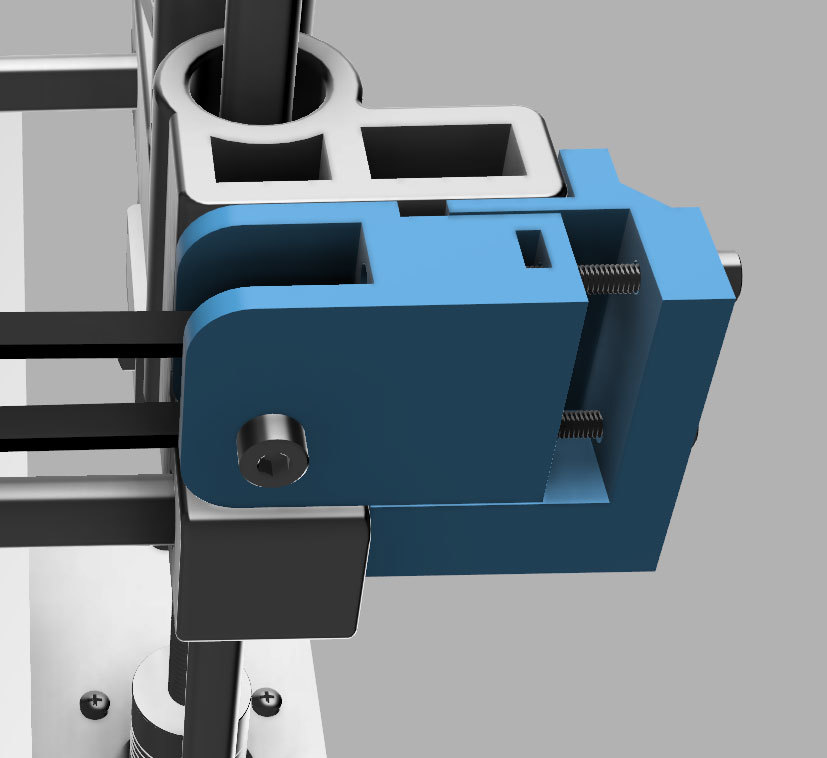
ROBO 3D Belt Tensioner
thingiverse
This is a belt tensioning system for a ROBO 3D printer. The one I installed it on was a kickstarter beta model, but I think it should work just fine on an R1 and R1+. It replaces the stock large idler bearing, washers, nuts, and bolt with a printed idler assembly that uses two M3 screws to provide tensioning, eliminating the need for a tensioning spring on the belt. It uses the following hardware: * 1 x GT2 20T idler (got mine off Amazon) - You could also use a smooth version or printed version. * 1 x M4 x 16mm screw (for the idler) * 2 x M3 x 20mm screws (for the tensioner) * 2 x M3 x 5.5mm x 2mm square nuts (for the tensioner - got these from Amazon) - You can also use standard M3 nuts for this, but it's a bit fiddly. * 1 x M3 x 10mm screw (for the anchor) Assembly: Insert the nuts into the slots of the idler bracket. Use the M4 screw to mount the idler pulley in place and make sure it rotates freely. Loosely assemble the tensioner bracket to the anchor with the two M3 X 20mm screws, but leave plenty of slack in there. (Refer to the render images to see how this goes together.) Take the idler nut, bearing, and bolt off the X end. Insert the post of the anchor into the hole the original bolt was in. Use the printed bushing (little circular piece) and the M3x10mm screw to secure it in place. Adjust the tension screws until the edge of the tensioner is just even with the X end (see render image). Now snip your belt free and loop it around the new idler. Pull it tight and zip tie it back down. The tail of the belt will be a bit longer since this system uses a shorter overall belt than stock. Now tighten the tensioner screws evenly to take the slack out of the belt. The edge of the tensioner should be set back a few mm from the edge of the X end. This is important to get full range of motion (so the tail of the belt doesn’t collide with the pulley). Before you trim the extra belt off, make sure you can safely move the X carriage all the way to the tensioner side. If you can’t, loosen the belt a notch and retighten the tensioner.
With this file you will be able to print ROBO 3D Belt Tensioner with your 3D printer. Click on the button and save the file on your computer to work, edit or customize your design. You can also find more 3D designs for printers on ROBO 3D Belt Tensioner.
