Ring Launcher Project
prusaprinters
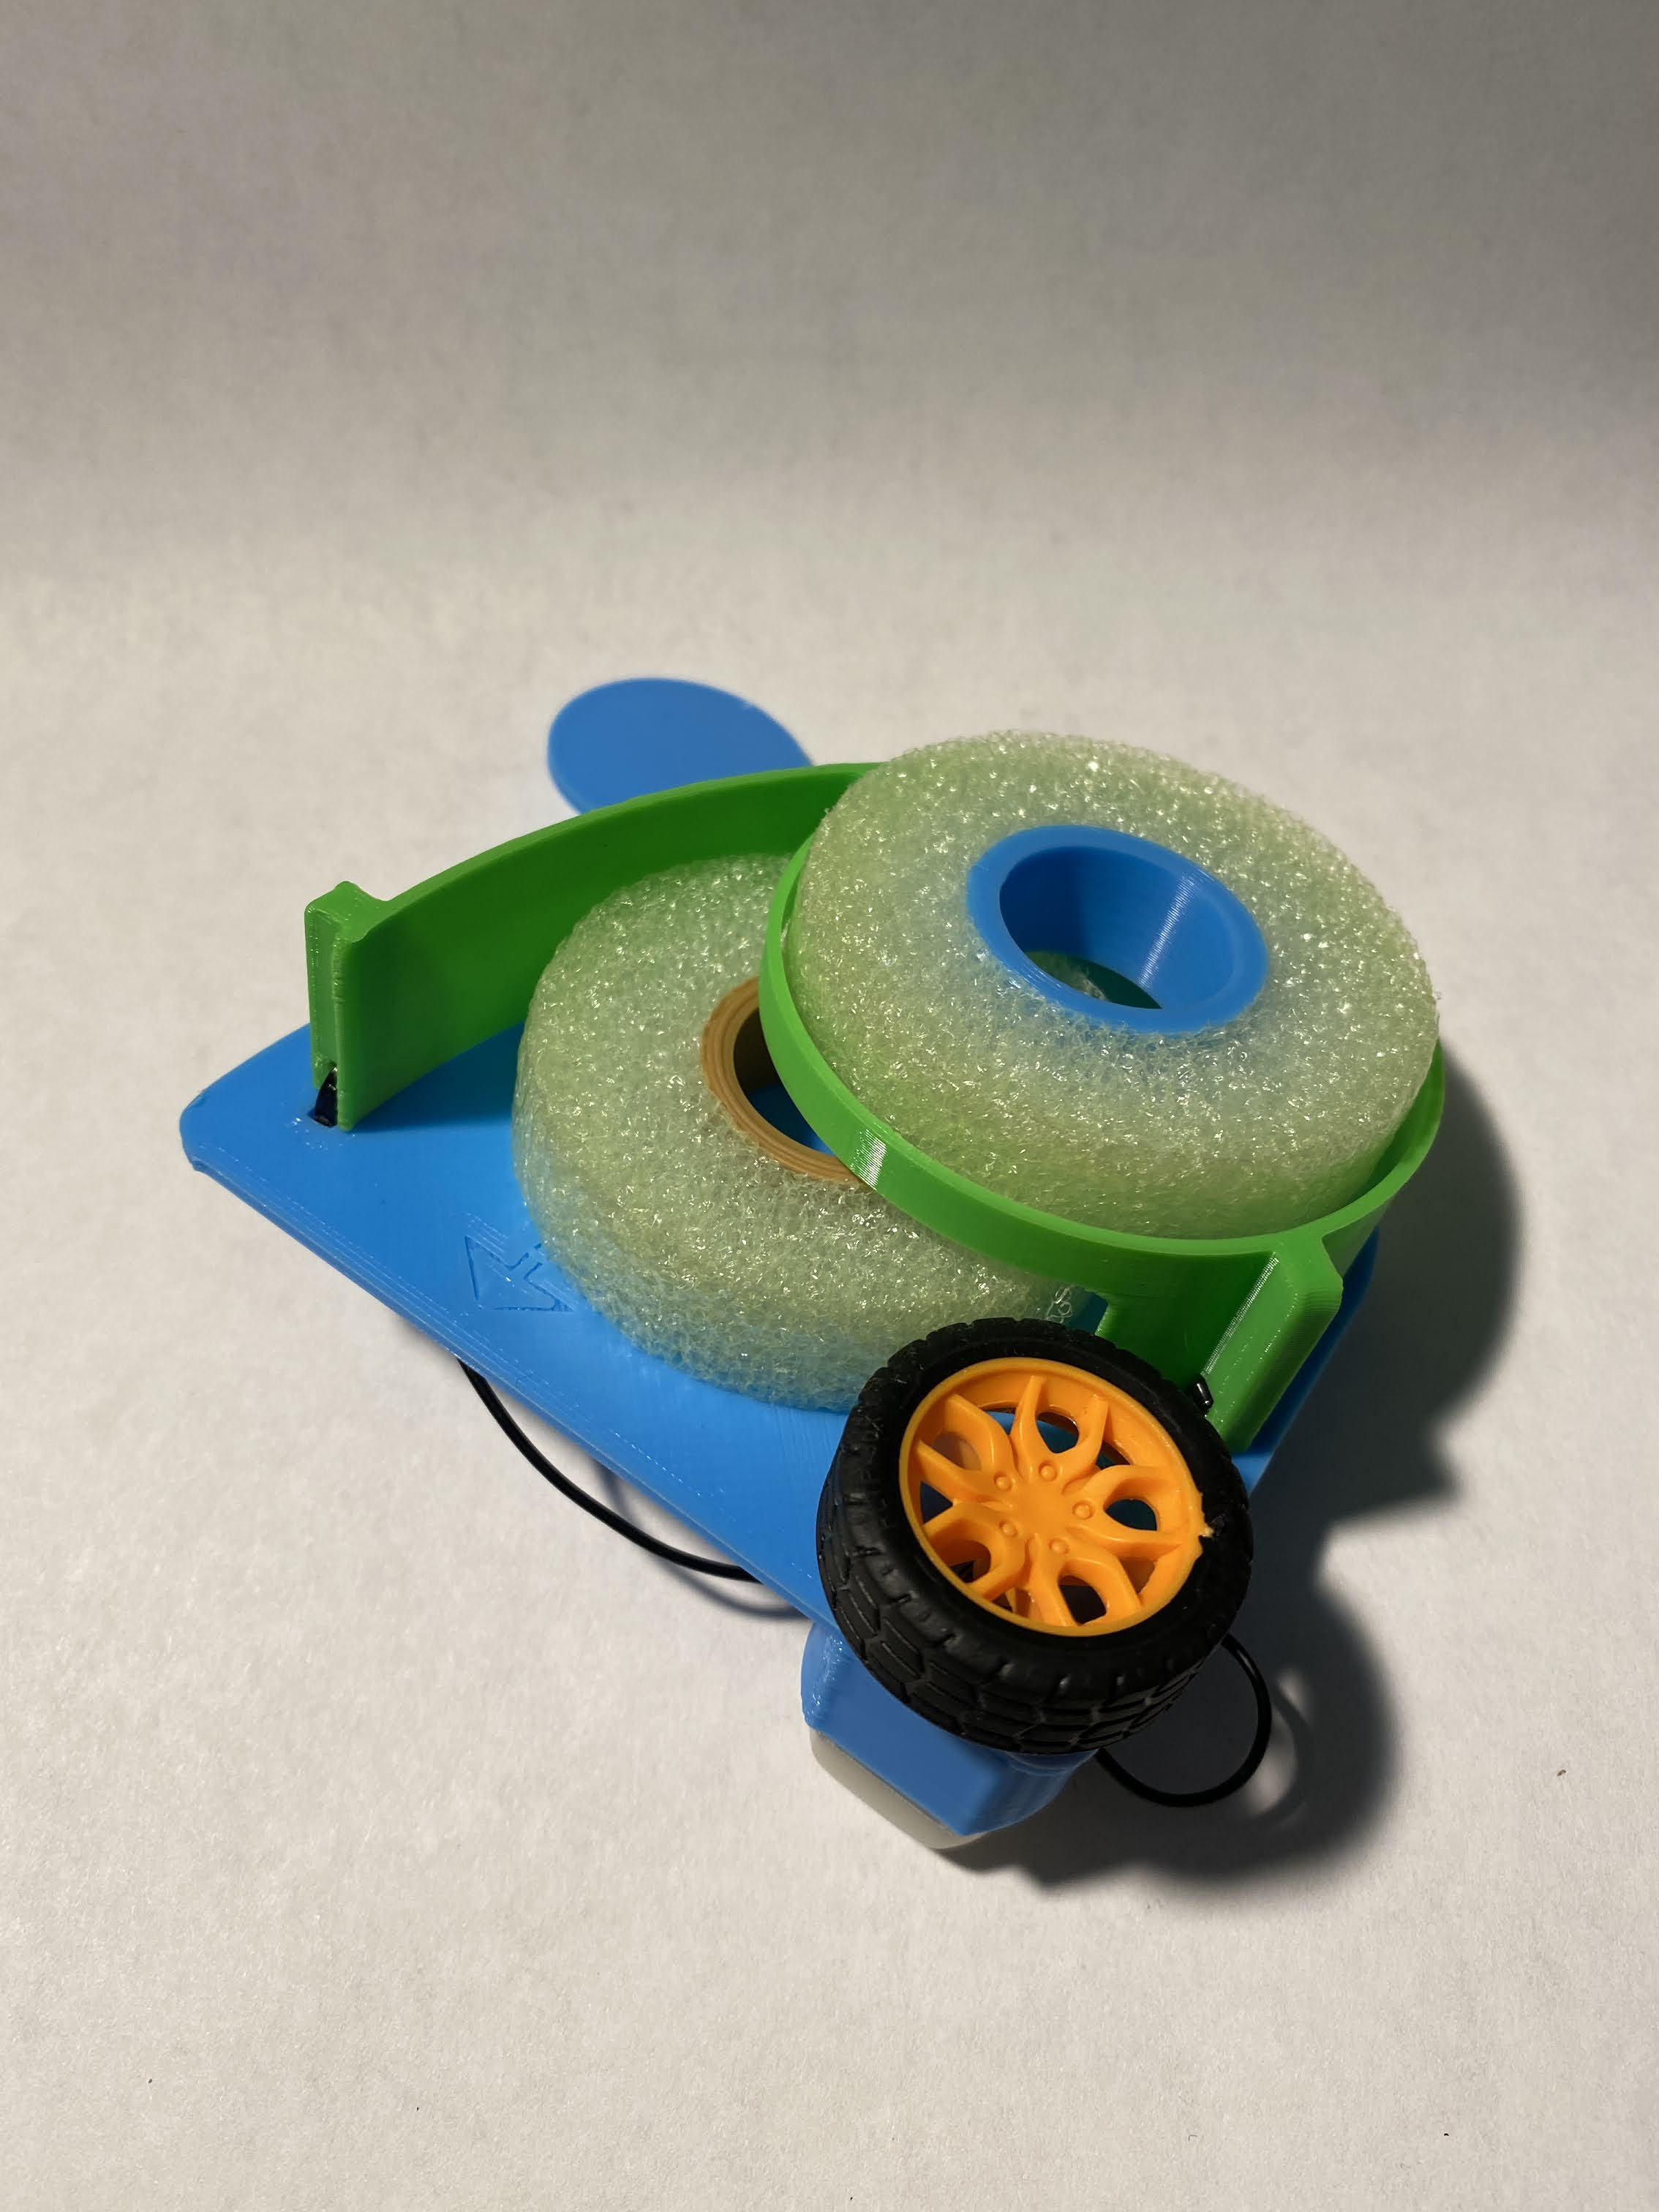
<p>This is an ultra-low-budget foam ring-launching STEM project. It has a range of about 5ft (2m) and is perfectly safe as the ring is foam. This was originally designed to inspire STEM learning through hands-on workshops with elementary to middle school age children. With a total unit cost of $1.39 and allowing students to learn hands-on about motors, batteries, electricity, and physics, it is my hope to spread STEM learning and education. </p><p>The main parts of the launcher are 3D printed: “Part A” and “Part B”. Part A is the base and includes an integrated motor mount, battery holder with spring, and some cutouts. Part B is where the rings are stored and the guide for the ring while launching. They are held together with two zip-ties on opposite sides.</p><p>Printing Instructions:</p><ul><li>Print at 0.25mm layer height or better. PLA/ABS preferred. No supports.</li><li>Part A is ~19g and should take about an hour to print. Part B is 6g and should take 20 minutes to print. Each Ring Core is 2g.</li></ul><p>Ring Assembly Instructions:</p><ol><li>Cut a 55mm diameter pool noodle into ½" slices. If you are having trouble or are making these in bulk, you can print the 4 Slice Ring Jig to help. Just align the pool noodle to the end of the arrow, and use a box cutter in each groove.</li><li>Press the Ring Core into the center of the ring.</li></ol><p>Launcher Assembly Instructions:</p><ol><li>Use two zip-ties to join Part A and Part B. It's recommended to have the head of the zip-tie on the bottom (under Part A).</li><li>Push in the motor into the motor mount with the metal tabs closest to the battery holder.</li><li>Gently twist each wire onto the motor tabs.</li><li>Push each wire through the battery holder's wire holes until the metal portion of the wire is all the way through and fold the wire down.</li><li>Use two zip-ties to secure the wires in place on each side of the battery holder.</li><li>Press the flywheel onto the motor shaft.</li><li>Add the battery with the “+” to the left side.</li><li>Load up to two rings at a time and when ready push each ring into the flywheel from the cutout. The “off switch” is just removing the battery.</li></ol><p>Please see the BOM for the materials needed and bulk cost per unit. Everything can be bought on Amazon and Dollar Tree: <a href="https://docs.google.com/document/d/1lt9dJus7oMgIdpCElqAHUjtK4M0dTr0P0pMzetoVnyY/edit?usp=sharing">https://docs.google.com/document/d/1lt9dJus7oMgIdpCElqAHUjtK4M0dTr0P0pMzetoVnyY/edit?usp=sharing</a></p><p> </p><p>I'm always open to questions, comments, or suggestions., just shoot me a message. You can also remix this freely. Thanks!</p>
With this file you will be able to print Ring Launcher Project with your 3D printer. Click on the button and save the file on your computer to work, edit or customize your design. You can also find more 3D designs for printers on Ring Launcher Project.