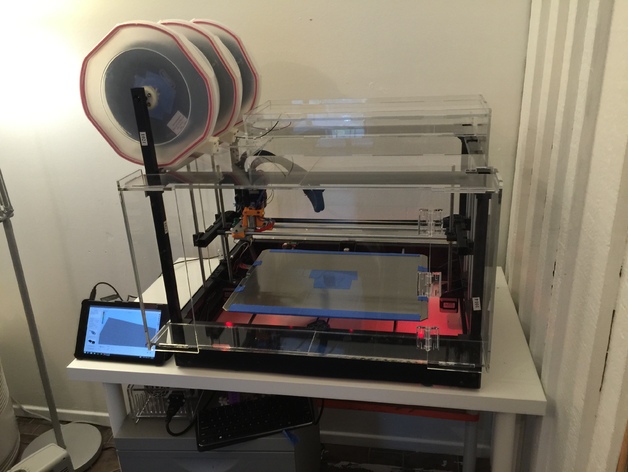
Rigidbot Big Acrylic Enclosure
thingiverse
Update: 6.29.2016 After extensive use, I made several improvements to enhance functionality and user experience. Notably, I added a webcam and digital thermometer for more precise temperature control. When routing cables through the z-stop cutout, it's beneficial to create a notch or hole elsewhere for easy cable management. With ABS prints, temperatures were surprisingly favorable, with 54C internal temps and zero warping when throwing a blanket over the entire unit. In contrast, covering just the top resulted in consistent temps of 45C. Keep in mind that for PLA prints, you'll likely need to remove the front door panel to prevent excessive heat buildup. This project involves creating an entirely enclosed build chamber for the Rigidbot Big 3D Printer with minimal footprint expansion while maintaining the original print volume. Be cautious not to sacrifice too much z-height at the left edge due to material spool spacing. You can rectify this by enlarging the relief box or repositioning it. Optimized specifically for use with 18x24" 5mm (0.220") acrylic available in the USA, these materials are readily accessible at Lowe's and Home Depot. Additionally, you'll require eight M4 screws, between 12-16mm in length; I employed 12mm stainless steel socket cap screws, which provided adequate length. The provided cut files offer ample tolerances for printer deviations, yet some minor cleanup might be necessary. To bond the joints and door hinges, apply Acrylic Cement with a hypo-type solvent cement applicator. TAP Plastics offered versatile materials like clear acrylic hinges, self-closing hinge, and an acrylic pull handle to create the front door. To maintain closure without impeding functionality, I installed one single-sprung hinge and two standard hinges on the acrylic material, achieving desired balance between accessibility and thermal protection. If utilizing a normal Rigidbot setup, considerable alterations will be required due to dissimilar print parameters; however, these should lead to reduced material requirements since fewer sections will necessitate separation over 24" in length. **Instructions:** 1. Assemble the six marked pieces into one single structure: front and rear plates with left and right side panels. 2. Secure the left backside piece by slottedly attaching it to both top piece tab and relief box tabs, ensuring secure placement with Loosely screwed-in rigidbot chassis. 3. Follow this process for installing the Right Back side plate followed by the Front right Sill pieces to finalize front panel attachments 4. **Steps 6-12 follow these guidelines:** A) Create Top plate (left rear) B) Insert Two side panels from top (Rear) C) Install top box section D) Repeat steps for both front & Rear E) Complete Rear Plate Filing Process (F) Dryfit Front door F. Assemble Door components I've found an additional improvement Finalizing the RigidBot Chamber
With this file you will be able to print Rigidbot Big Acrylic Enclosure with your 3D printer. Click on the button and save the file on your computer to work, edit or customize your design. You can also find more 3D designs for printers on Rigidbot Big Acrylic Enclosure.
