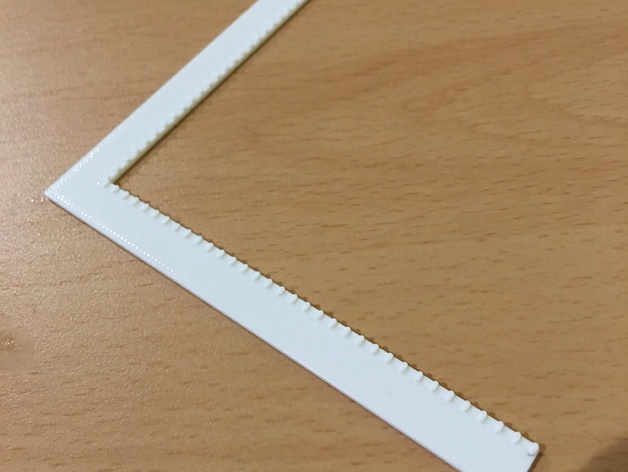
Right Angle Ruler
thingiverse
This is a functional right angle ruler design created by a grade 8 student to assist students and teachers in engineering and drawing lessons. The ruler features small bumps at 5mm increments for precise measurements. Print Settings: Printer Brand: Stratasys Printer Model: uPrint SE Plus Rafts: Not Required Supports: Not Required Resolution: 0.2540 mm Design Process: This design was created using Autodesk Inventor, incorporating measurements and 2 simple extrusions with a pattern to produce accurate results. Project: Drawing Tool Design Objectives: 1. To create a useful drawing tool for students and teachers. 2. To utilize the school's 3D printer effectively. 3. To emphasize accuracy in making precision tools. Target Audience: Grade 8+ students in design classes Teachers who can use the tool with other students Preparation: Before designing, students should conduct surveys to determine the most useful products for their audience and take careful measurements to ensure accuracy. A sketch is then drawn based on the gathered information. Steps: 1. Create a basic L shape using CAD software by drawing a sketch and extruding it. 2. Add one bump at the inside corner of the part by extruding it. 3. Use 3D pattern copying to replicate the bumps along the length of the ruler. 4. Mirror the bumps at a 45-degree angle from the corner to copy them to the other side of the ruler. Results: The tool was printed in approximately 20 minutes and has been found useful. Adding embossed numbers would further enhance its functionality.
With this file you will be able to print Right Angle Ruler with your 3D printer. Click on the button and save the file on your computer to work, edit or customize your design. You can also find more 3D designs for printers on Right Angle Ruler.
