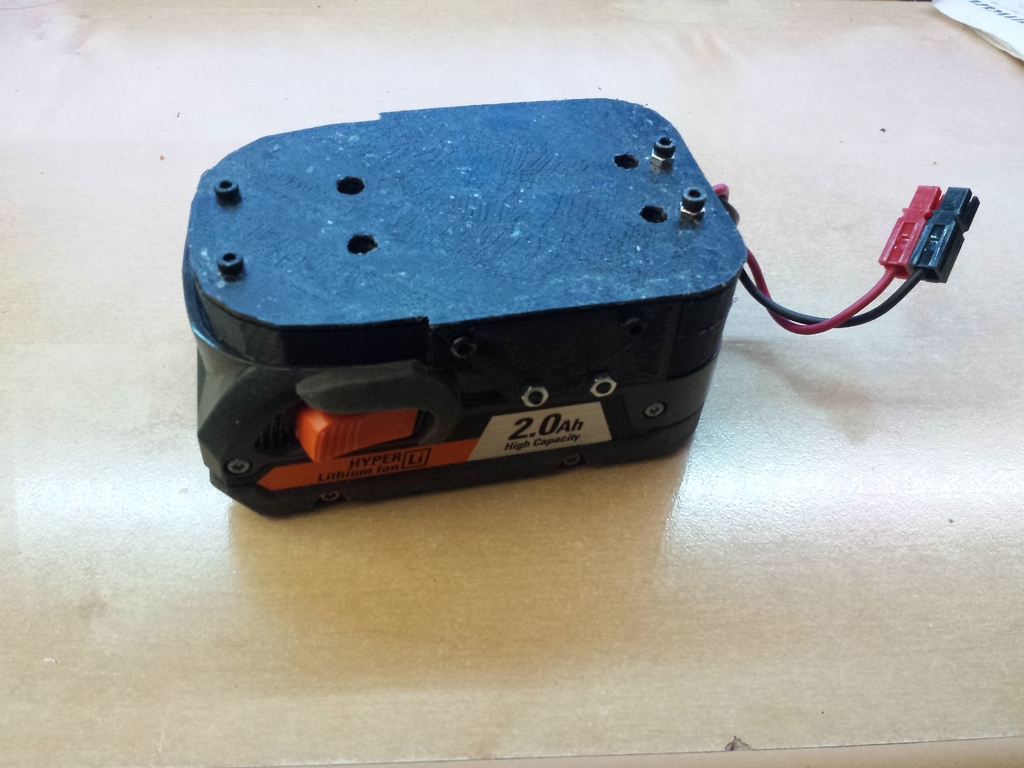
Ridgid Battery Bracket (mk1)
prusaprinters
<p>If you are making one of these, consider sending a tip - every dollar helps to create more things like this and encourage more open sourcing of designs.</p> <p>This is a 3d printable bracket designed to allow you to use Ridgid brand 18V lithium batteries from their cordless power tool series as portable power for projects.</p> <p>Ridgid brand batteries with internal battery management, short circuit protection, overdischarge protection, rugged case, and electronic fuel gauge provide a safer means of lithium power for projects where weight constraints aren't as critical as safety.</p> <p>Note: Requires Ridgid replacement part 270015155</p> <h3>Print Settings</h3> <p><strong>Rafts:</strong></p> <p>No</p> <p class="detail-setting supports"><strong>Supports: </strong> <div><p>Yes</p></div> <p><strong>Resolution:</strong></p> <p>0.4</p> <p class="detail-setting infill"><strong>Infill: </strong> <div><p>0.2-0.5</p></div> <p><strong>Notes:</strong></p> <ul> <li>Left and right halves - print with support</li> <li>Top plate - print flat</li> <li>Gusset plates - print 2 mirrored versions (flat side on print bed)</li> <li>Rail block - print flat</li> </ul> <h3>Post-Printing</h3> <p><strong>Step 1 - Print</strong></p> <div><p>Print components as per print settings - high infill is not necessary, but should not negatively impact performance.</p></div> <p class="detail-title"><strong>Step 2 - Assemble</strong></p> <div><ul><li>Clean support material on left/right halves</li> Press-fit 1/4"-20 and M3 nuts (tolerances may be tight for press-fit nuts) into top left and right halves, and rail block. Connect leads to battery connector (Ridgid replacement part 270015155) Insert battery connector into large slot facing forward (narrower end of battery) on left and right halves of the assembly Loosely secure top halves to bottom rail block with M3 screws Thread M3 SHCS through sides of rails with socket head facing inward, secure on outside with gusset plates. Connect gusset plates to top halves with M3 SHCS Remove M3 screws holding top halves to bottom rail, place top lid on, secure with M3 screws Tighten all screws, test fit and adjust as necessary. <h3>Custom Section</h3> <p><strong>Electrical Cautions</strong></p> <div><p>18V battery has nominal 20.5VDC falling to 18VDC when discharged. Provide appropriate gauge wires when connecting to the battery as high current output is available from the battery, and normal battery output can exceed current capability of wiring or circuitry.</p> For safety add some means of fault current protection (fuse, PTC fuse/polyfuse, breaker). No responsibility is assumed for this device, build and use at your own risk. </div></ul></div></p></p> Category: Electronics
With this file you will be able to print Ridgid Battery Bracket (mk1) with your 3D printer. Click on the button and save the file on your computer to work, edit or customize your design. You can also find more 3D designs for printers on Ridgid Battery Bracket (mk1).
