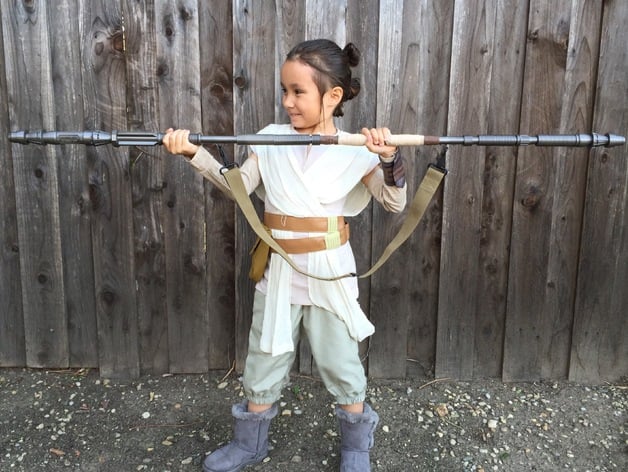
Rey's Staff
thingiverse
UPDATE: Uploaded photos of upgraded leather grips with detail work. UPDATE: Added photo of alternate design for strap harness. UPDATE: Uploaded instructions and photos for attaching leather strap mount. UPDATE: Shortened Part_8, as original felt too lengthy. UPDATE: Added STL versions of files for printing. UPDATE: Smoothened out curves on new version of part_3-21. UPDATE: Provided alternate files for Parts 1 and 23. Use these if you prefer a rubber foot instead of one layer less with the top layer being the foot. I designed all parts in Sketchup to create a replica of Rey's Staff from Star Wars Ep 7 - The Force Awakens. I created models based on photo references, stills from the movie, and caliper measurements taken from the toy staff purchased on Amazon for twenty dollars. http://static.comicvine.com/uploads/original/11117/111178634/4978032-visual+dictionary+rey.jpg The parts are designed to be glued in sequential order onto an inner core. I recommend using standard EMT conduit found at Home Depot or any hardware store. I built models in Sketchup on a smaller scale because I initially planned to make a five-foot staff for my six-year-old daughter. For this build, I used a five-foot section of half-inch EMT conduit. After testing the builds, I adjusted the scaling to 110 percent using Makerware to allow proper clearance for the pipe and glue. The uploaded Thing files are already at 110 percent. If you're building an adult staff, my estimate is six feet based on photo references of the actual hero staff against Daisy Ridley's height of five-foot-seven inches. For an adult-sized staff, I recommend resetting scaling to native and then starting with a 135 percent increase. This brought the prop details up to adult size. To ensure accurate sizing, do test prints with part_9 if you're unsure about the pipe or rod diameter. Glue Part 1 onto one end of the conduit, then slide all other parts in sequence, gluing them into place as needed. Some parts are duplicates; however, I assigned unique part numbers to keep them organized. Please note that part_5 requires two prints and assembly for proper fit. The middle grip section uses Parts 12 and 13, which are identical. You will need a total of four grips across the staff. Part 19 is an alternate grip style matching the original prop. On each end of the staff, I screwed on a rubber foot to minimize shock when tapping it against a surface. This also makes replacing the ends easier than reprinting new pieces. After gluing everything in place, with allowance for wraps and shoulder strap anchors, I painted the staff using Rust Oleum Hammered Metal paint. For attaching leather straps, cut two pieces at 4.5 by 0.75 inches (five by 0.75 for the larger staff) and one piece at 1.5 by 0.5 inches. Attach button snaps to each end, looping the smaller leather as a bridge over the anchor. Use threaded button snaps to secure the assembly to the staff. Alternatively, you can bind three pieces of leather together with button snaps and a D-Ring to create a strap harness (see photo). For an adult-sized strap, I purchased a tan Condor shoulder strap from Amazon for six dollars and forty cents. I hope you enjoy this build as much as I did. This was my first attempt at fabricating a movie-style replica prop, and I learned new techniques in Sketchup during the process. May the Force be with you. Print Settings: Printer Brand: MakerBot Printer Model: MakerBot Replicator 2 Rafts: No Supports: No Resolution: Standard Infill: 10% Notes: Original model scaled up to 110 percent for a half-inch section of EMT conduit. For an adult-sized staff, scale it up at least 135 percent to fit a three-quarter inch section of EMT conduit. If unsure about rod or pipe diameter, do test builds with part_9 and adjust scaling until the correct fit is achieved. Allow some clearance for glue.
With this file you will be able to print Rey's Staff with your 3D printer. Click on the button and save the file on your computer to work, edit or customize your design. You can also find more 3D designs for printers on Rey's Staff.
