Retro Pie Box - Portable Raspberry Pi Emulation Console ***OUTDA
pinshape
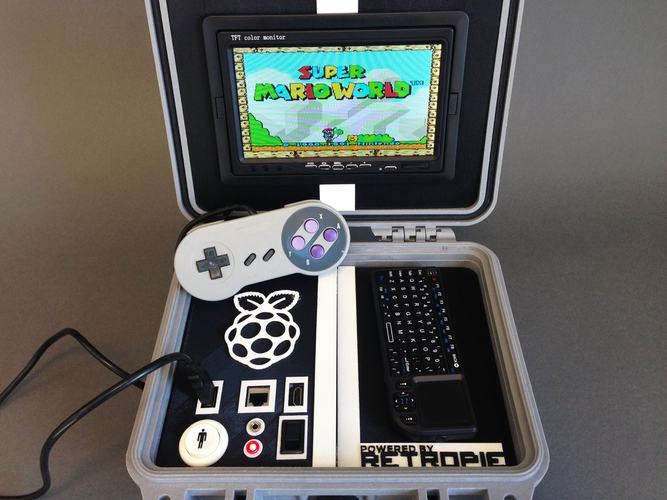
Summary Update - Here's the latest update for this project - http://www.thingiverse.com/thing:688566 I stumbled upon a fantastic mod last December where someone cleverly fitted an SNES into a pelican case, and I was determined to recreate it using a Raspberry Pi as a portable gaming rig. Seven long months of intense frustration, elation, joy, anger, blood-soaked setbacks, fried circuit boards, and heart-wrenching tears finally came to an end with the completion of this project. I couldn't have achieved this without the outstanding contributions from the Retro Pie and Emulation Station projects' brilliant developers. To help you get started, I've included a comprehensive walkthrough from Lifehacker - http://lifehacker.com/how-to-turn-your-raspberry-pi-into-a-retro-game-console-498561192 Feel free to attempt to recreate my project, but I highly recommend using it as a template and adding your own personal touch. The blank interior pieces that fit the pelican case are included so you can modify them to suit your style. I've left out the accent pieces I printed in white, which helped conceal the seams of the separate prints needed to assemble the faceplates. This portable gaming rig is fully waterproof and weighs around 3 or 4 pounds. It might not make you a favorite among airport security officials, but it's definitely a showstopper. I've equipped my Raspberry Pi with a 16gb SD card for the main operating system and a 16gb flash drive for extra storage. You can even boot into Raspbian and enjoy wifi connectivity, allowing you to access your device remotely via ftp if desired. However, I had to omit the option to externally power the system while it's in use, but the beefy lipo batteries should provide several hours of uninterrupted gaming. I managed to squeeze out around 7 hours of playtime while plugged into an external HDMI TV with the internal screen powered off. If you were to play using the internal screen, you could expect around 3ish hours of battery life. To make it easier for you to replicate my project, I'll be posting as many parts as I can find. Good luck and happy crafting! Instructions Go forth and create your masterpiece! Partial Parts List Raspberry Pi Model B - http://www.adafruit.com/products/998 Screen - http://www.amazon.com/gp/product/B007G3J4EC/ref=oh_details_o01_s00_i01?ie=UTF8&psc=1 Wifi - http://www.adafruit.com/products/814 Wireless Keyboard - http://www.adafruit.com/products/922 Panel Mount Ethernet - http://www.adafruit.com/products/909 Panel Mount HDMI - http://www.adafruit.com/products/978 Panel Mount USB - http://www.adafruit.com/products/908 SNES USB Controller - http://www.amazon.com/Retro-Nintendo-Controller-Not-Machine-Specific/dp/B0034ZOAO0%3FSubscriptionId%3D11V4BFFP7Y247FYTQ882%26tag%3Dkinjamod-20%26linkCode%3Dxm2%26camp%3D2025%26creative%3D165953%26creativeASIN%3DB0034ZOAO0&ascsubtag=[postId%7C498561192[asin%7CB0034ZOAO0[authorId%7C5716493564230329059[type%7Cmodlink Lipo Batteries - http://www.hobbyking.com/hobbyking/store/uh_viewItem.asp?idProduct=7314 Pelican 1200 Case - http://www.amazon.com/camera-photo/dp/B0002INQT2
With this file you will be able to print Retro Pie Box - Portable Raspberry Pi Emulation Console ***OUTDA with your 3D printer. Click on the button and save the file on your computer to work, edit or customize your design. You can also find more 3D designs for printers on Retro Pie Box - Portable Raspberry Pi Emulation Console ***OUTDA.
