RepRapPro Huxley - Proximity Sensor Upgrade
thingiverse
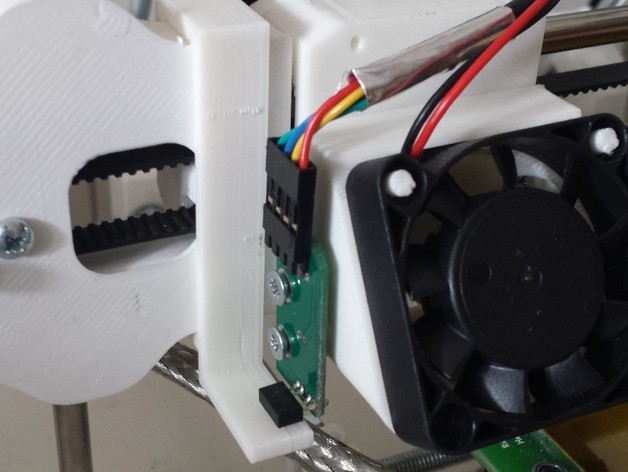
This upgrade kit enables seamless integration of a modulated proximity sensor with your RepRapPro Huxley, offering precision axis homing in both X and Z axes. To install this feature-rich kit, start by printing the extruder fan duct and proximity sensor clip. Then, securely attach the proximity sensor to the extruder fan duct using two M3 x 6mm countersunk screws. Once you've combined these components, slide the fan duct and sensor assembly into place on the tool carriage, utilizing the lower set of holes. The original RepRapPro Huxley Duo part or a replacement STL can be found here: https://github.com/reprappro/huxley-duo/blob/master/STLs/714.STL Secure this assembly using two countersunk screws that previously held the X-axis micro switch in place. Finally, fit the clip to the X-axis motor mount, allowing the proximity sensor to just clear the lip (approximately 1mm) when the tool carriage is positioned close to the motor. In addition to the hardware components, you'll need electronic capabilities compatible with the proximity sensor (you can use this: https://reprappro.com/shop/components/duet-pcb/) and make necessary modifications to your homing and bed levelling macros. Ensure that the X datum is set accurately when the proximity sensor triggers and automate the bed probing once the sensor is positioned above the bed.
With this file you will be able to print RepRapPro Huxley - Proximity Sensor Upgrade with your 3D printer. Click on the button and save the file on your computer to work, edit or customize your design. You can also find more 3D designs for printers on RepRapPro Huxley - Proximity Sensor Upgrade.
